Hammerspace DSX Store/Storage Data Services
DSX nodes are the workhorses of Hammerspace Data Platform, which include numerous data services functions. This section will cover using the DSX Store service.
The DSX Store service makes block storage available as file storage volumes. Using DSX Store is a simple way to include local NVMe drives and white box storage solutions into the global file system. Block storage is made available using XFS as a file system on top of the block device.
Adding a DSX Storage System
Adding a Hammerspace DSX Store is either fully automated or a single-click operation. During installation, the DSX is configured to connect only to a specific Anvil Cluster IP. If the Anvil administrator credentials were also provided during installation, then the next step of manually adding the DSX has already been completed automatically, and you can proceed to the Adding DSX Storage Volumes section.
Manually Adding a DSX Node
In the Storage Systems tab, click on the + (plus sign), on the right side.

The DSX must be added using this method even though it may not have any storage attached to it. Any of the DSX services hosted on the DSX, such as Data Portals, Cloud Mover, and Data Mover, will not function unless the DSX is added to the cluster. It is not required to have storage attached to the DSX node.
Adding DSX Storage Volumes
To complete the DSX Store configuration, click + Volume button in the Storage Systems view or Add Volume from the Volumes view.
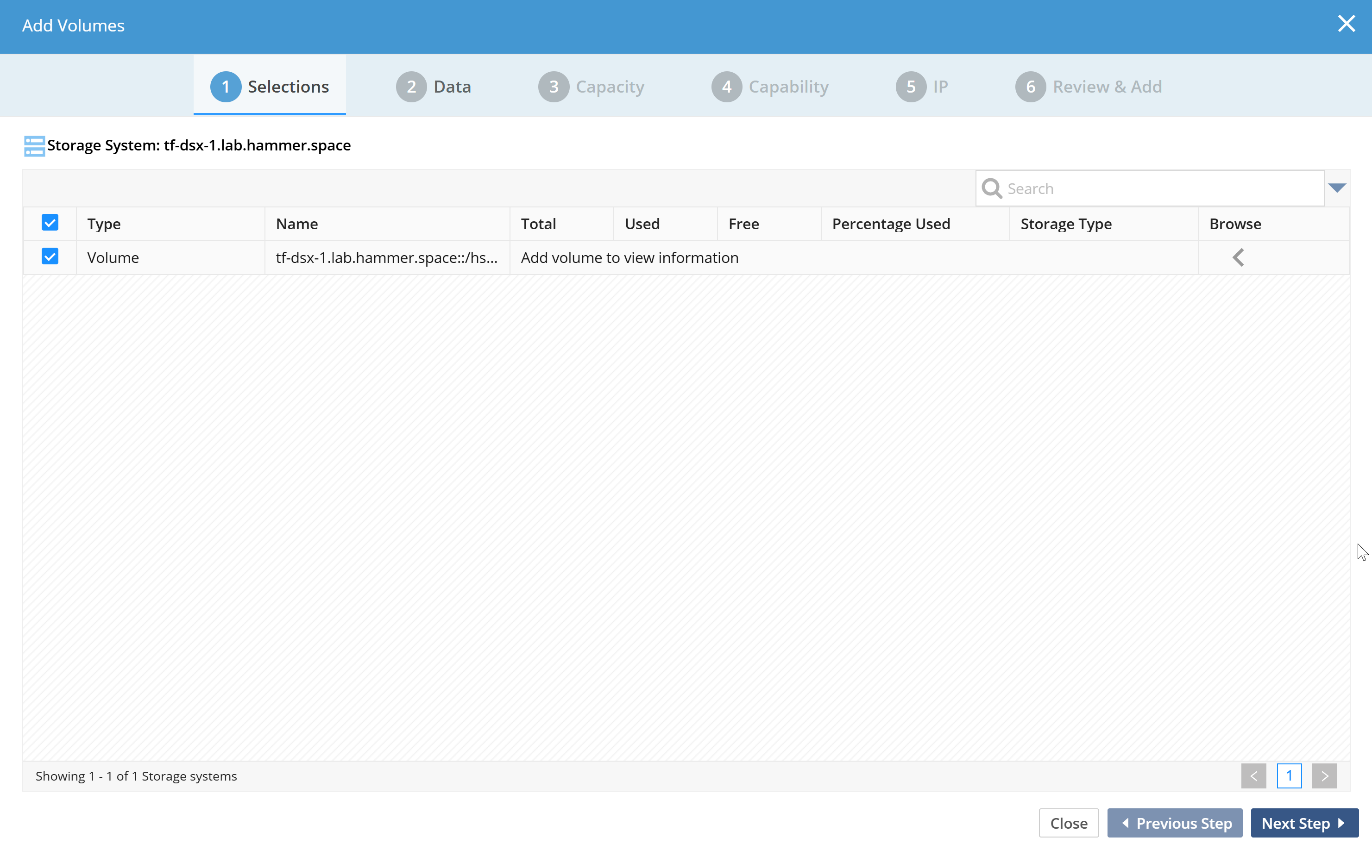
Step 1: Select Volumes
Select the volumes to add from DSX. Each configured block device will automatically be formatted with an XFS file system during the installation process.
See the Hammerspace 5.2 Administration Guide for instructions on adding new block storage after the DSX has been installed.
| Product guides are available as PDF downloads on the Hammerspace Licensing and Delivery Portal downloads page. |
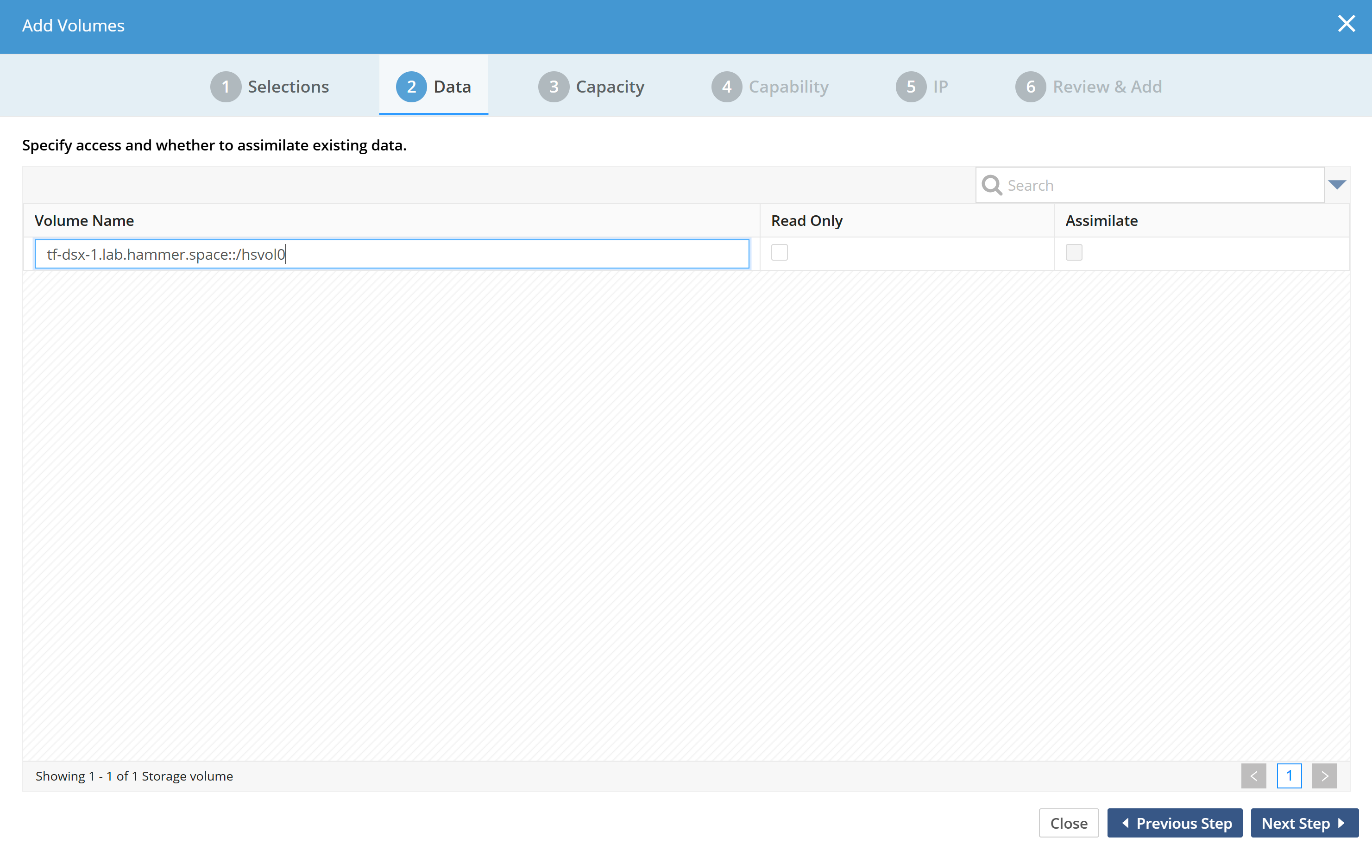
Step 2: Assimilate Data
The second step detects existing data on the volume and prompts the user to go through the data assimilation process.
For a brand-new DSX installation, there will be no existing data to assimilate.
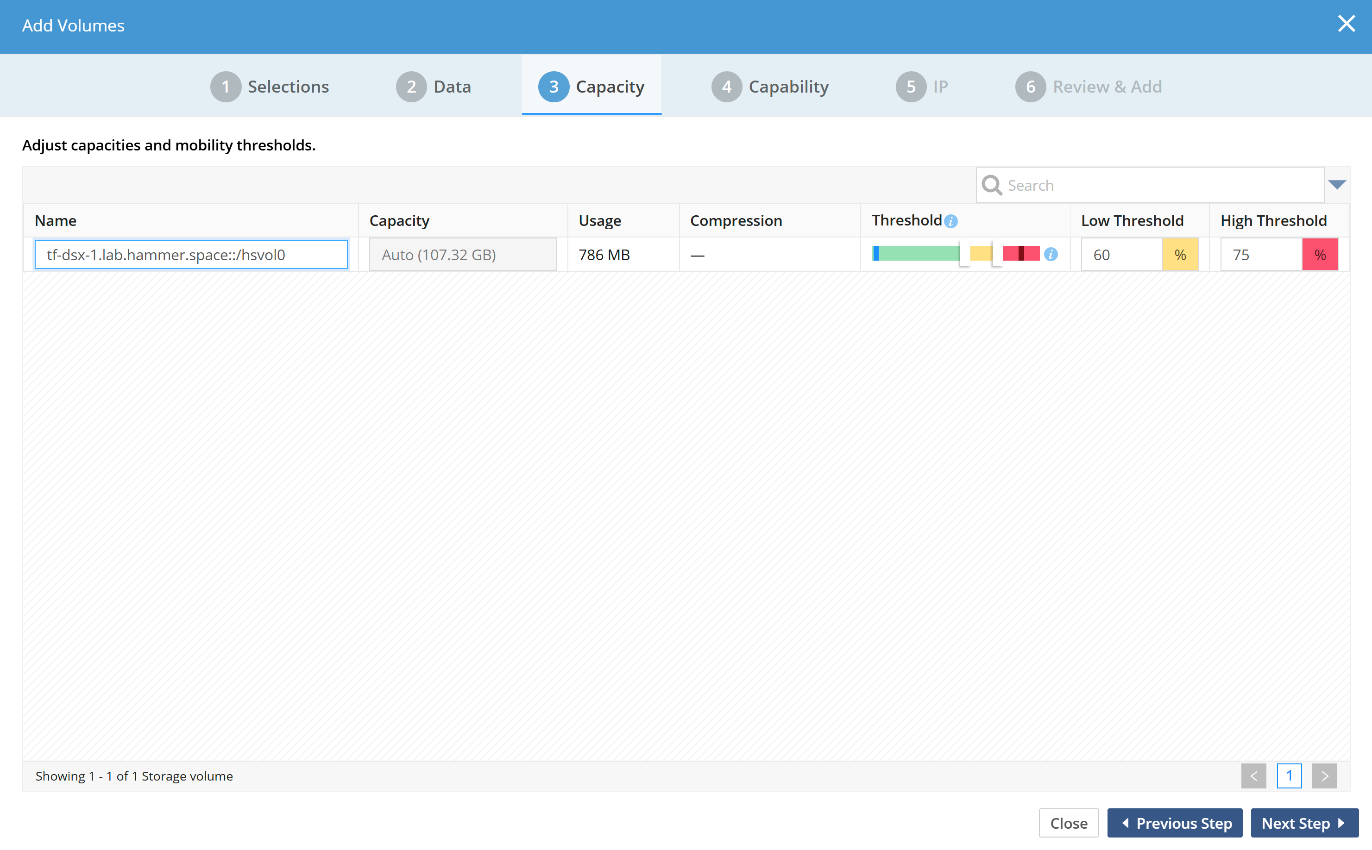
Step 3: Set Manage-to Capacity for the Storage Volume
Hammerspace enables live data mobility for all data stored on Hammerspace volumes. With this core functionality, it is now possible to have the system automatically load-balance across storage volumes without any disruption for data access.
The manage-to capacity for volumes allows administrators to set the desired high threshold of a volume before the system will no longer place new data on this volume unless it determines that all other volumes are full and that there is no object storage volume available. The data placement logic is driven by a machine learning engine that automatically takes capacity, placement and user-driven needs into account for placing data.
The Low Threshold setting determines how much data moves off a volume once the High Threshold has been reached. The system will schedule mobility from the volume until the low threshold has been met.
The high and low percentage value can be changed on the volume settings screen after the volume has been added.
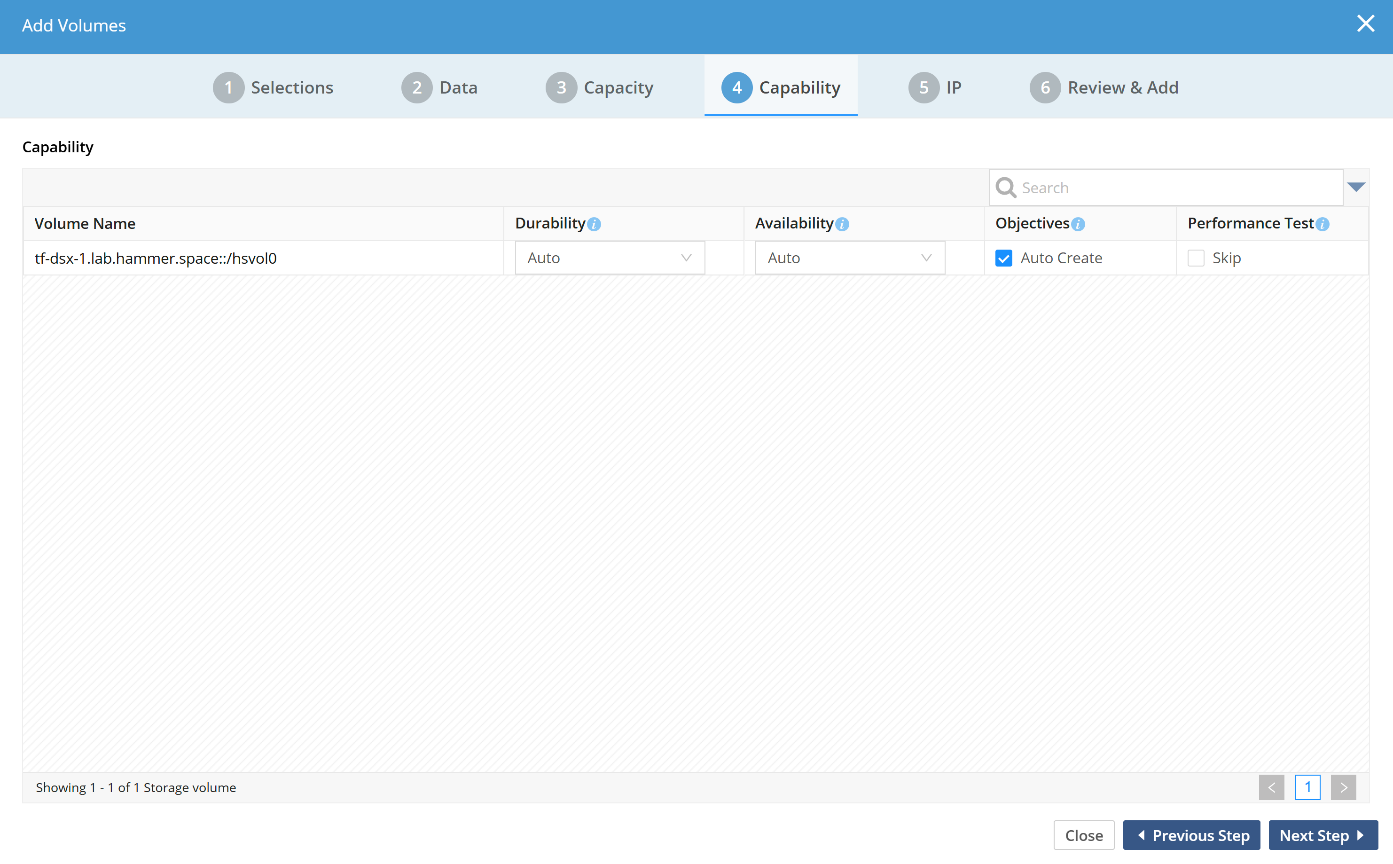
Step 4: Configure the Volume Capabilities
Each volume type is configured with a default set of capabilities. It is recommended to leave the Durability and Availability setting to the default values.
Objectives such as place-on-<volume name>, exclude-from-<volume-name> and confine-to-<volume-name> are auto-created when following the default GUI workflow. Unchecking the Auto Create box will require the admin to manually create those objectives after the volume is added.
The performance test will do a quick IOPS and throughput test of the volume; these values are used as the basis for performance-oriented objectives. The performance test will take approximately 1-2 minutes per volume.
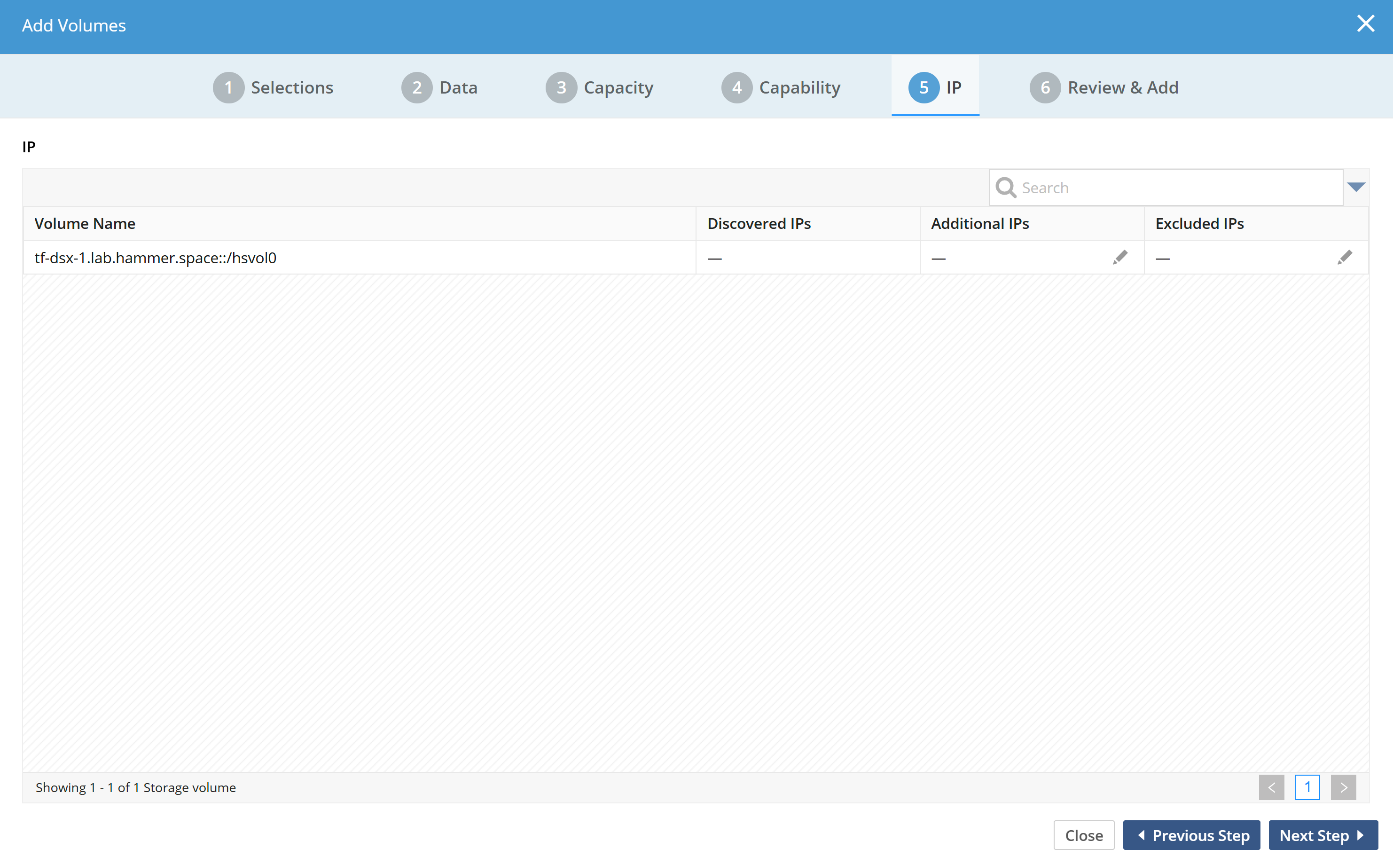
Step 5: Configure Additional IPs for the Data Volume (Optional)
A storage volume can have one or more IP addresses. Add or remove additional IPs as needed. The IP addresses can also be edited after the volume is added using the Management GUI or the Admin CLI. IP addresses are generally auto-discovered.
Step 6: Review the Configuration Summary
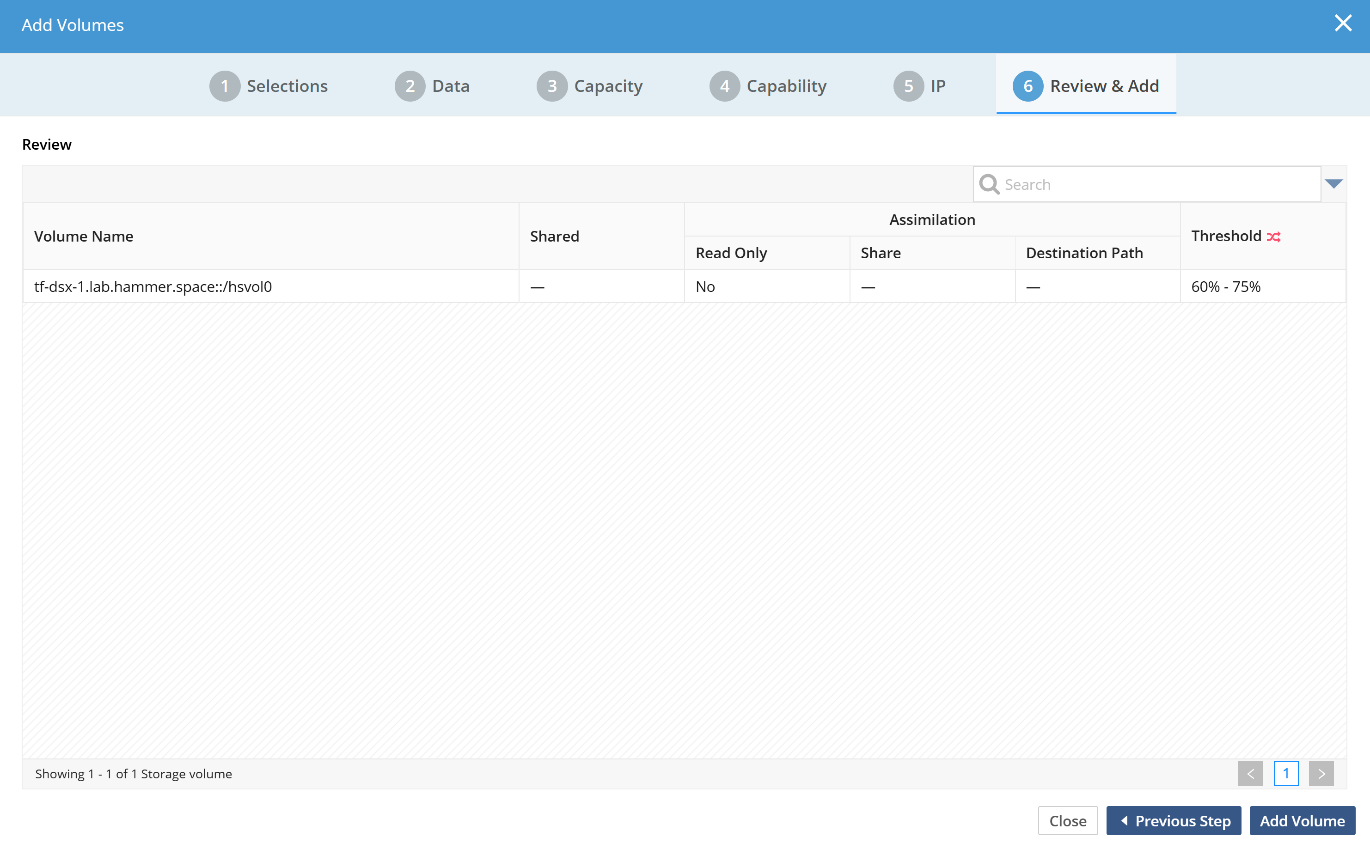
This final screen in the volume add step gives a summary of what will be done when clicking on Add Volumes.
Adding a volume is a background process and may take a few minutes to complete per volume. The progress of the volume add can be viewed in the task window or on the CLI.
Alternatively, you can use the following command to add the volume:
volume-addNFS-Other Storage Type
For NAS storage systems other than those listed in the GUI/CLI, the NFS Other type can be used to add the third-party storage into the namespace.
The Management IP address represents the actual NFS export IP address. If the storage supports multiple IP addresses, those can be added later using the volume-update command.
Required Export Settings
-
Exports must be exported over NFS v3 (even if client access is over SMB or NFS v4).
-
Exports must be exported read/write to all client IPs that will use the storage.
-
Exports must be configured with the Root Clients option set to the Anvil and DSX IP addresses. Make sure cluster IPs, node IPs, and floating IPs are included.
-
The root user cannot be squashed (
no_root_squashexport setting) for the Hammerspace product nodes and floating IPs. -
The file system ID must be unique for each export from this NFS server.
/space/app *(rw,sec=sys,no_root_squash,fsid=1)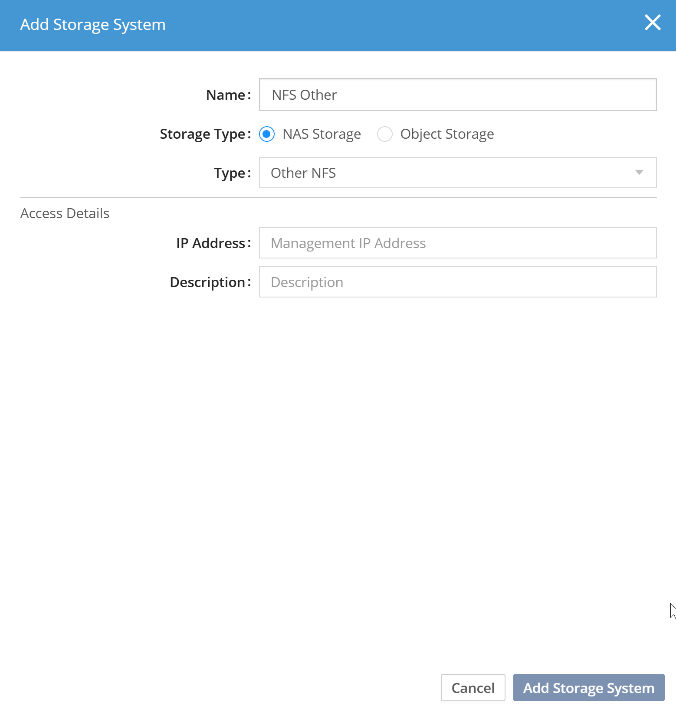
Adding NFS Other Storage Volumes
Use the following workflow to add NFS Other volumes using the Management GUI.
Step 1: Select Volumes
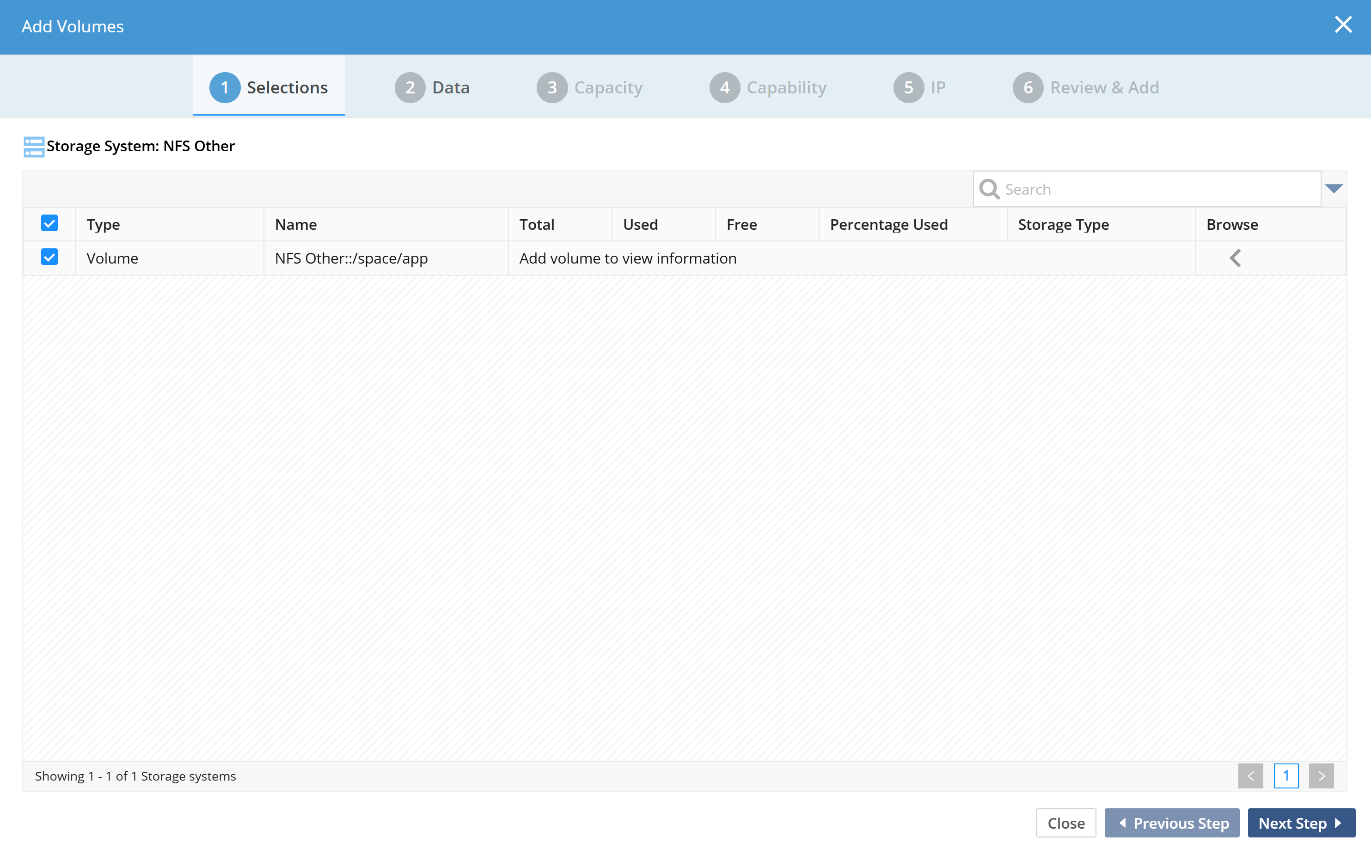
Select the volumes to add from NFS Other. These volumes are discovered using the API equivalent of the showmount command. If a volume is missing from the list, ensure that it is properly exported over NFSv3 from the NFS server.
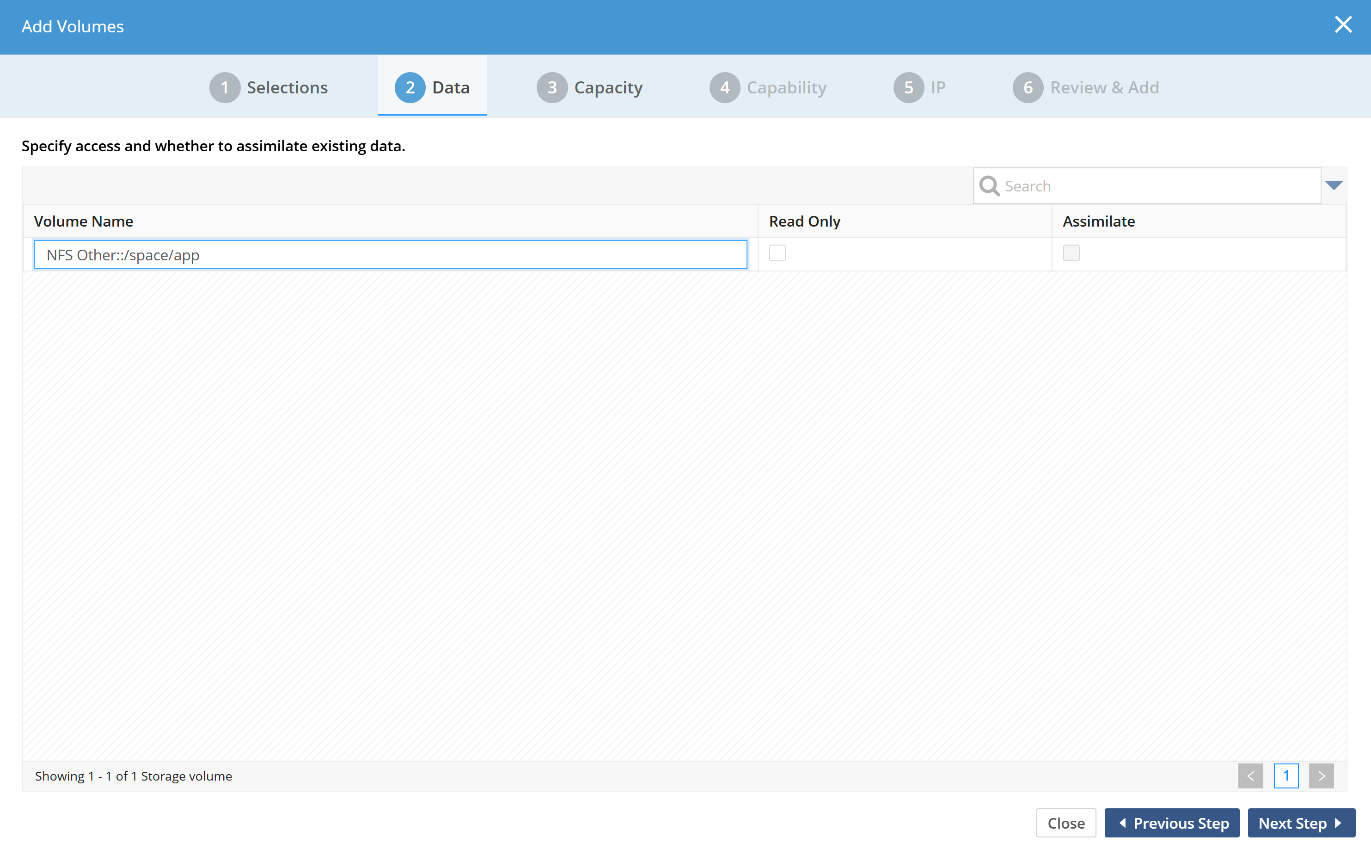
Step 2: Assimilate Data
The second step will automatically detect existing data on the volume and prompt the user to go through the assimilation process.
Step 3: Set the Manage-to Capacity for the Storage Volume
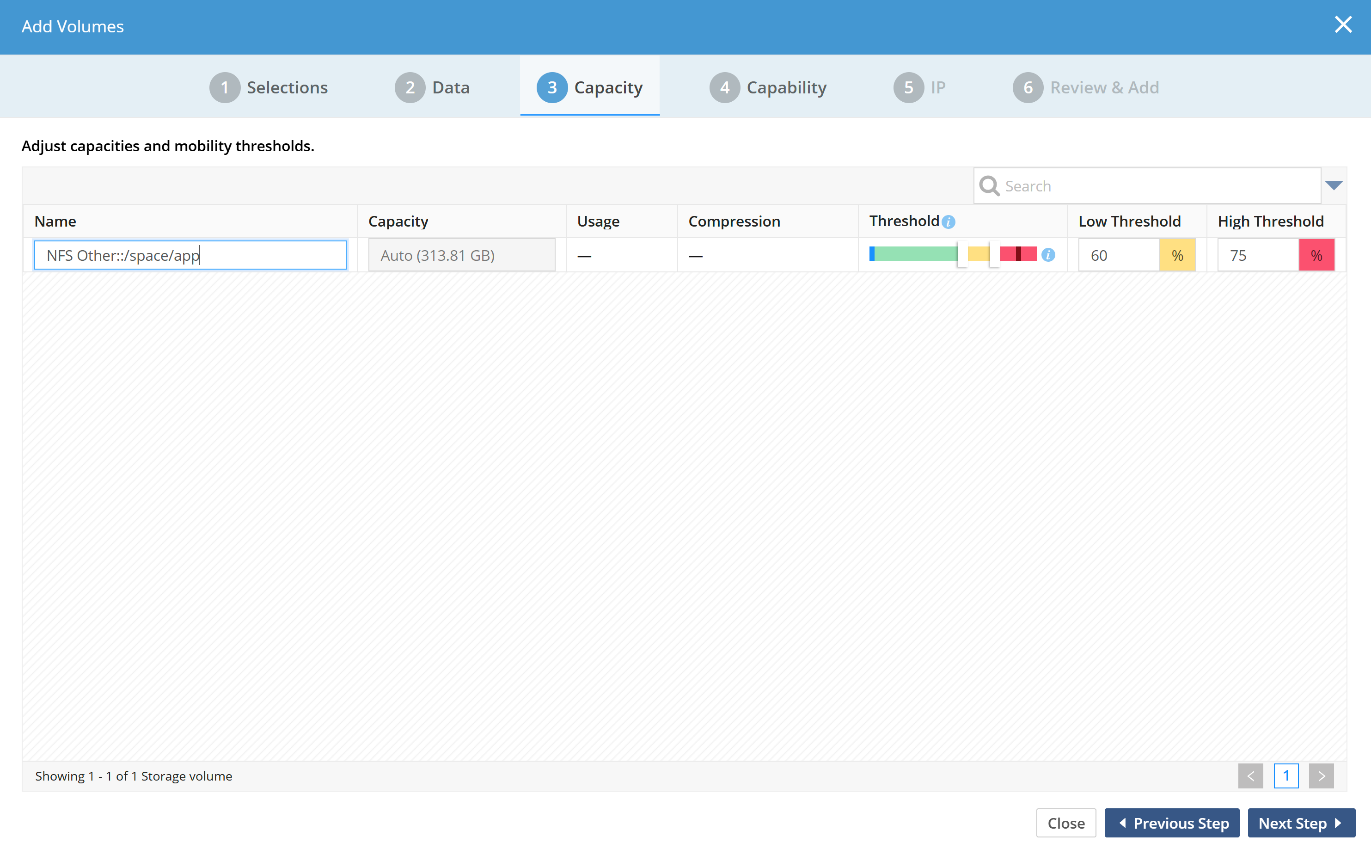
Hammerspace enables live data mobility for all data stored on Hammerspace volumes. With this core functionality, the system can now automatically load-balance across storage volumes without disrupting data access.
The manage-to capacity for volumes allows administrators to set a high threshold for a volume, after which the system will no longer place new data on this volume unless it determines that all other volumes are full and that no object storage volume is available.
The data placement logic is driven by a machine-learning engine that automatically accounts for capacity, placement, and user-driven needs when placing data.
The low threshold setting determines how much data moves off a volume once the high threshold has been reached. The system will schedule mobility from the volume until the low threshold has been met.
The high and low percentage values can be changed on the volume settings screen after the volume has been added.
Step 4: Configure the Volume Capabilities
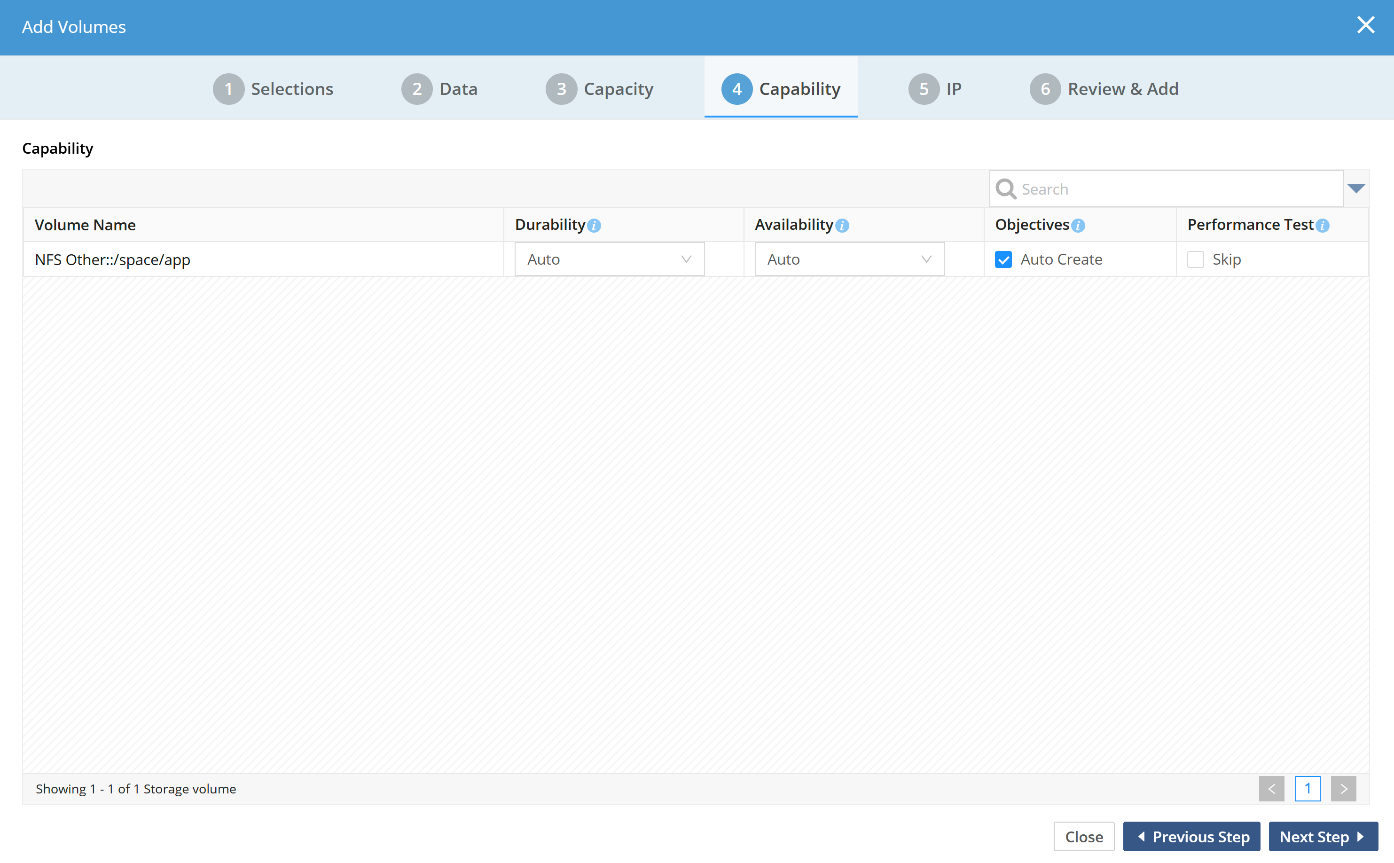
Each volume type is configured with a default set of capabilities. It is recommended to leave the Durability and Availability settings to the default values.
Objectives such as place-on-<volume name>, exclude-from-<volume-name>, and confine-to-<volume-name> are auto-created when following the default GUI workflow. Unchecking the Auto Create box will require the admin to manually create those objectives after the volume is added.
The performance test will do a quick IOPS and throughput test of the volume; these values are used as the basis for performance-oriented objectives. The performance test will take approximately 1-2 minutes per volume.
Step 5: Configure Additional IPs for the Data Volume (Optional)
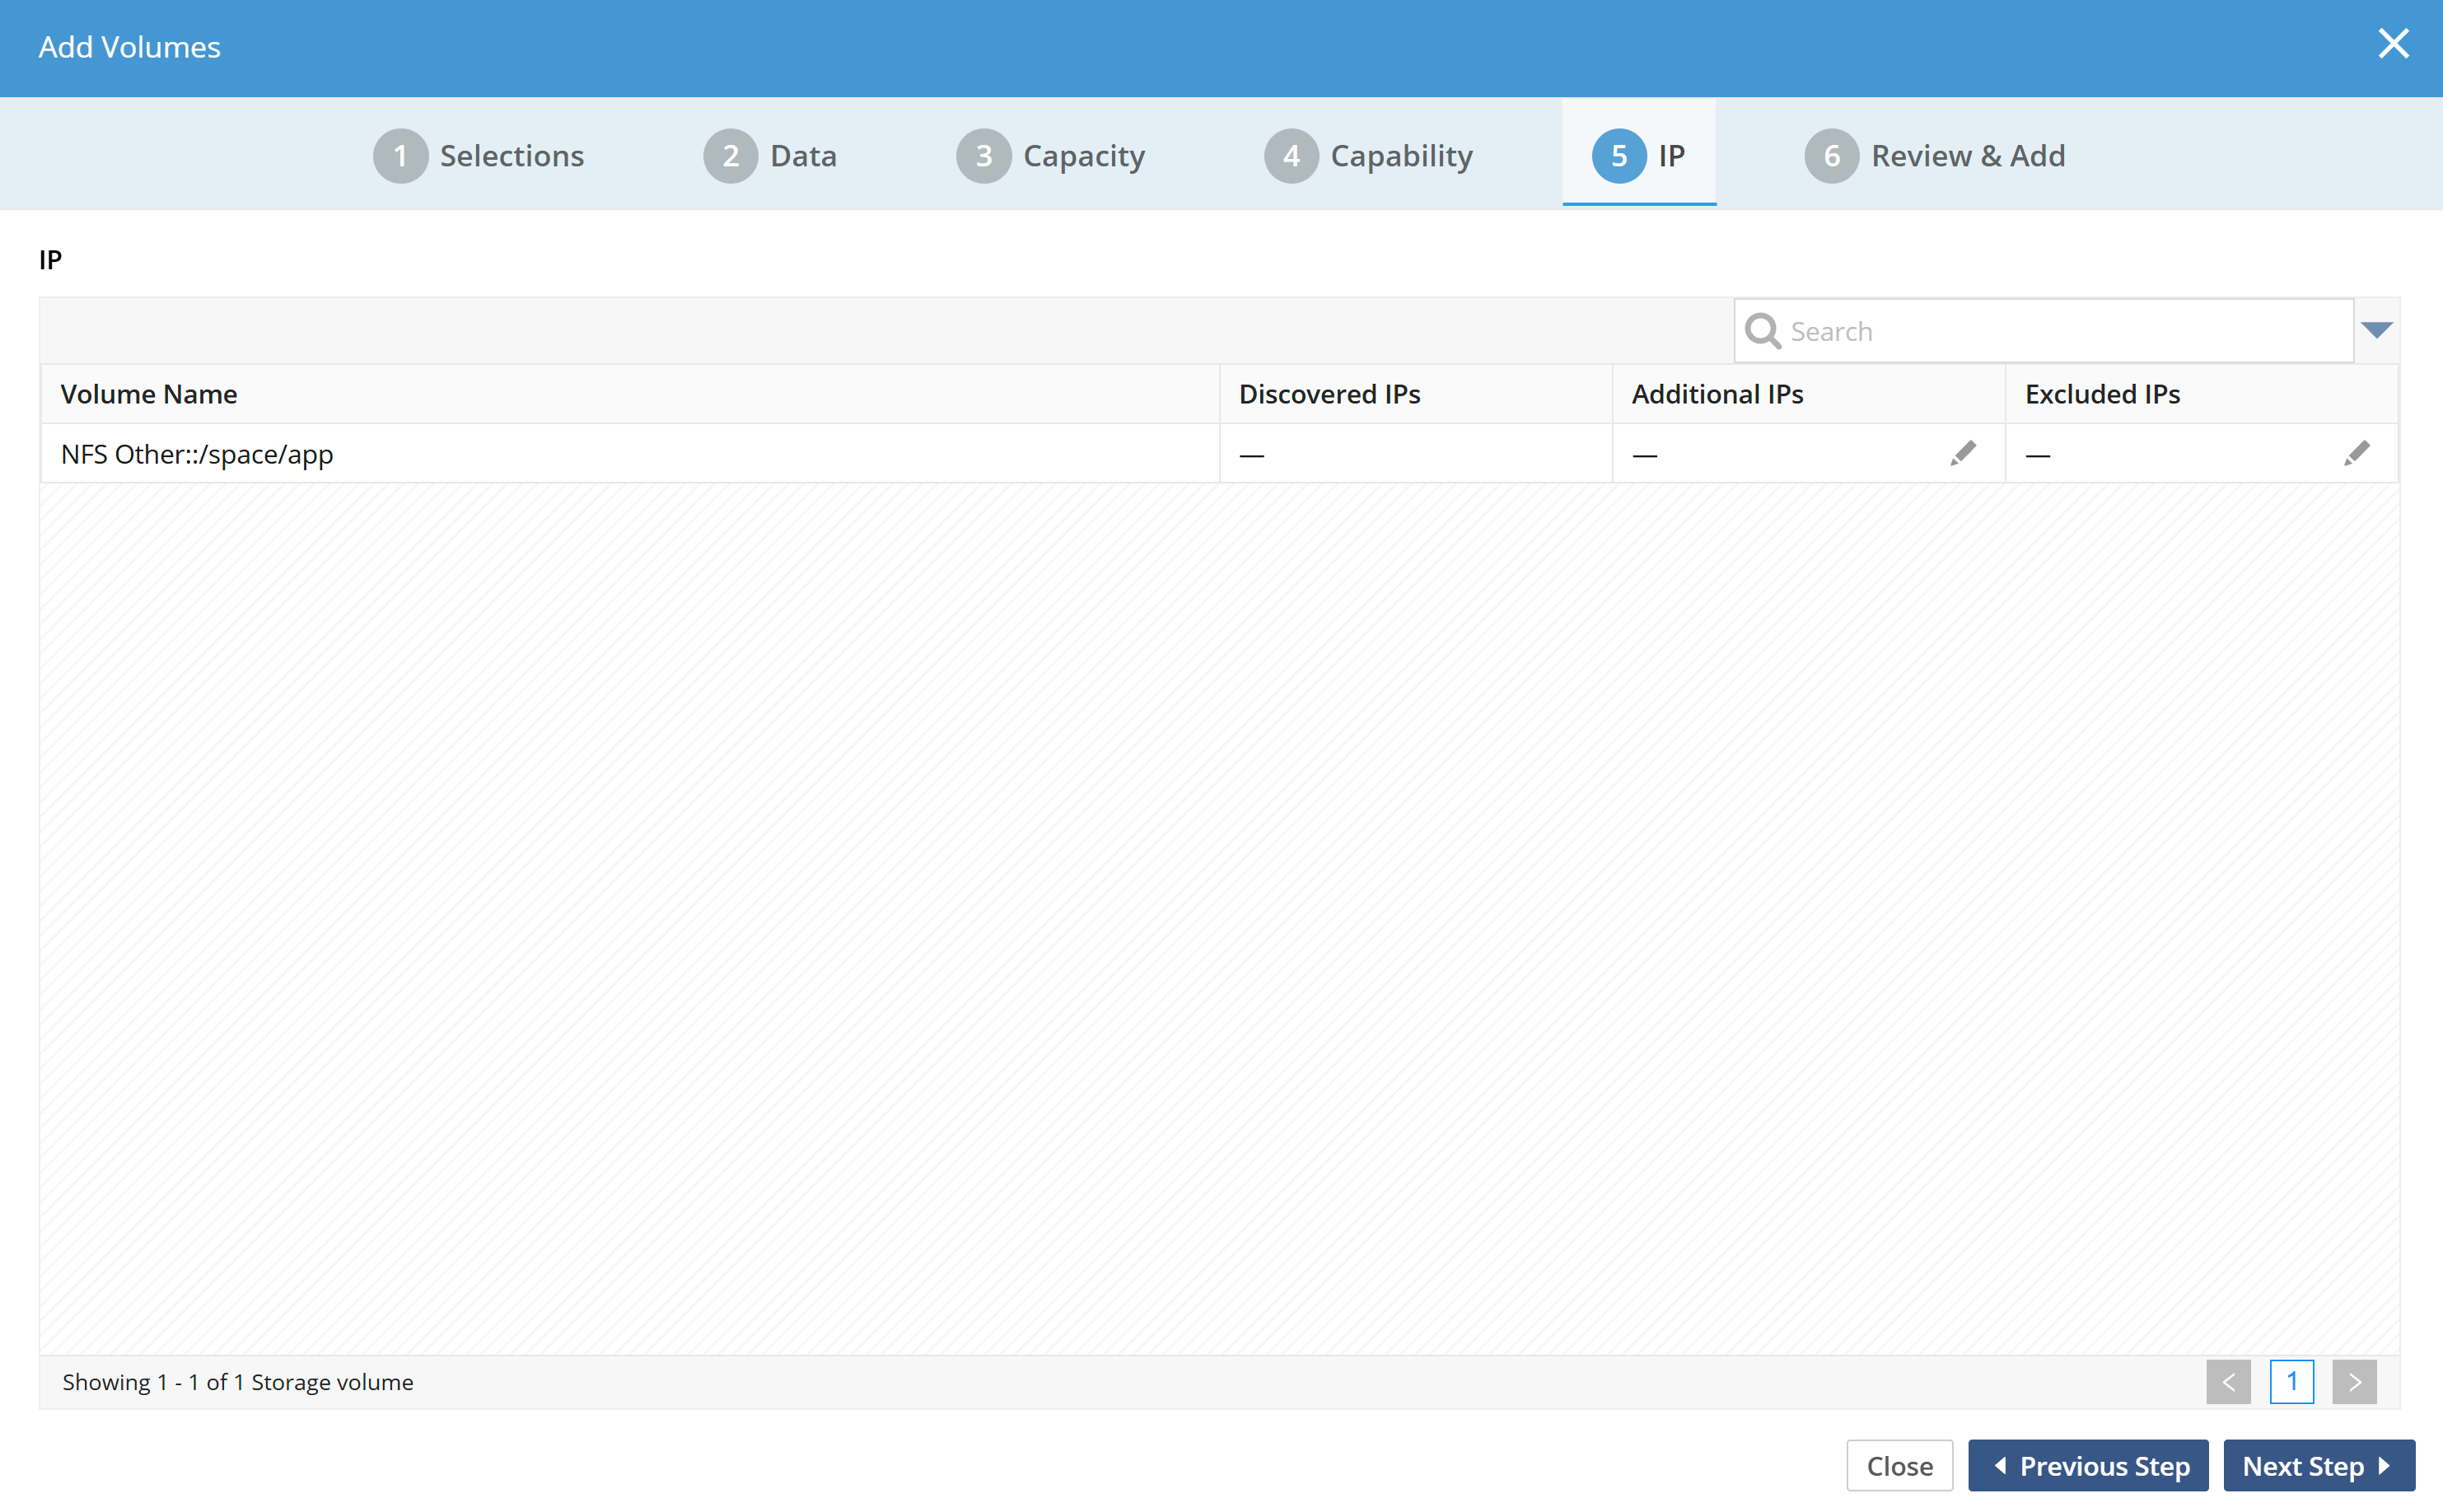
A storage volume can have one or more IP addresses. Add or remove additional IPs as needed. The IP addresses can also be edited after the volume is added using the Management GUI or the Admin CLI. IP addresses are generally auto-discovered.
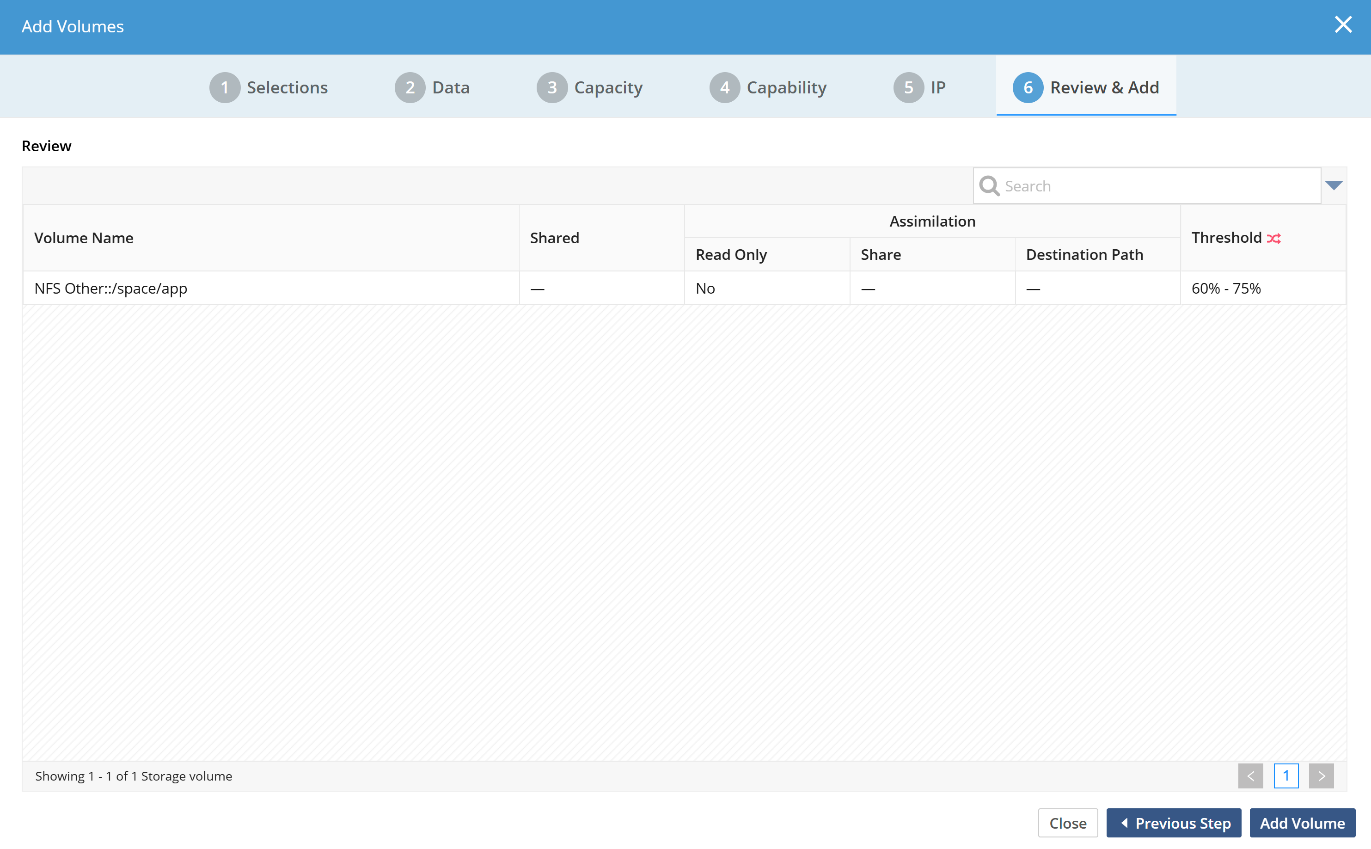
Step 6: Review the Configuration Summary
This final screen in the volume add step gives a summary of what will be done when clicking on Add Volumes.
Adding a volume is a background process and may take a few minutes to complete per volume. Progress can be viewed in the task window or on the CLI.
Alternatively, you can use the following command to add NFS Other volumes:
volume-add