Configuring Hammerspace WORM
The following instructions walk through the process of configuring a basic WORM-enabled share in Hammerspace, followed by additional examples tailored for specific use cases. Keep in mind when viewing these simple examples that the techniques shown may be combined and used with additional conditional logic to meet nearly any requirement.
All steps shown using the GUI may also be accomplished using the CLI or programmatically.
Examples include:
-
Configuring a WORM share including an expiration date (GUI)
-
Extending the expiration date of a WORM share (GUI)
-
Setting WORM on a directory with
deny-writeanddeny-delete(GUI) -
Setting WORM on a directory with
deny-writeanddeny-delete(CLI) -
Setting WORM on a directory with
worm-operation, including setting theWORM_EXPIRE_DATEattribute (CLI) -
Delaying WORM application until files reach a specified age (GUI)
-
Expiring WORM on files once they reach a specified age (GUI)
-
Archiving to a Compliance WORM storage target (GUI)
-
Sending snapshots to a Compliance WORM target (GUI)
-
Setting WORM on a file based on a user-applied label (GUI)
Configuring a WORM Share Including an Expiration Date
This is a basic WORM configuration, useful for archive use cases where populations of data must be saved for a specified amount of time. For example, retaining details of financial filings for seven years. In this case a share could be created for each year’s files, with an expiration date set seven years forward.
Follow these steps after logging into the Hammerspace GUI as an administrator.
-
Navigate to the Data tab of the left menu bar and click Create Share.
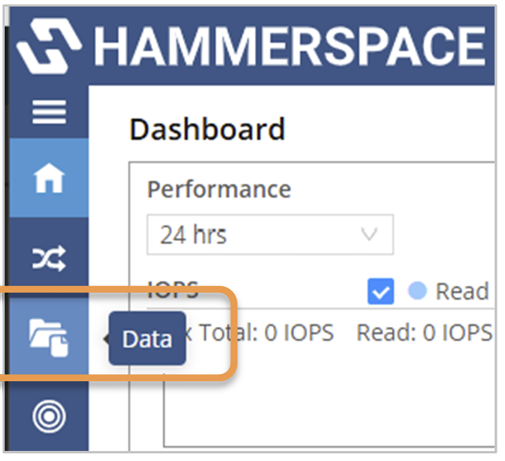 Figure 1. Create a share from the Data tab
 -
Enter a name for the share, then click Advanced. Check the box to enable WORM, and enter a date in the Until field. This defines a date when files in the directory will be unlocked and able to be modified or deleted.
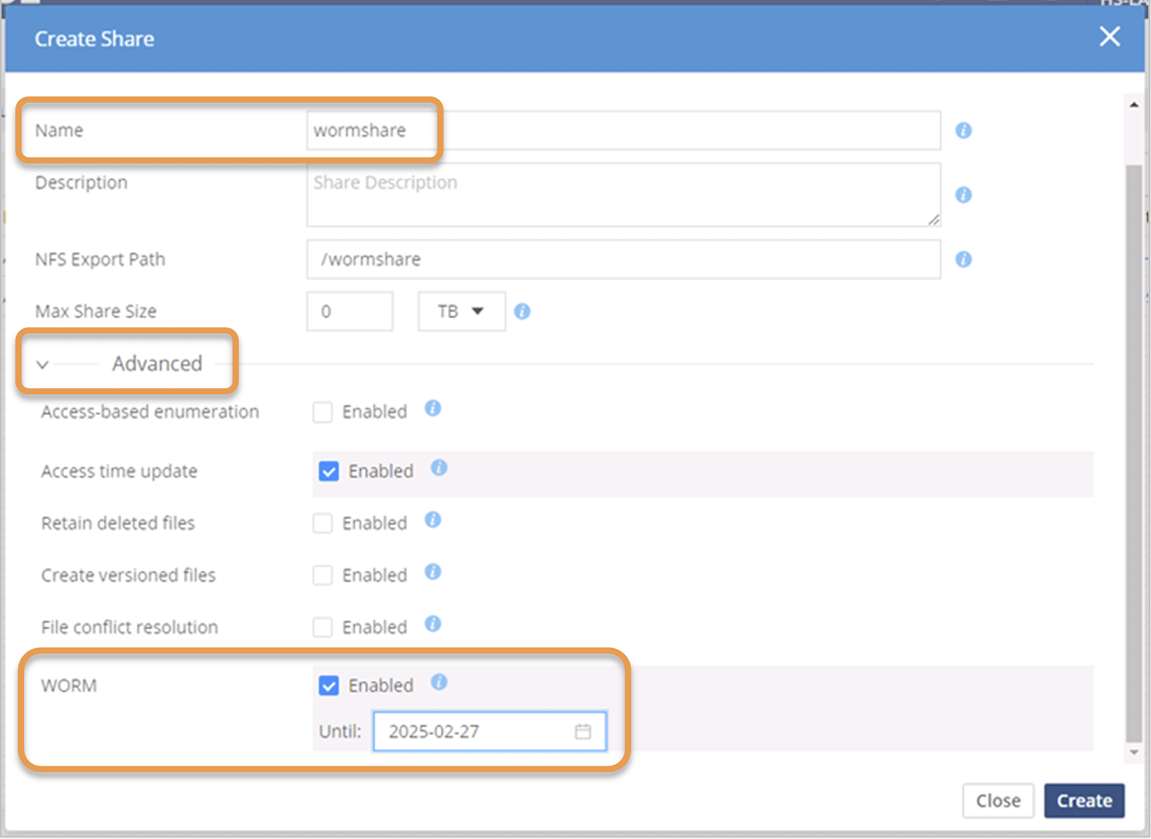 Figure 2. Advanced share settings with the WORM checkbox and Until date
 -
Move to the Objectives tab. Note that Applicability is set to ALWAYS. This ensures that WORM always applies to the entire share and cannot be removed on any files or directories within it.
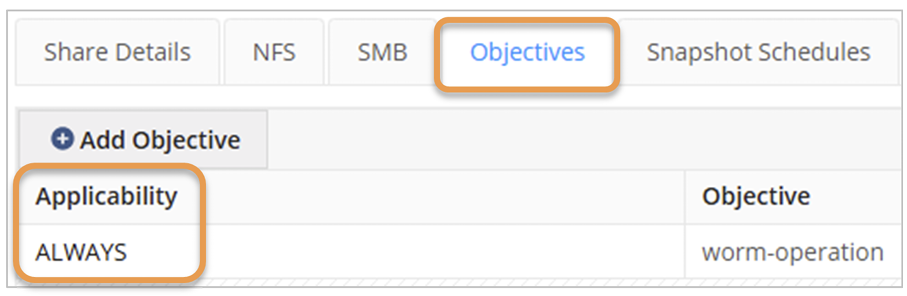 Figure 3. Objectives tab showing Applicability set to ALWAYS
 -
Click the Create button. After a few seconds, the new share will appear in the list of shares.
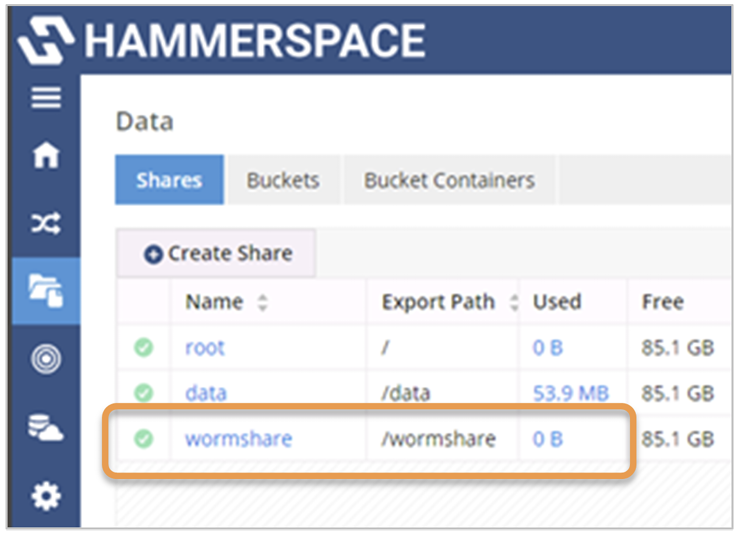 Figure 4. The new WORM share in the list of shares
It is also possible to add the WORM objective to an existing share, simply by modifying the advanced share properties and checking the WORM checkbox as one would when creating a new share. WORM will take effect immediately on any existing and new files.
Extending the Expiration Date of a WORM Share
Once a share has the WORM objective set, the expiration date (the WORM "Until" date) may be modified, but only in one direction. The duration may be increased, but not decreased.
To extend the expiration date:
-
Log into the Hammerspace administrative GUI and click the Data tab on the left menu bar.
-
Click the pencil icon under Actions to edit the options for the share to be modified.
-
Open the Advanced options on the Share Details tab and click in the WORM Until field to open the calendar. The current Until date will be highlighted. Note that prior dates are not selectable.
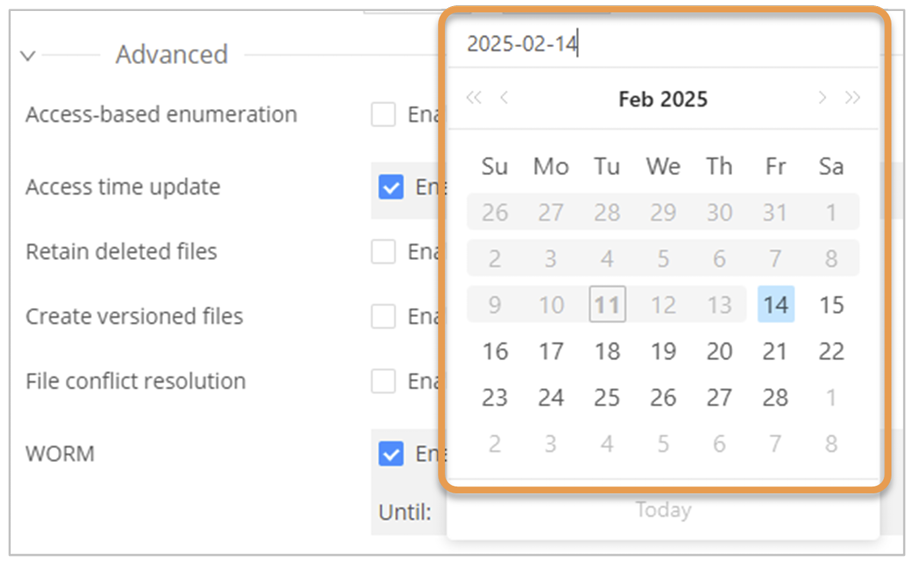 Figure 5. WORM Until calendar with past dates disabled
 -
Click a future date to extend the date, then click Update to apply the change.
Setting WORM on a Directory Using the GUI
These steps may also be used to set WORM on individual files.
-
From the Data tab in the Hammerspace GUI, click the name of the share (share1 in this example) to bring up the share dashboard. Click on the Files tab. The Files tab will display the files and directory listing for the root of the share.
 Figure 6. Files tab showing the directory listing for the root of the share
 -
Click the pencil icon to edit the objectives that apply to that directory.
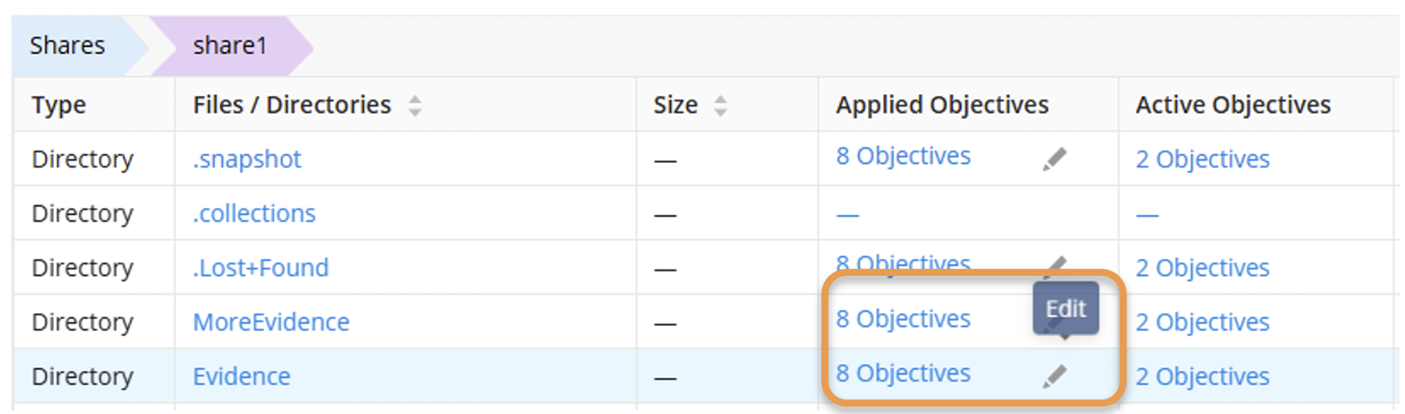 Figure 7. Edit the objectives that apply to the directory
 -
Click Add Objective.
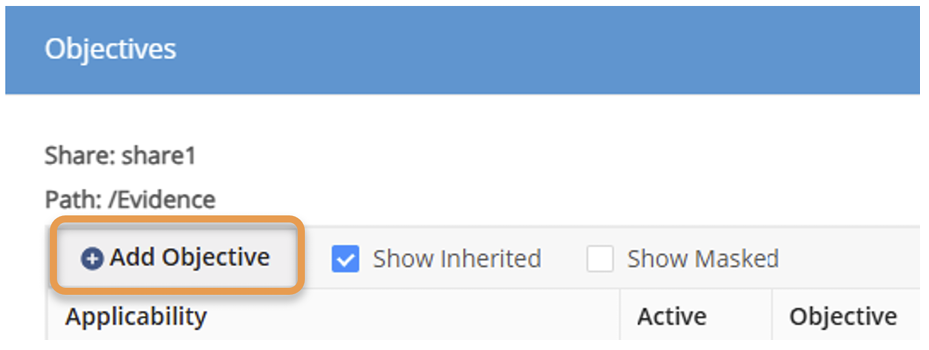 Figure 8. Add an objective to the directory
 -
Click the checkboxes for both the
deny-deleteanddeny-writeobjectives.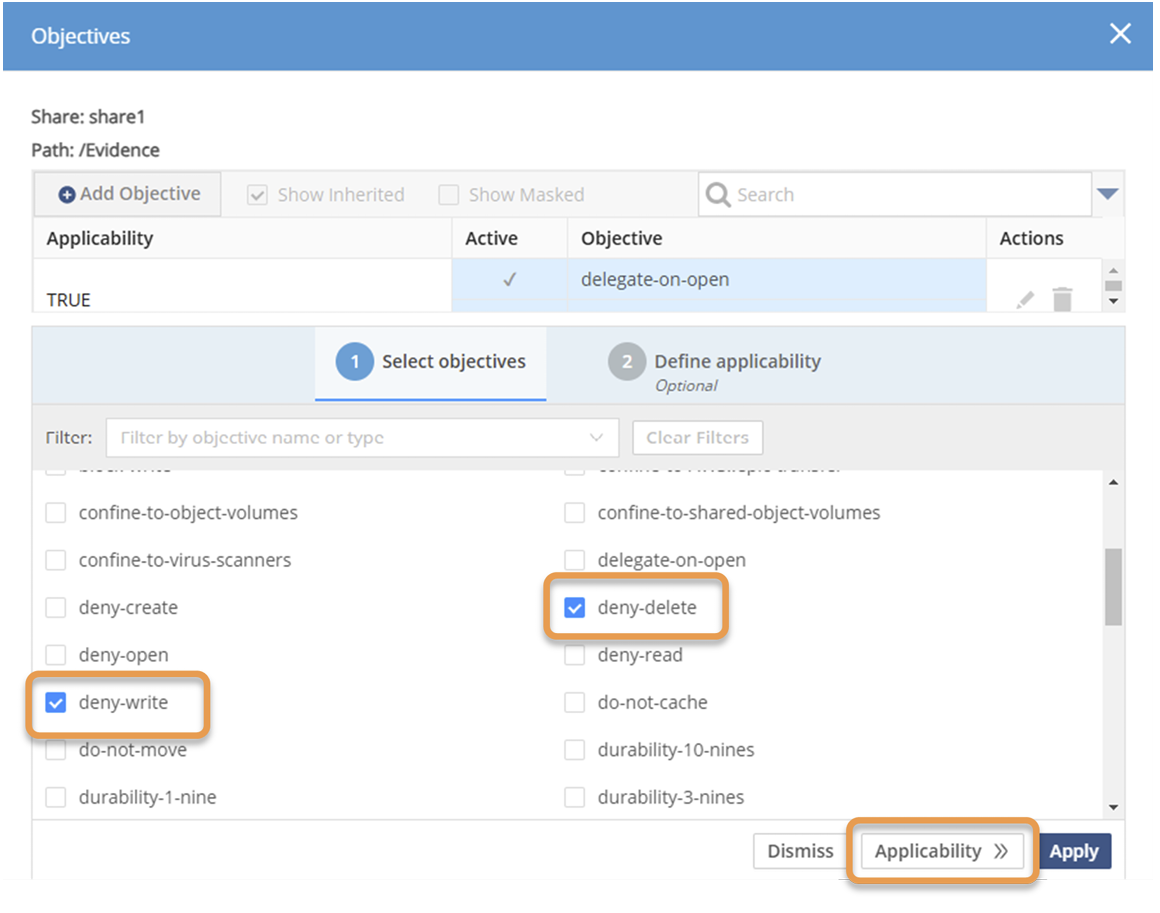 Figure 9. Select the deny-delete and deny-write objectives
 -
Click the Applicability button and select ALWAYS to prevent the objectives from being removed inside the directory, and click Apply to apply the change.
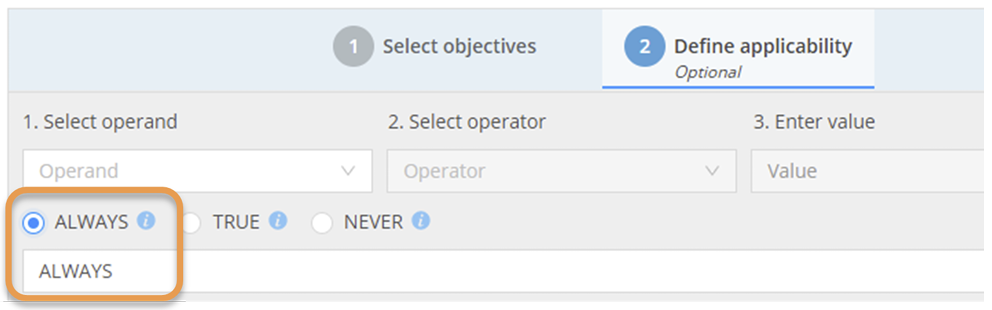 Figure 10. Set Applicability to ALWAYS
 -
The new objectives will appear in the list.
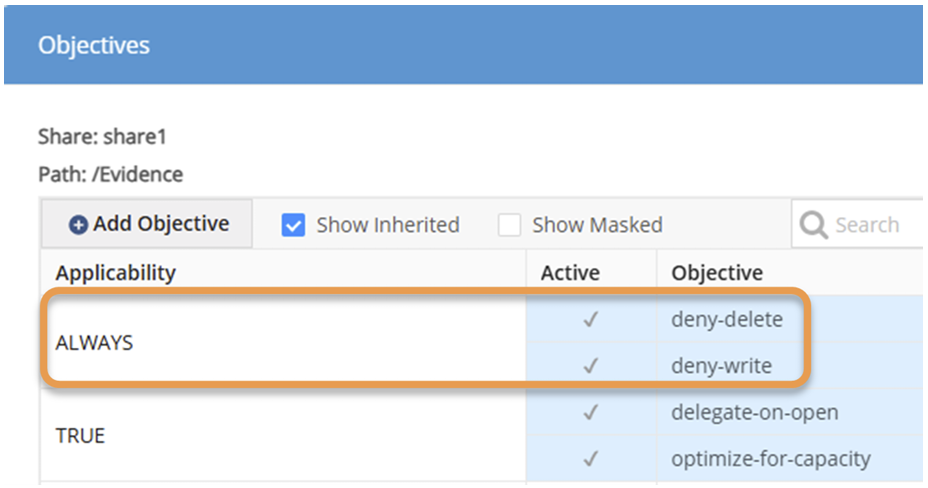 Figure 11. The new objectives in the list
Setting Deny-Write and Deny-Delete on a Directory Using HSTK
As with the previous example, this process may also be used to set objectives on files. This example uses a Windows system, but the commands are the same regardless of the OS the Hammerspace Toolkit is running on. For Windows, the use of PowerShell is recommended as it parses text input a little differently than the standard command line.
For this example, the S: drive is mapped to the share named share1, the same one used in the previous example.
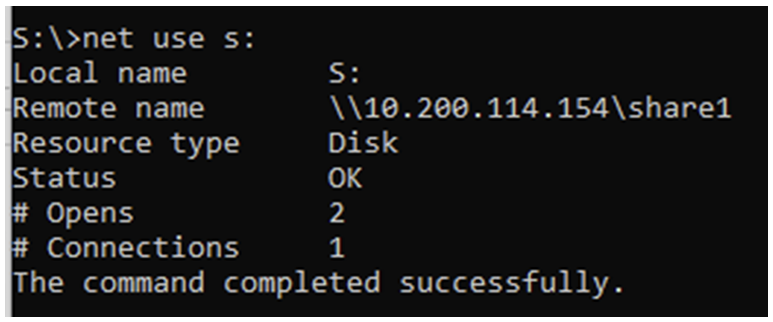
The hs objective add command may be used to apply the deny-write and deny-delete objectives on a directory or file. In this case, they are used on the directory named Evidence.
-
First, create the directory with
md.md Evidence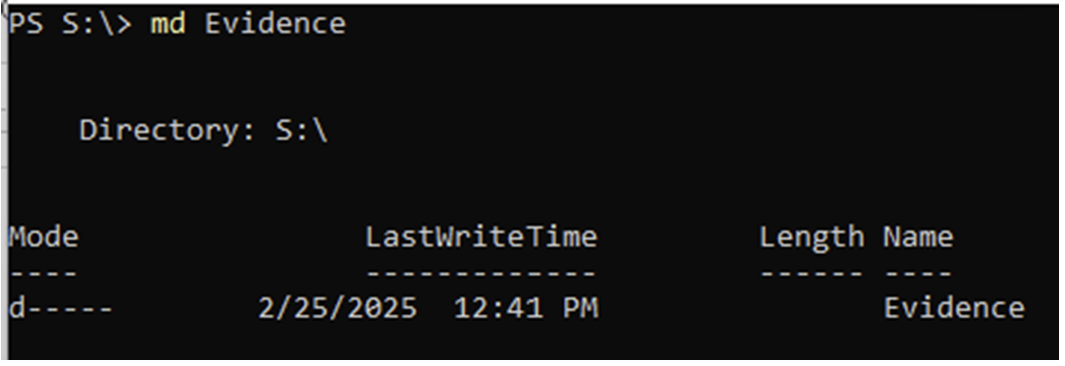 Figure 13. Create the Evidence directory with md
 -
Then, apply the objectives with
hs objective add.hs objective add deny-write Evidence hs objective add deny-delete Evidence Figure 14. Apply the deny-write and deny-delete objectives
 -
Finally, use
hs objective listto list the objectives on the directory to validate that the new ones were applied. In this case they appear at the top.hs objective list Evidence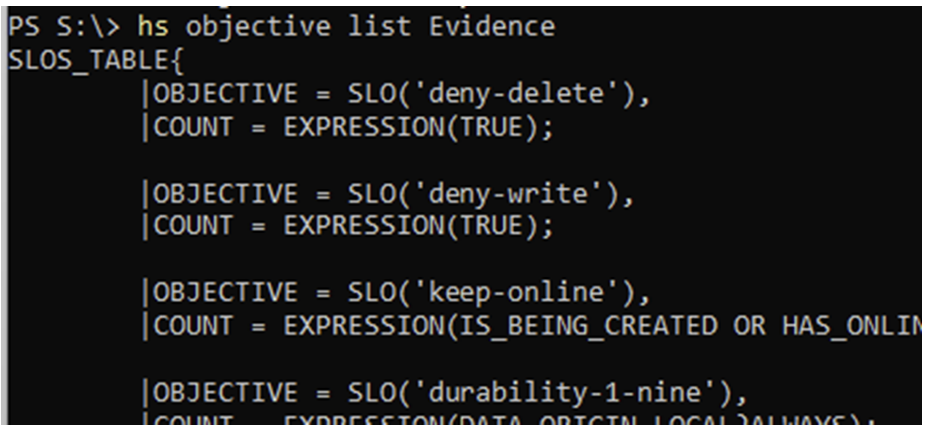 Figure 15. List the objectives on the directory
Setting Worm-Operation on a Directory Using HSTK
This example is similar to the previous one, but instead of using deny-delete and deny-write, the worm-operation objective is used. This requires setting the WORM_EXPIRE_DATE attribute as well.
-
First, create a directory named CaseArchive using
md.md CaseArchive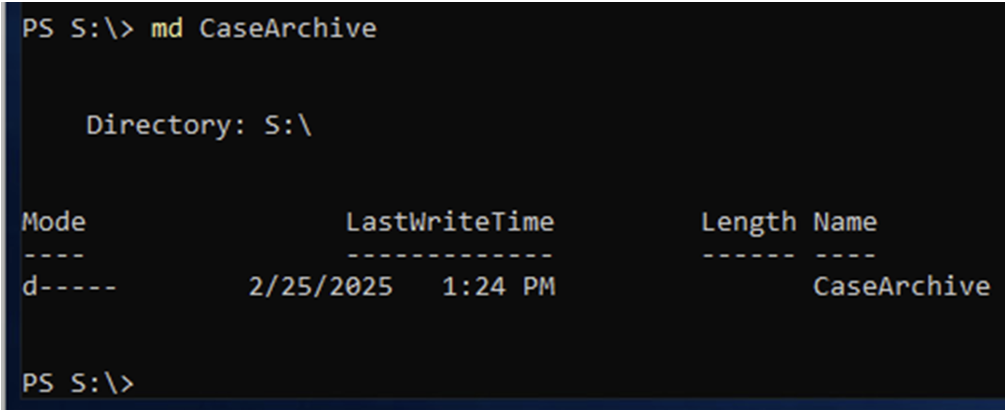 Figure 16. Create the CaseArchive directory with md
 -
Next, set the
worm-operationobjective usinghs objective add, and verify it usinghs objective list.hs objective add worm-operation CaseArchive hs objective list CaseArchive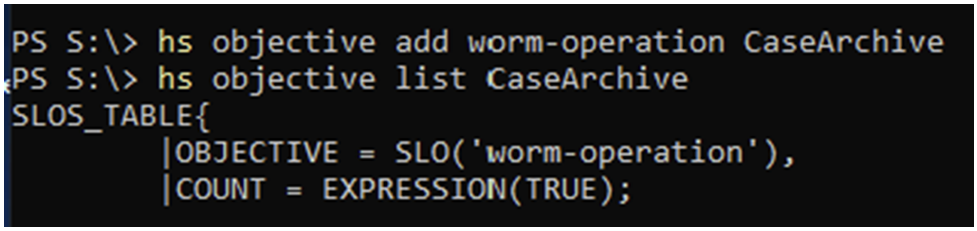 Figure 17. Set and verify the worm-operation objective
 -
Finally, remember that for
worm-operationto work, the attributeWORM_EXPIRE_DATEmust be set, which is done withhs attribute setand verified withhs attribute get.hs attribute set WORM_EXPIRE_DATE CaseArchive hs attribute get WORM_EXPIRE_DATE CaseArchive Figure 18. Set and verify the WORM_EXPIRE_DATE attribute
Delaying WORM Application Until Files Reach a Specified Age
For some workflows, it may be desirable to not have WORM take effect on files right away. For example, a workflow scanning documents or photos that then require human QA or cleanup before being archived in immutable form. Using WORM storage as working storage avoids the need to move the finished files from one share to another, and delaying the onset of WORM based on file age enables applications to work correctly for the pre-WORM period.
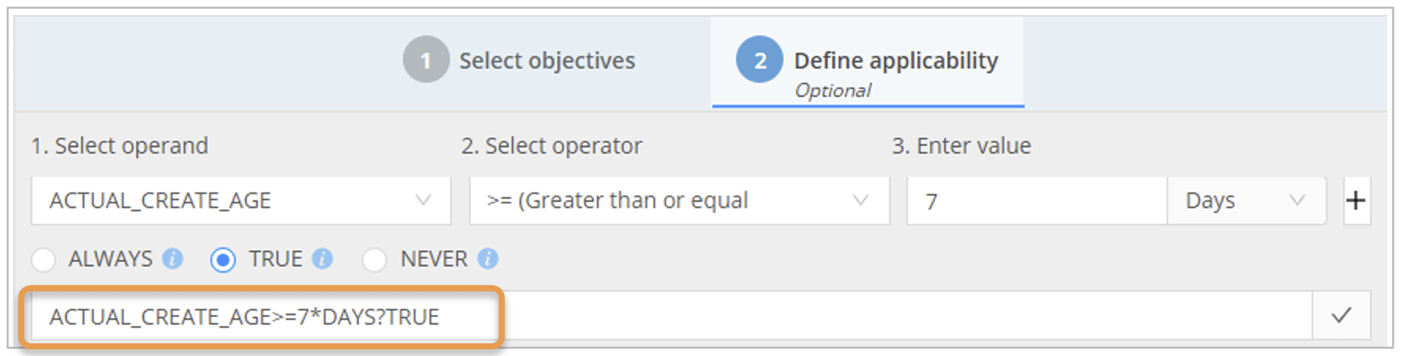
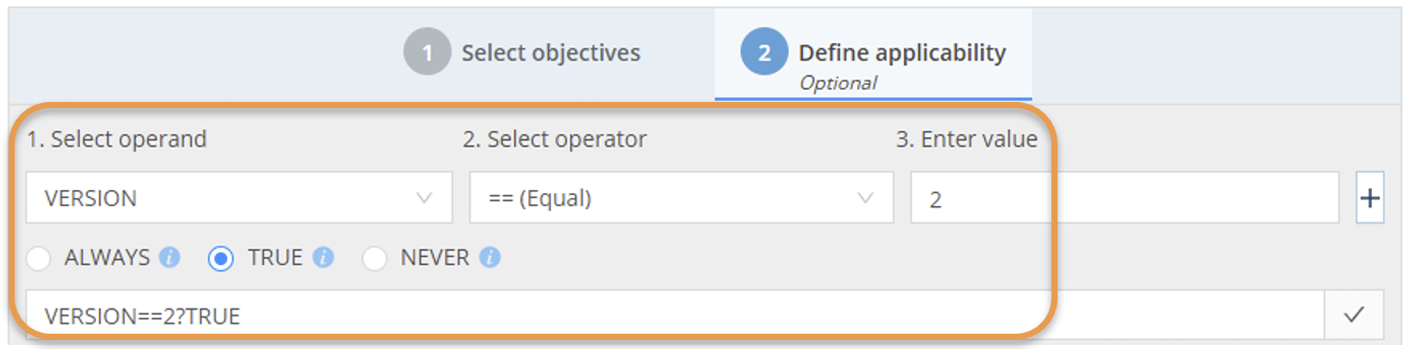
The two figures below show how to configure a share objective that waits until seven days have passed since files were created, at which point the deny-write and deny-delete objectives are applied. Perform this configuration from the edit share dialog, Objectives tab.
The objective uses a file-age condition with a "greater than or equal" operator so that the WORM objectives apply only once files reach the specified age:
IF ACTUAL_CREATE_AGE>=7*DAYS THEN {SLO('deny-write'),SLO('deny-delete')}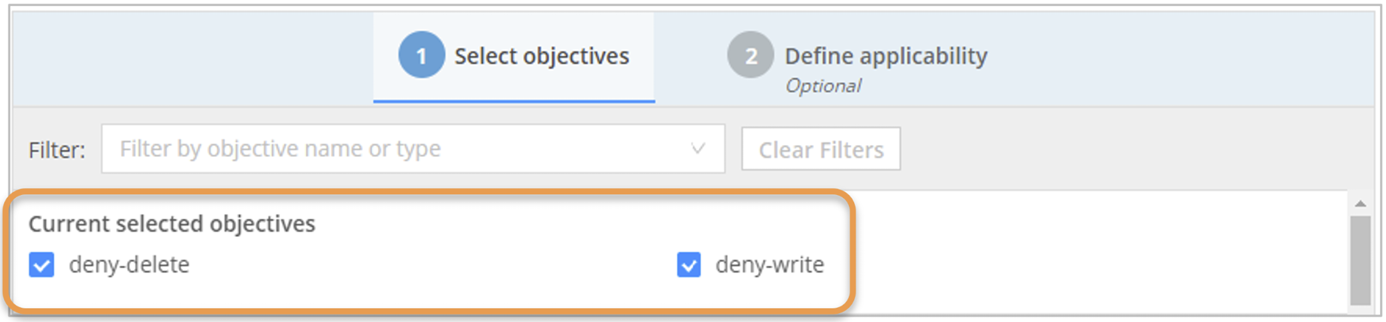
Expiring WORM Based on File Age
Another common requirement is to make files immutable for some defined period, such as 30 days or seven years. This simply requires setting a WORM objective that operates for the required duration based on the age of the file. After the objective expires, files may be changed or deleted as needed.
Note that this is different from the first example, which sets a general expiration date for WORM on the share without considering the age of individual files.
Some use cases requiring this type of time-limited objective (with typical retention times) include:
-
Protecting backup images from ransomware (14–30 days)
-
Secure retention of log files (1 year)
-
Retaining business records for audit compliance (7 years)
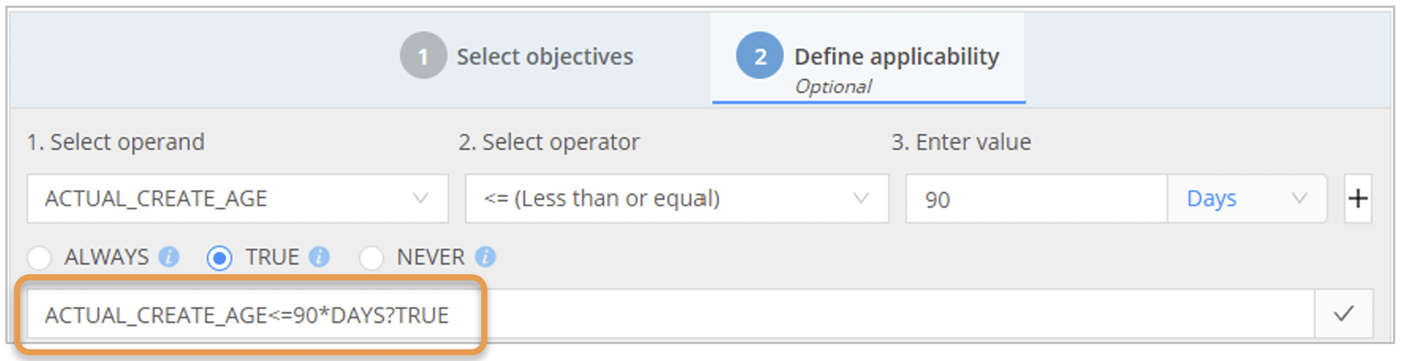
The objective shown below protects all files in the share with WORM for 90 days after they are created. Notice it uses the same operand as in the previous example, but with a "less than or equal" operator vs. "greater than or equal."
IF ACTUAL_CREATE_AGE<=90*DAYS THEN {SLO('deny-write'),SLO('deny-delete')}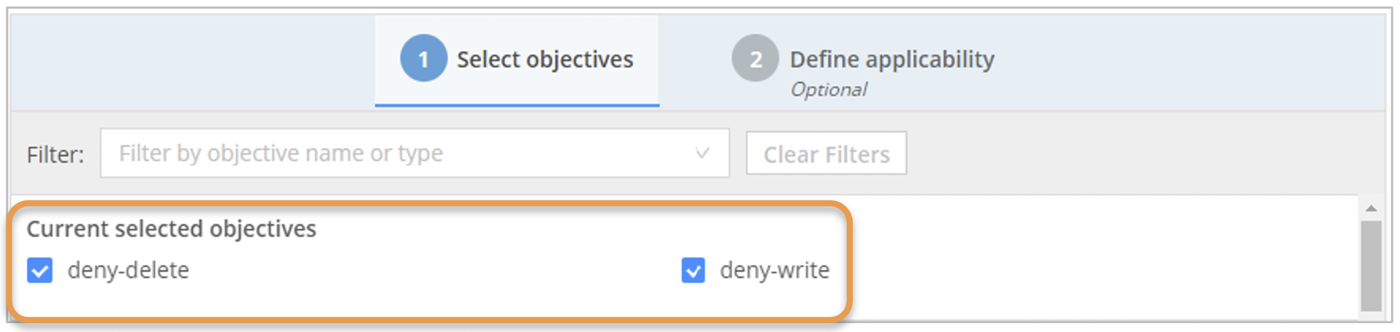
The workflow for some WORM use cases requires deleting files at the end of their retention time. For example, an organization may need to retain certain records immutably for seven years and then delete them.
|
For safety reasons, Hammerspace does not include objectives to automatically delete files, but administrators may use Hammerspace CLI commands to generate a list of files eligible for deletion. The file list may be used with standard OS command line or scripting tools to automate the deletion task itself. Details are beyond the scope of this document, but consult the Hammerscript and the Hammerspace Toolkit Guide for ideas, specifically the section entitled "Using Collections for Data Lifecycle Management." |
Archiving to a Compliance WORM Target
Hammerspace can integrate with storage targets that provide Compliance WORM capability, such as immutable file stores or S3 buckets. Many Compliance WORM S3 targets are available, both on premises and in public clouds. Examples include AWS S3 Object Lock, Azure Immutable Blob storage, and even LTO-WORM tape behind a supported S3-to-tape gateway.
As mentioned in the best practices section above, when using Hammerspace with a Compliance WORM target, an objective must be created that sets both the deny-write and deny-delete objectives on all files or objects on that target.
The following objective configuration confines all files in this share to an AWS bucket that has Object Lock enabled. deny-write and deny-delete are also set. The objective is configured to apply ALWAYS so that data owners may not remove it.
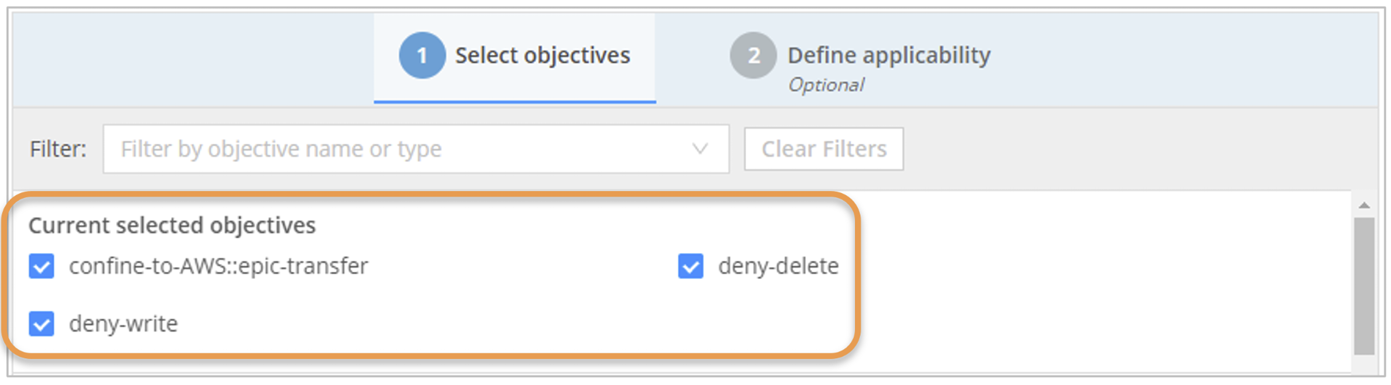
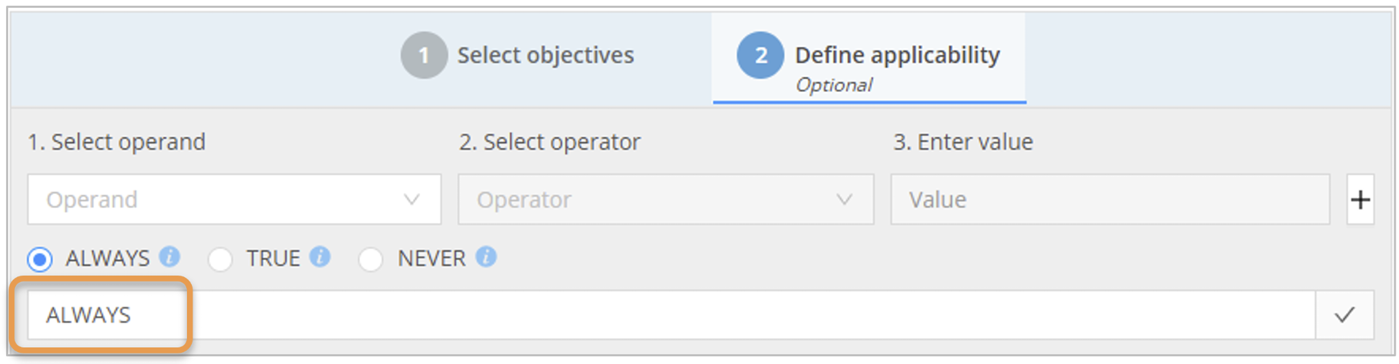
Any files copied into this share will only reside on the specified immutable AWS bucket.
Sending Snapshots to a Compliance WORM Target
In order to meet requirements for immutable snapshots, Hammerspace objectives may be configured to copy snapshots to an on-premises or cloud-based WORM storage target.
Hammerspace may be configured with a snapshot retention schedule. If this feature is used, ensure that the WORM target bucket has a retention period configured that is shorter than the Hammerspace snapshot retention schedule. Otherwise, the scheduled deletion of expired snapshots will fail.
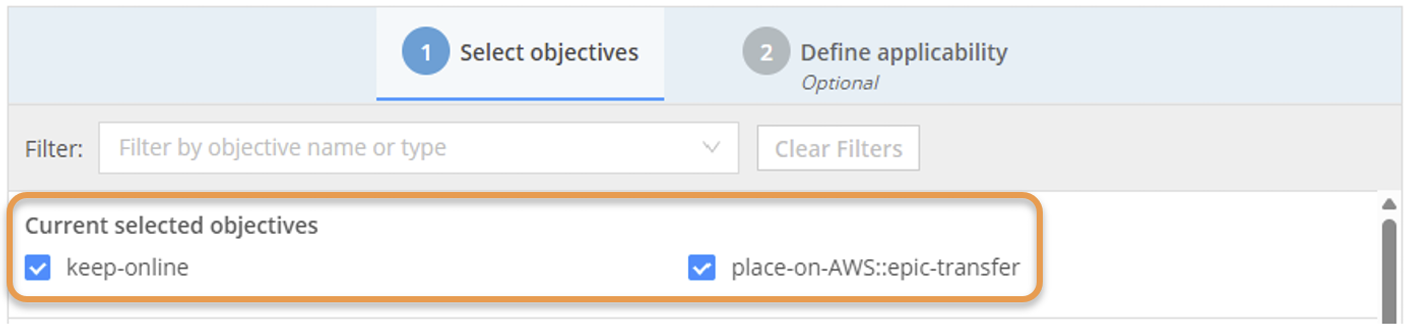
In this example two objectives are used to protect a copy of all snapshots to the WORM target. The first places all snapshots older than the current snapshot onto the WORM cloud target.
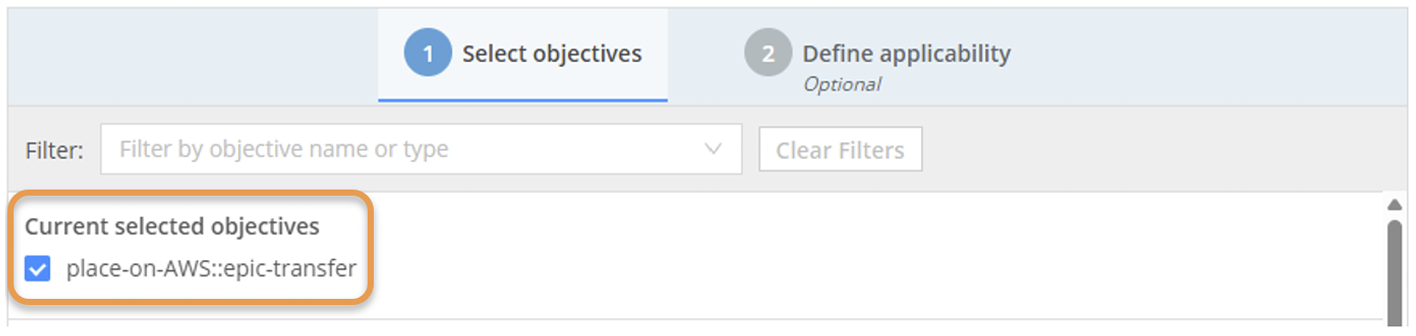
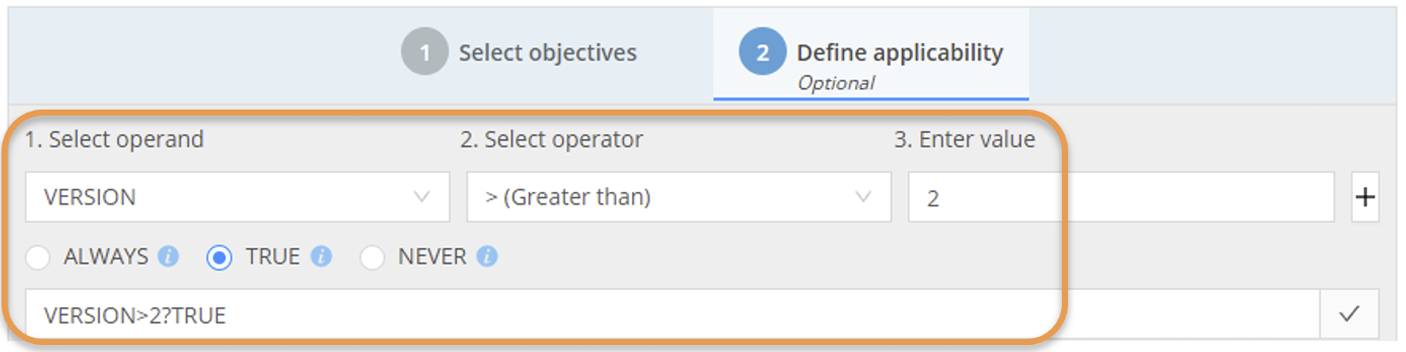
The second ensures that the current snapshot is always kept in the original location on premises for quick recovery, as well as having a copy on the WORM cloud target.
Setting WORM on a File Through a User-Applied Label
Hammerspace has very flexible support for user-defined metadata. This includes the ability for end-users to select from a set of labels that have been pre-defined by the administrator. Labels may be applied to files and directories using the HSTK, or via the Hammerspace Metadata plugin for Windows Explorer. Usage of both these tools is covered in detail in the Hammerscript and the Hammerspace Toolkit Guide.
This example configuration enables users to set the legalhold label on files. This triggers an objective that makes the file immutable.
|
If a user has permission to apply a label to a file, they also have permission to remove it. In this case, that means that a user can remove the WORM objective from a file by removing the |
-
First, a Hammerspace administrator creates the label using the
label-createcommand at the admin CLI.Create the legalhold labelCommand:
label-create --name legalholdExpected output:
Name: legalhold Internal ID: 1 -
Next, the administrator configures the
deny-writeanddeny-deleteobjectives to be set on all files that have thelegalholdlabel. The operandHAS_LABELis not available in the dropdown list, but is typed in the text field below. This field can accept any valid Hammerscript expression. The check mark to the right of the field will appear when the expression is valid. If the check mark is not seen on the right side, the expression as typed is not valid — check the syntax.HAS_LABEL('legalhold')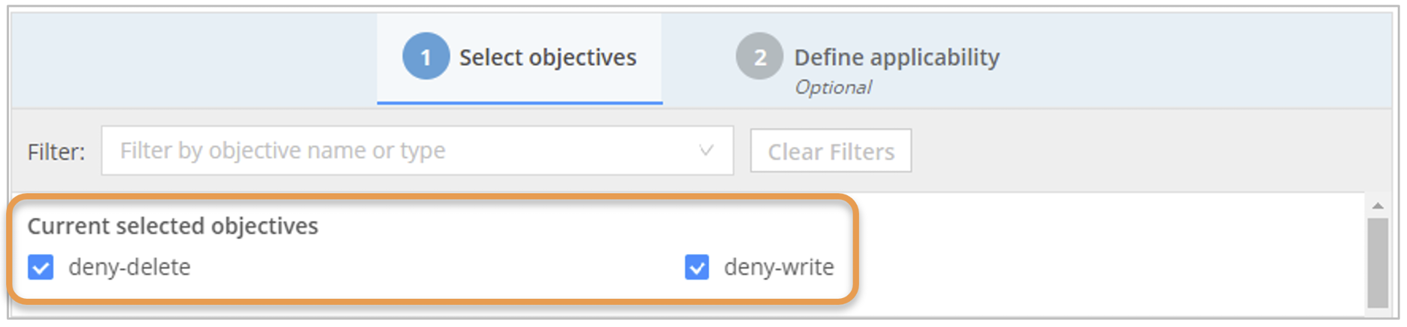 Figure 29. Objective editor with the typed HAS_LABEL expression and the valid-expression check mark
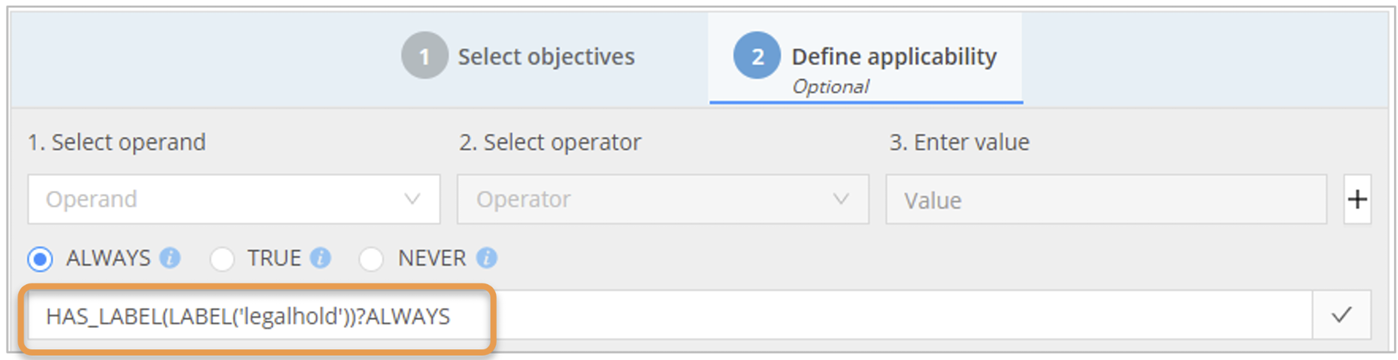 Figure 30. The deny-write and deny-delete objectives set for labeled files
 -
At this point, any user on Windows with the Hammerspace Metadata Plugin installed may place the label
legalholdon a file or directory. The plugin is invoked by right-clicking on any file or directory in Windows Explorer, then selecting Open Hammerspace from the context menu.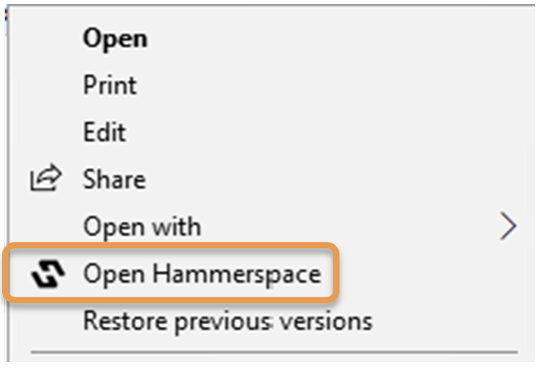 Figure 31. Windows Explorer context menu showing Open Hammerspace
The label may also be applied at the CLI on any Linux, macOS, or Windows machine running the HSTK, or at the system CLI by an administrator.
After clicking the Select Label button, the user is presented with a picklist of pre-defined labels, and in this case, selects the legalhold label.
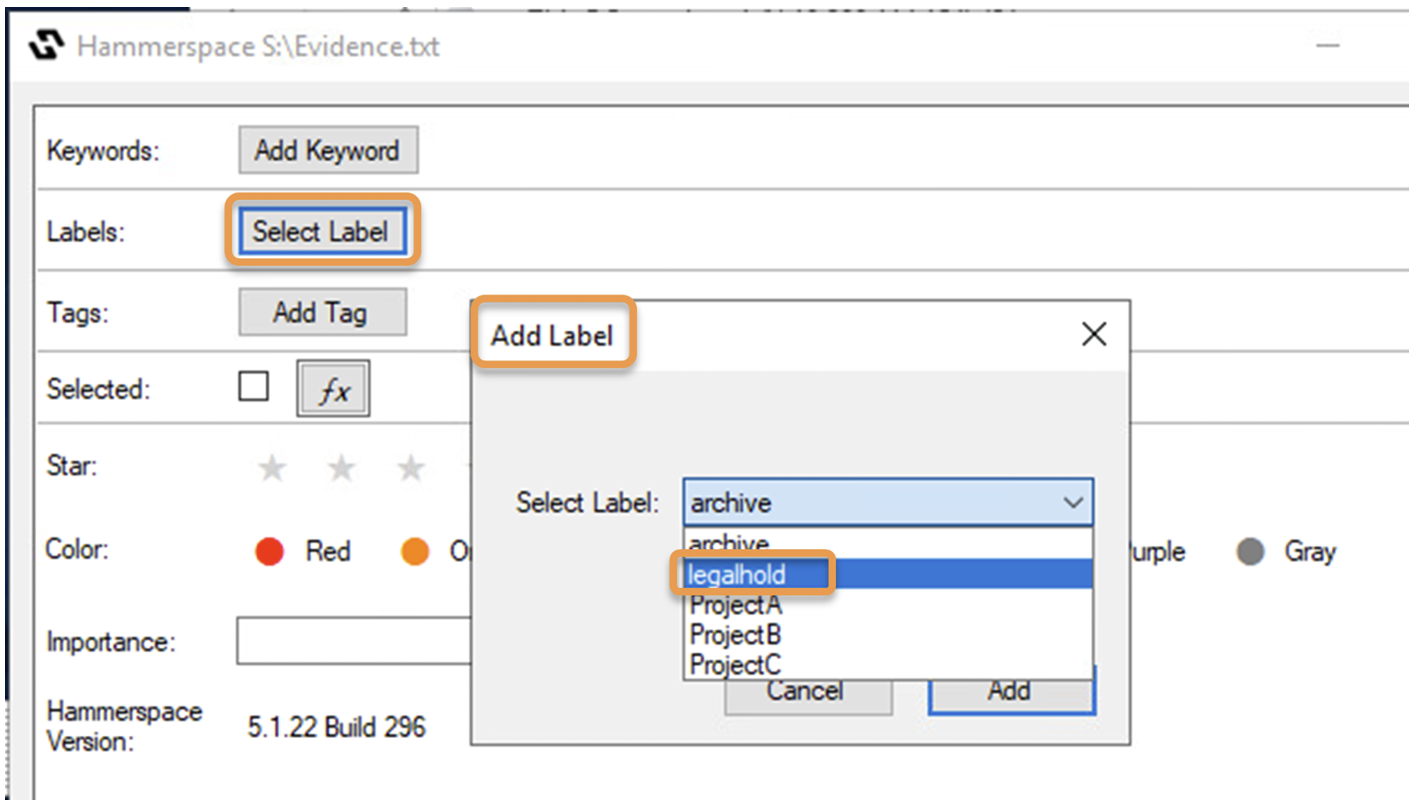
Labeling files and directories triggers the pre-defined objective. Affected files will not be able to be modified or deleted until the label is removed or an administrator removes the objective.