Example 2: Two Tenants, Isolated Resources
This example will configure a single Hammerspace instance for two tenants representing two completely independent corporate customers of a service provider. The tenants in this case must be kept as isolated from each other as possible. A service provider will configure, manage, and monitor the system.
Hammerspace Architecture
Three Anvil nodes are deployed, one in each of the three power domains at the service provider facility. Four DSX nodes are used, each with the S3 service enabled. If additional horsepower is needed, additional DSX nodes are easily deployed.
Back-end storage consists of Linux Storage Servers (LSSs) which are simply commodity Linux servers with attached HDD storage. The storage is exported using NFSv3 and will be configured as Hammerspace storage volumes. Objectives will ensure object data is maintained with the level of availability and durability specified in each tenant’s contract.
Configuration Steps
The process to set up this example configuration consists of nine steps.
-
Enable S3 Services on all DSXs: On the GUI Administration page, switch to the Services tab and enable the S3 service on all four DSXs.
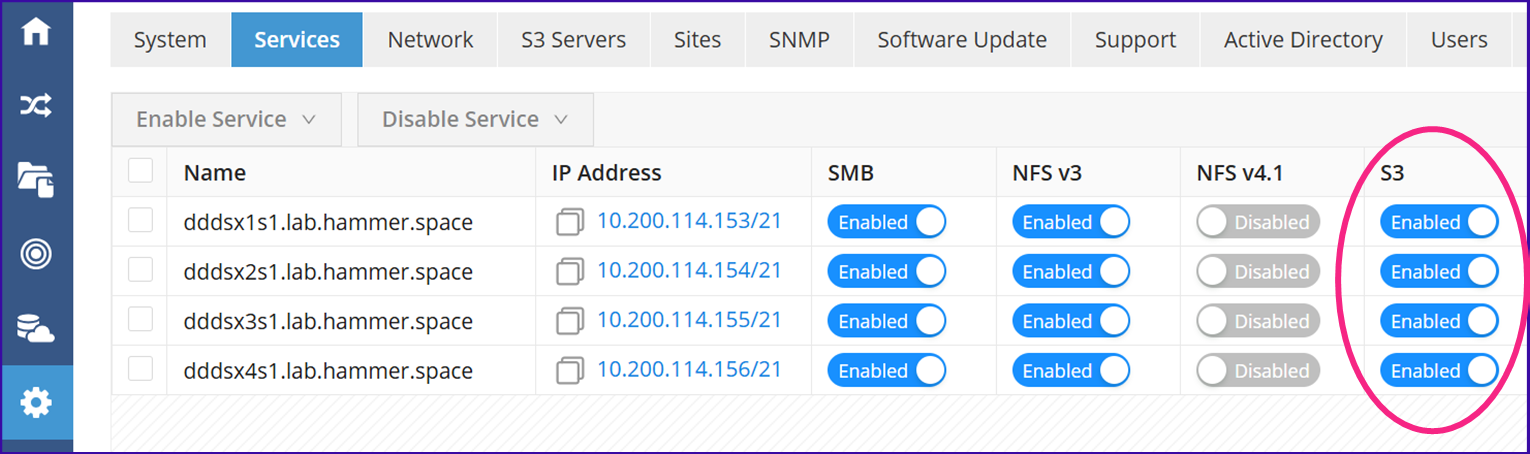 Figure 1. The S3 service enabled on all four DSX nodes
 -
Create Users: If using Active Directory, go to the Active Directory tab to configure Hammerspace to connect to AD. Full instructions are contained in the Hammerspace Administration Guide. The instructions below are for creating local users.
Still on the Administration page, switch to the Users tab and use the Create Users button to add at least one user for each tenant. Select the S3 Data Access Role.
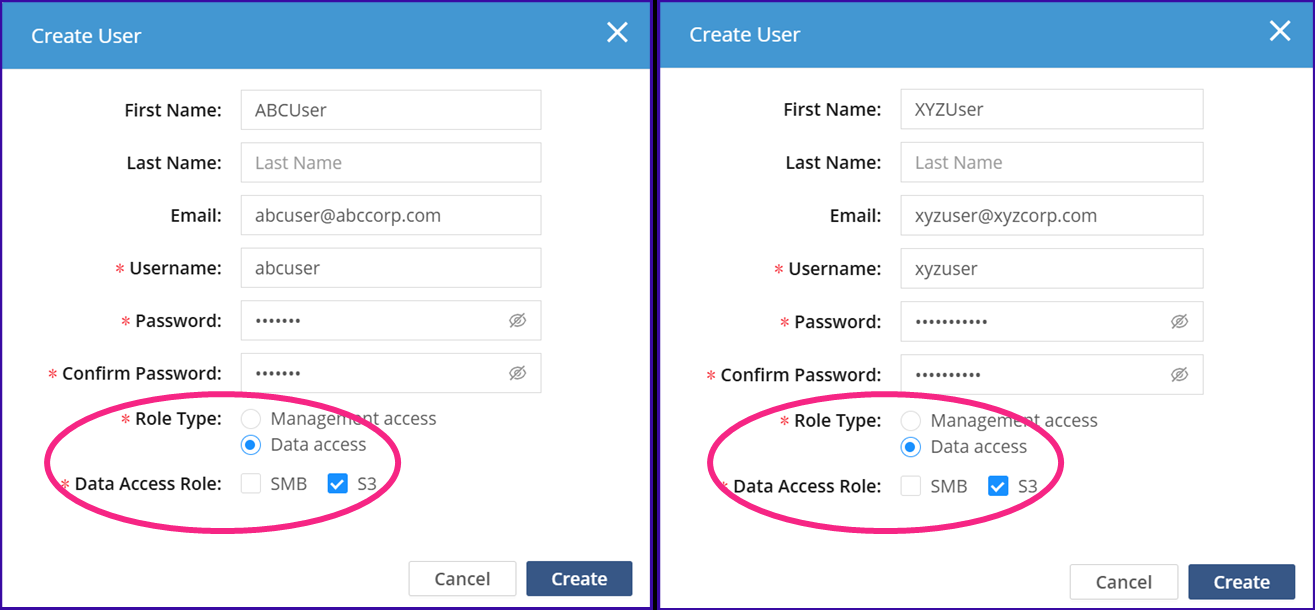 Figure 2. Creating a local user for each tenant with the S3 Data Access role
 -
Add Storage Volumes: The NFSv3 exports on our Linux Storage Servers (LSSs) need to be configured as Hammerspace Storage Volumes. Go to the Infrastructure page, Storage Systems tab and click Add Storage System.
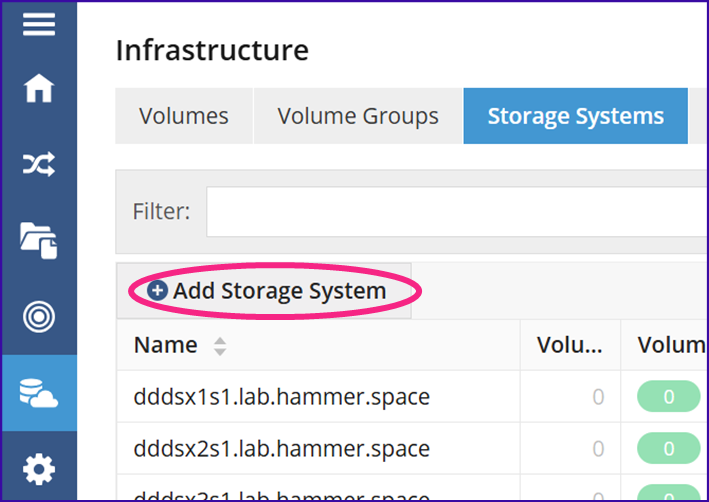 Figure 3. The Add Storage System button on the Storage Systems tab
Fill in the fields, choosing NAS Storage as the storage type, and Other NFS for the NAS type. When finished, click Add Storage System.
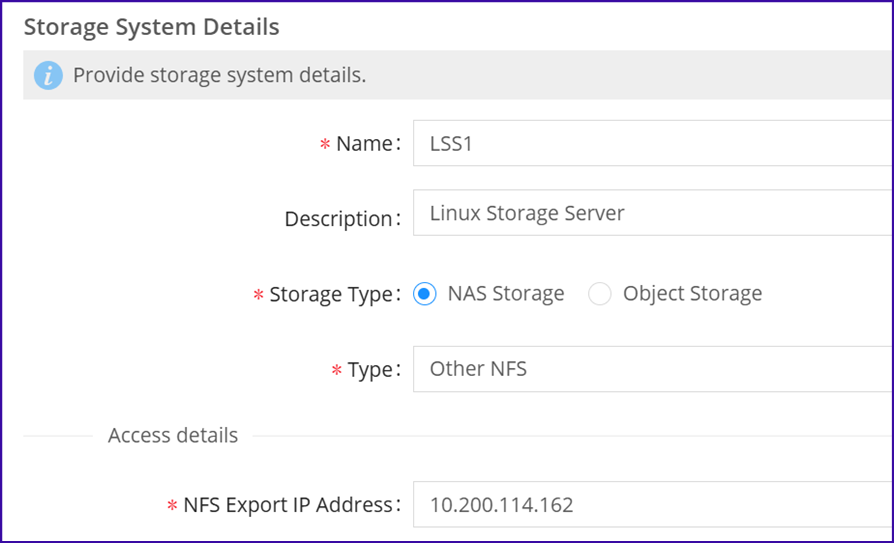 Figure 4. Adding a Linux Storage Server as a NAS storage system
At the completion dialog, click Add Volumes.
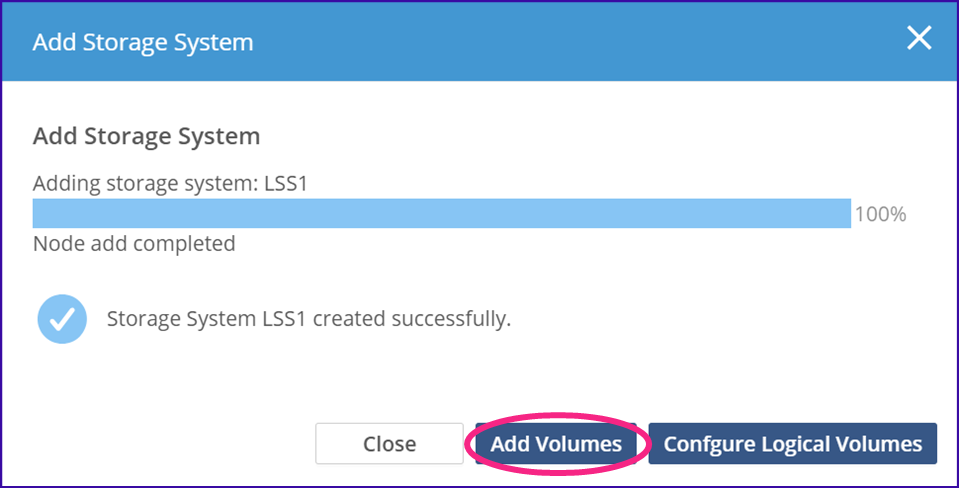 Figure 5. The completion dialog
The next screen shows a list of exported volumes on this storage system, only one in this example. Check the checkbox next to the volume name and click Next Step.
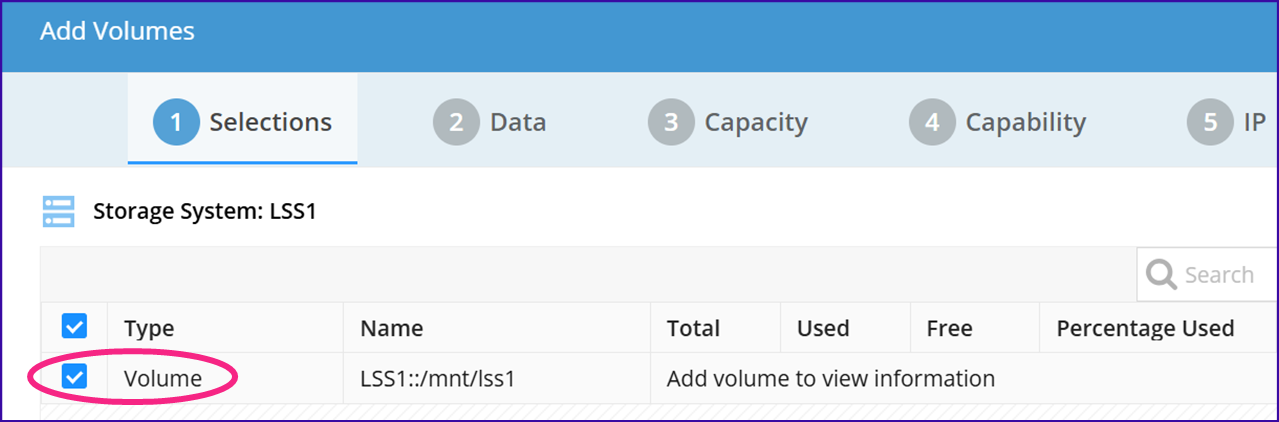 Figure 6. Selecting the exported volume
Since this share is empty and we don’t need to customize it, continue clicking Next Step until you get to the last step, Review & Add. Consult the Hammerspace Administration Guide if you are curious about the various options you see in the intermediate steps.
On step 6, Review & Add, click Add Volume to add the volume to Hammerspace. Click Add Storage System again and repeat the steps to add the remaining three LSSs and their storage volumes. You will then see all LSSs and their stats shown on the Storage Systems tab.
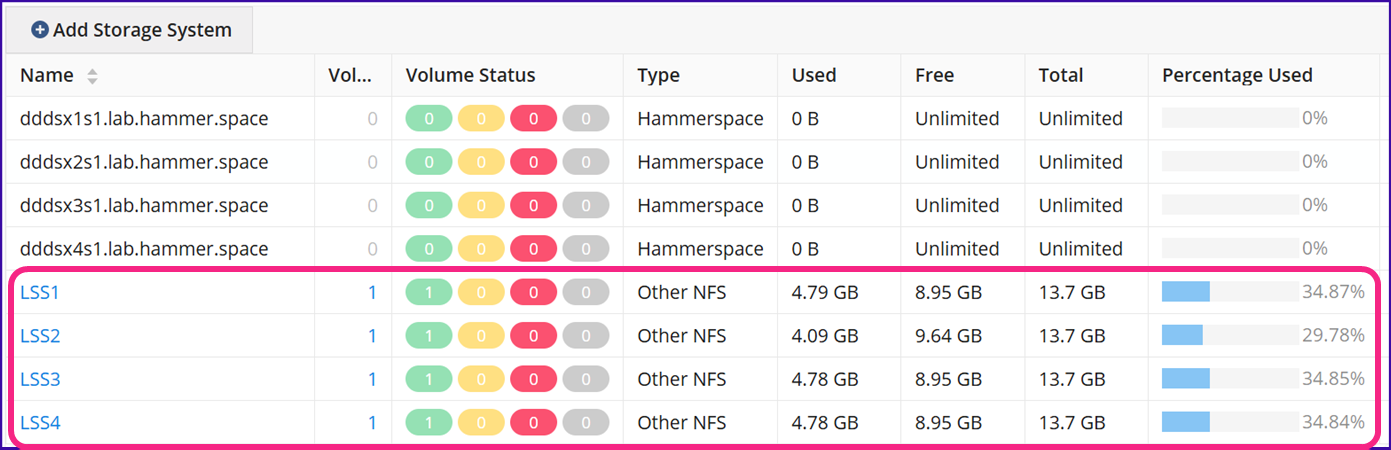 Figure 7. All four LSSs shown on the Storage Systems tab
 -
Create Volume Groups: Configuring a volume group for each tenant will simplify the configuration of Objectives and make it easier to add more LSSs and storage volumes for each tenant later.
On the Infrastructure page, Volume Groups tab, click Create Volume Group. Fill in the details in Step 1 as shown, then skip to Step 4.
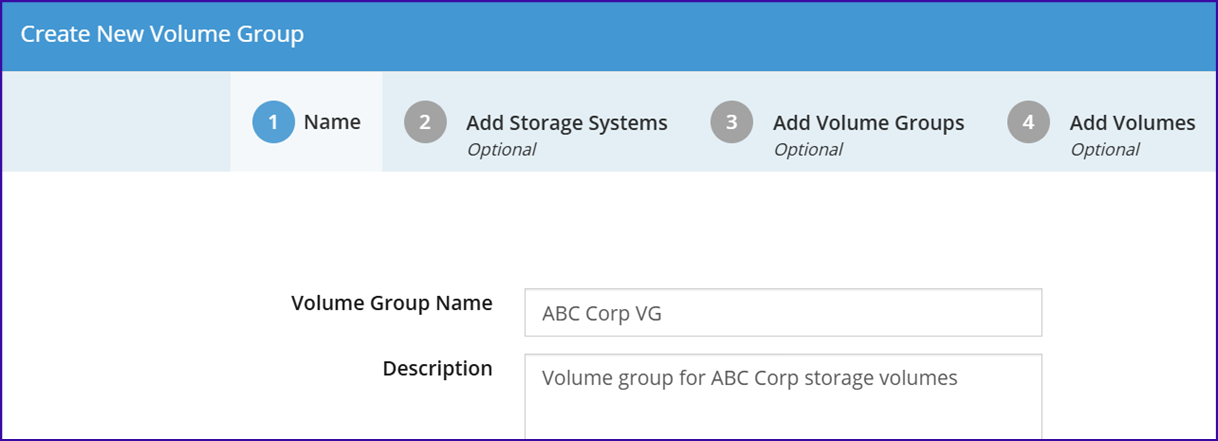 Figure 8. Volume group details in Step 1 of the wizard
In Step 4, select the first two storage volumes and click Next.
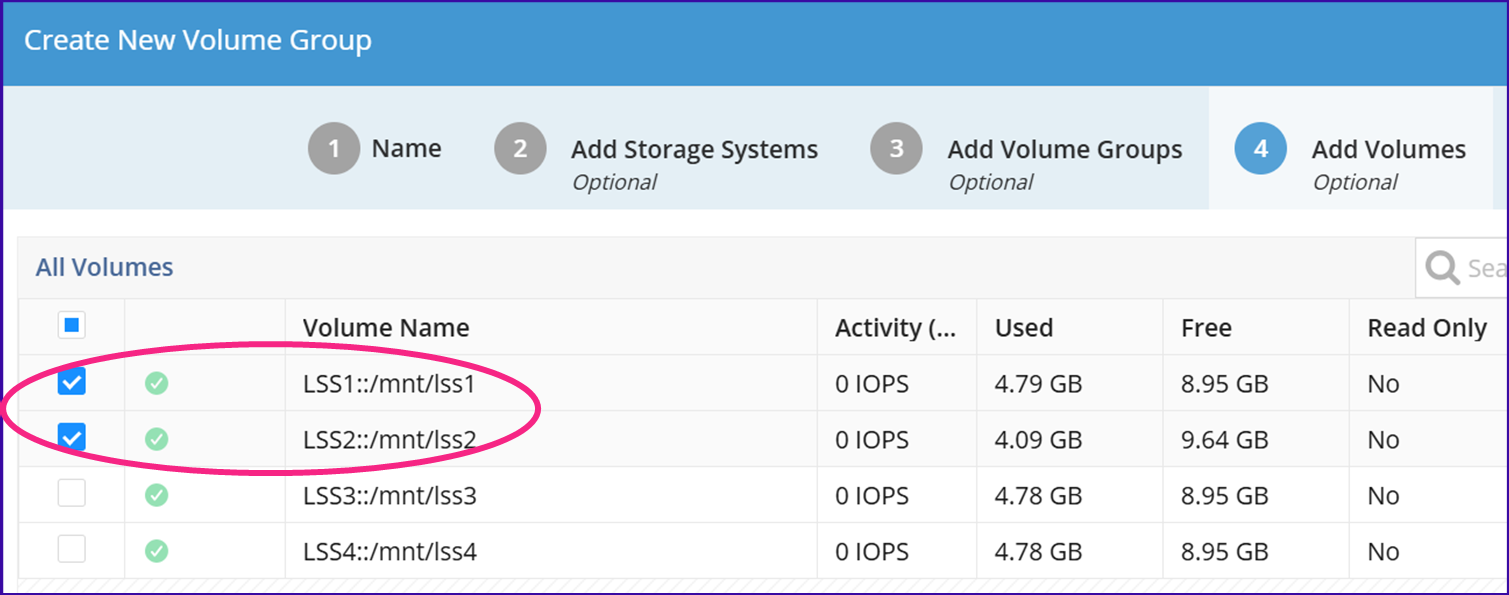 Figure 9. Selecting the first two storage volumes in Step 4
On Step 5, click the button to confirm and create the Volume Group. Repeat the steps and create a second volume group for XYZ Corp using the remaining two volumes.
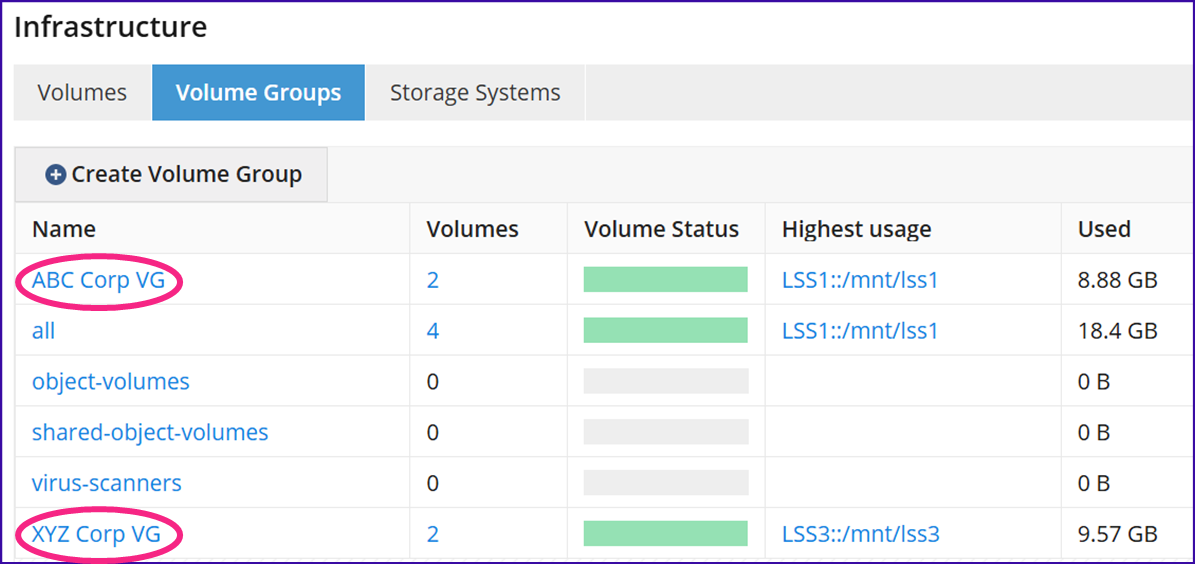 Figure 10. Confirming the volume group
When more storage volumes are added for a tenant, adding them to the appropriate Volume Group is all that needs to be done.
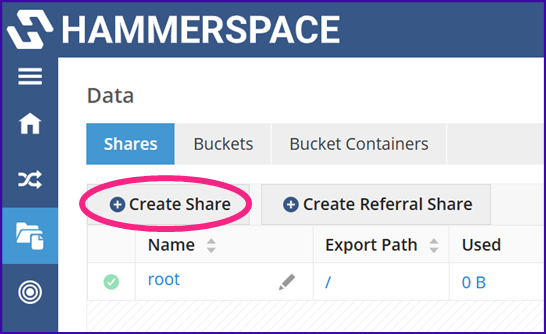 Figure 11. One volume group per tenant
 -
Create Shares: Hammerspace S3 servers require a target share, so before creating any S3 servers, shares must be configured. For this example, it makes sense to create one share per tenant. On the Data page, Shares tab, click Create Share to begin the process.
Give the share a name and description, and if desired set a limit on the maximum size of the share (a share quota).
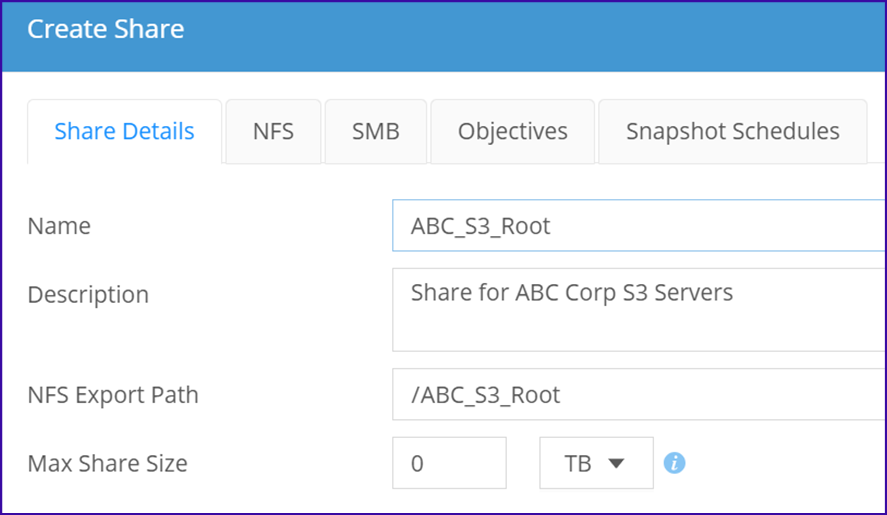 Figure 12. Naming the tenant share and setting an optional share quota
If desired, set up a snapshot schedule for data protection using the Snapshot Schedules tab. The settings on the other tabs may be left at their defaults. Objectives will be customized after the share is created. Click Create to create the share. After a few moments it will appear in the shares list. Follow the same process to create a share for the second tenant.
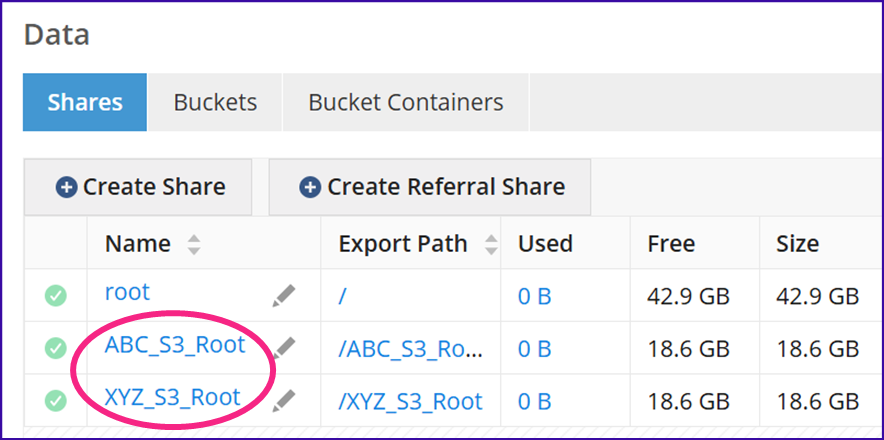 Figure 13. One share per tenant in the shares list
 -
Configure Share Objectives: Shares, like S3 servers, are logical entities. Objectives are used to control the storage volumes on which data written to the share will be stored. In this case, S3 servers are writing into the share, so the objectives determine which storage volumes will house incoming S3 objects from each S3 server.
To edit the objectives for the S3 shares created in the previous step, click the pencil icon in the Applied Objectives column.
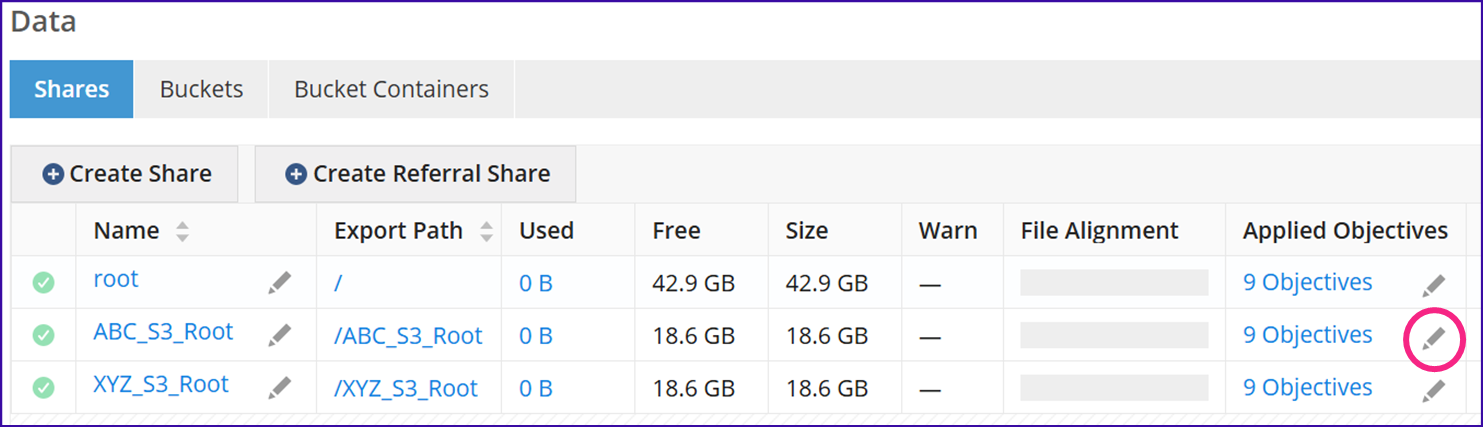 Figure 14. The pencil icon in the Applied Objectives column
On the Applicability: TRUE row of the table, click the pencil icon to edit those objectives.
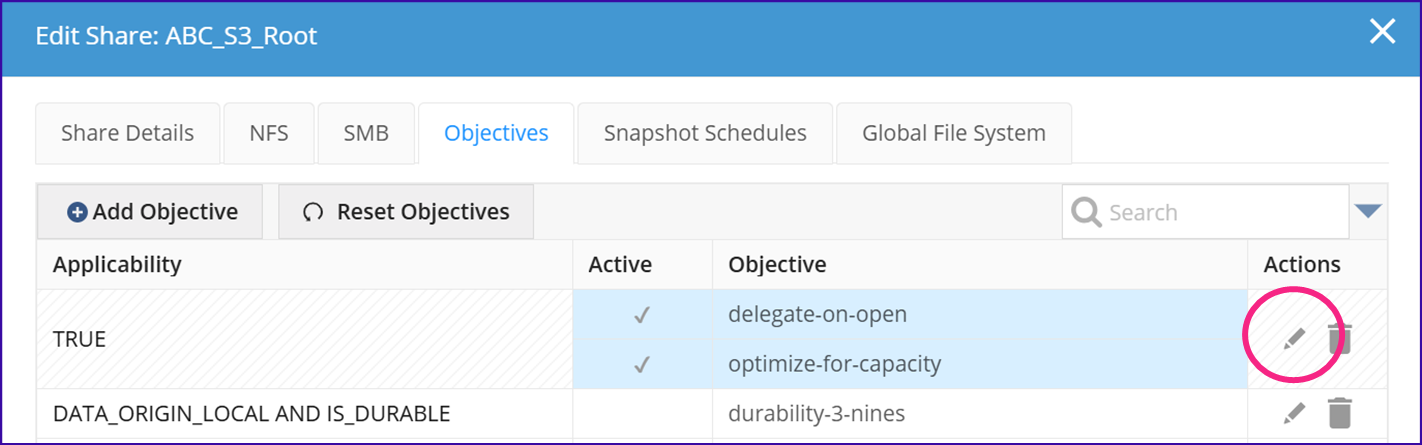 Figure 15. The pencil icon on the Applicability: TRUE row
Scroll down and in the Available Objectives section check the box next to the confine-to-ABC Corp VG objective. This directs Hammerspace to store all data that is written into the ABC_S3_Root share only on storage volumes that are members of the ABC Corp VG volume group. Also click the checkbox for the availability-3-nines objective and the durability-5-nines objective (not shown). This will ensure that Hammerspace maintains two instances of each file on different hosts for data protection.
This is a very basic example. Hammerspace Objectives may be configured to enable nearly any desired data protection scheme imaginable. Consult the How to Configure Hammerspace Objectives [Support article may require login to view.] for more information regarding objectives. 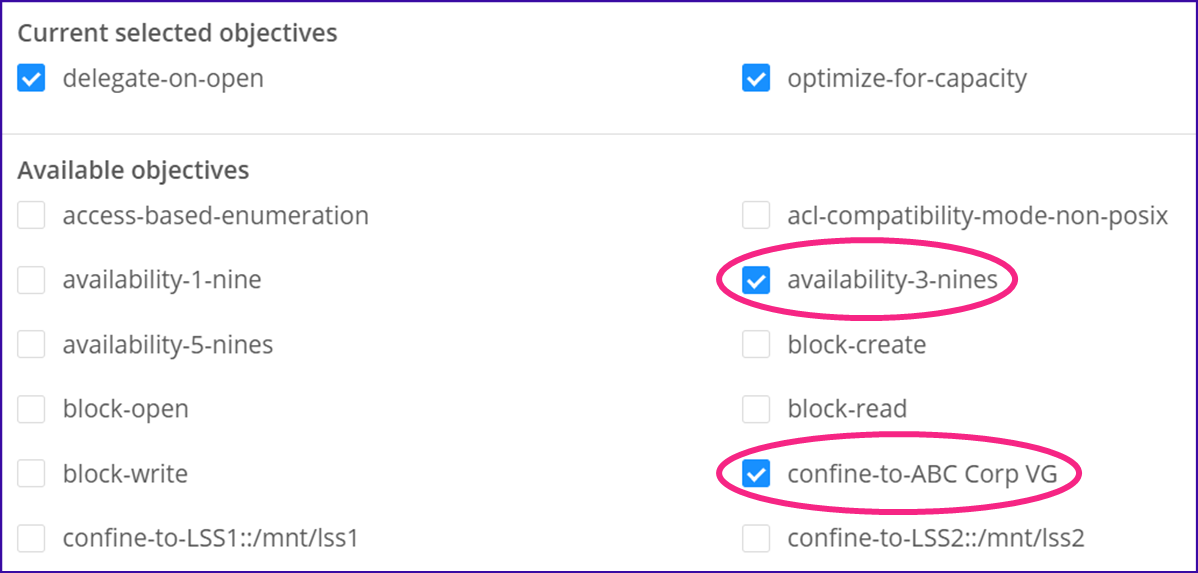 Figure 16. Selecting the confine-to objective for the tenant’s volume group
Click Apply to apply the changes. The Applicability: TRUE row in the table should now look like this:
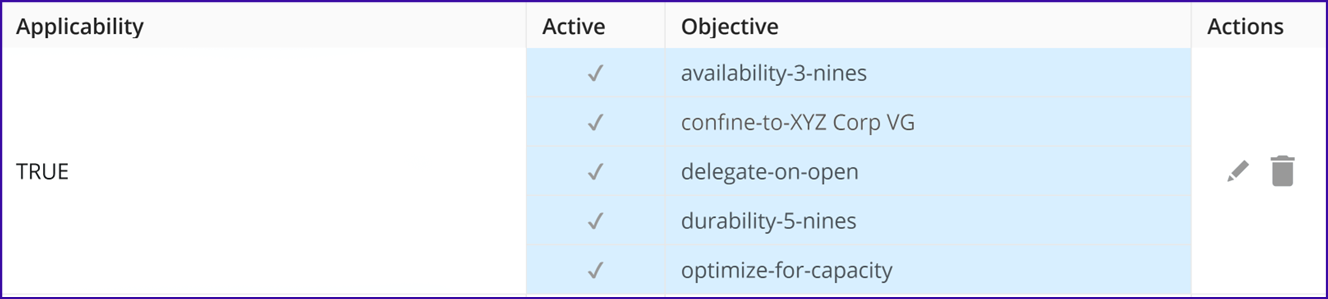 Figure 17. The Applicability: TRUE row after applying the objectives
Click Close to finalize the changes, and repeat the steps with the XYZ_S3_Root share, using the confine-to-XYZ Corp VG objective.
-
Configure S3 Servers: Now that the groundwork has been laid, the two S3 servers can be created. On the Administration page, S3 Servers tab, click Create S3 Server.
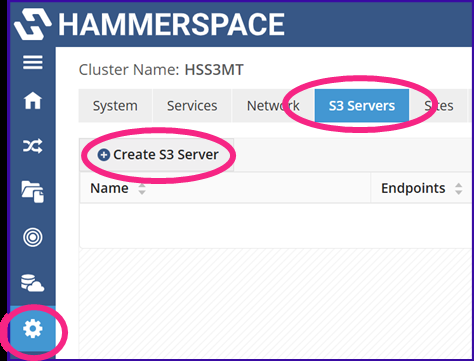 Figure 18. The Create S3 Server button on the S3 Servers tab
Give the S3 server an administrative name of ABC Corp S3. Un-check the Default Server checkbox, and ignore the warning. If a client attempts to connect to this server without specifying an endpoint, or using a non-existent endpoint, we want the attempt to be rejected. Specify an endpoint name of
s3.abccorp.com. This is how S3 clients will connect in our example. For the Identity Provider, select Local.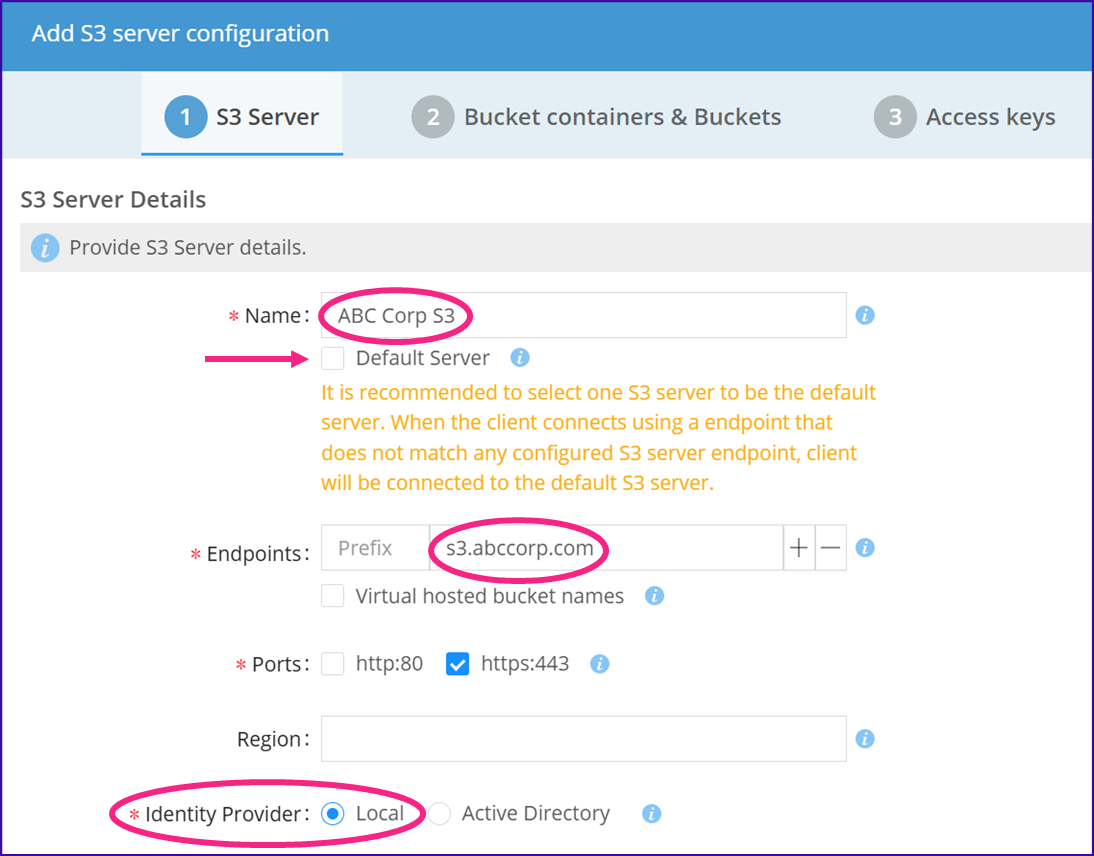 Figure 19. Creating the ABC Corp S3 server
Scroll down and set the remaining options as desired. The tooltips that appear when hovering over the blue information icons explain what they do. The most important is the Umask.
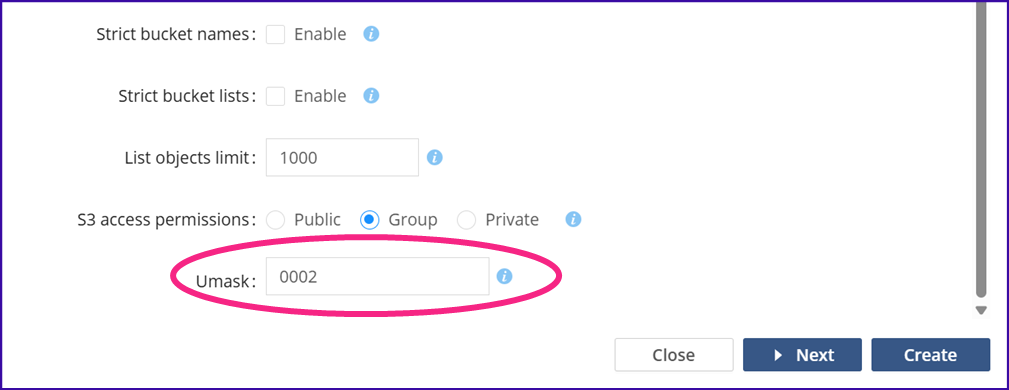 Figure 20. The remaining S3 server options
The Umask determines the access permissions for objects when Local users are used, not AD. The default setting (0002) is equivalent to "Group." For a complete explanation of how Umask works, see the Appendix. For this use case the default is appropriate.
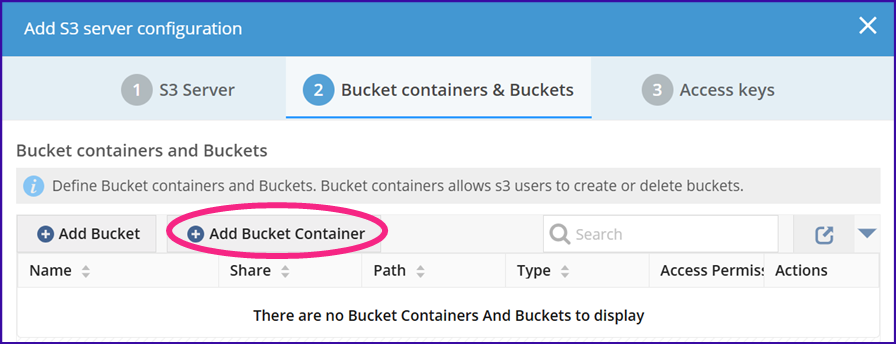 Figure 21. The Umask setting
Click Next to continue to the Bucket Container and Buckets step.
-
Create the Bucket Containers: In this example we need S3 clients to be able to create buckets using S3 API commands. This requires a bucket container to be configured, which is the location where created buckets will live. Click Add Bucket Container to begin.
On the next screen, fill in the Bucket container name ABC Corp Buckets, choose the share previously created (ABC_S3_Root), and specify the bucket container path as
/Buckets. The directory/ABC_S3_Root/Bucketswill be created and represent the bucket container in the filesystem. When a bucket is created using S3 API commands, a corresponding subdirectory will be created in/ABC_S3_Root/Buckets. For example, creation of a bucket named "Bucket1" will result in the directory/ABC_S3_Root/Buckets/Bucket1being created. Objects stored in Bucket1 will become files in the Bucket1 directory.Check the Default bucket container checkbox. The rest of the options can remain at their defaults. Note however that the S3 server-level default S3 access permissions could be overridden here, and the change would apply to all buckets created in this bucket container. The ability for clients to create and delete S3 buckets may also be enabled or disabled here.
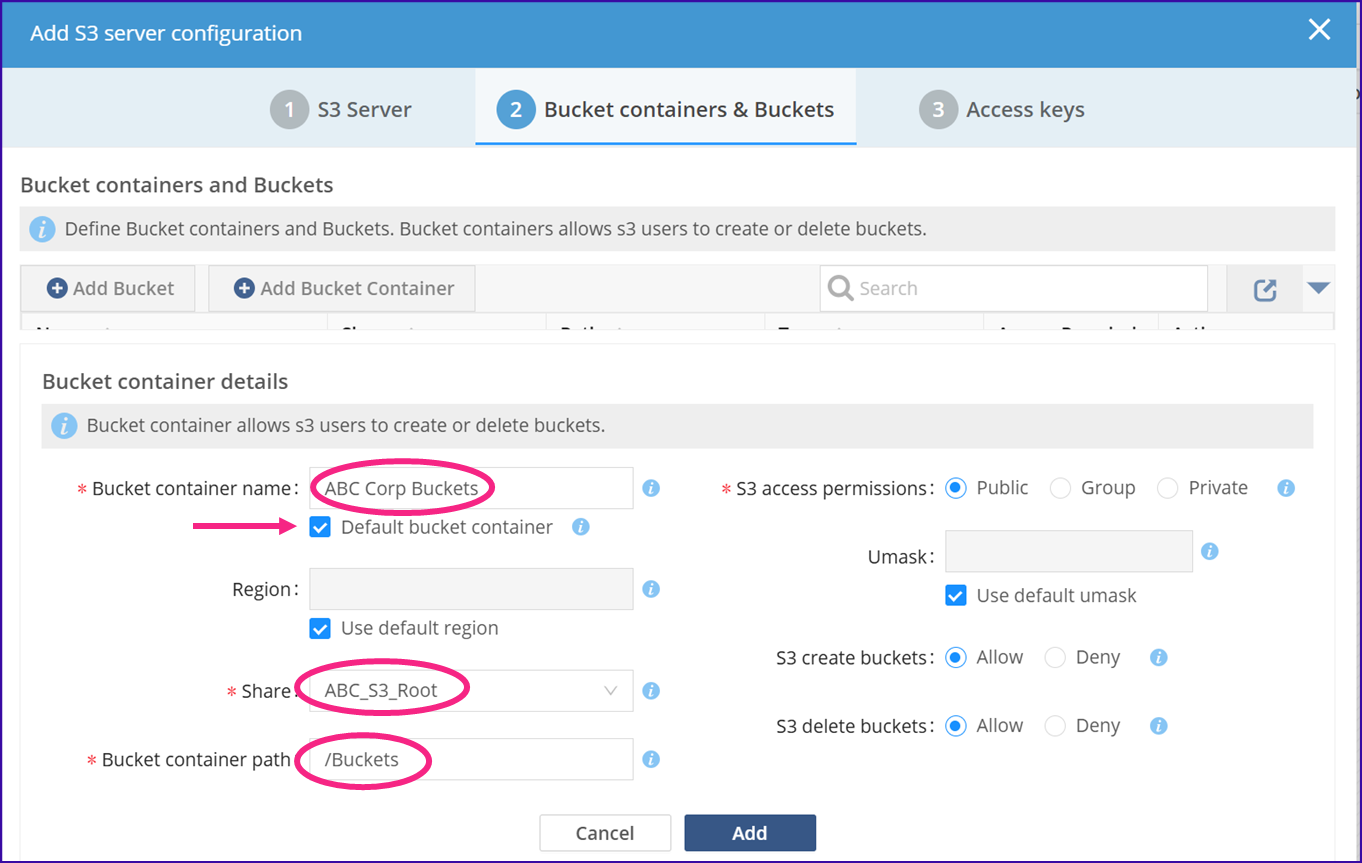 Figure 22. Adding the bucket container
Click Add to add the bucket container, which will be displayed in the table.
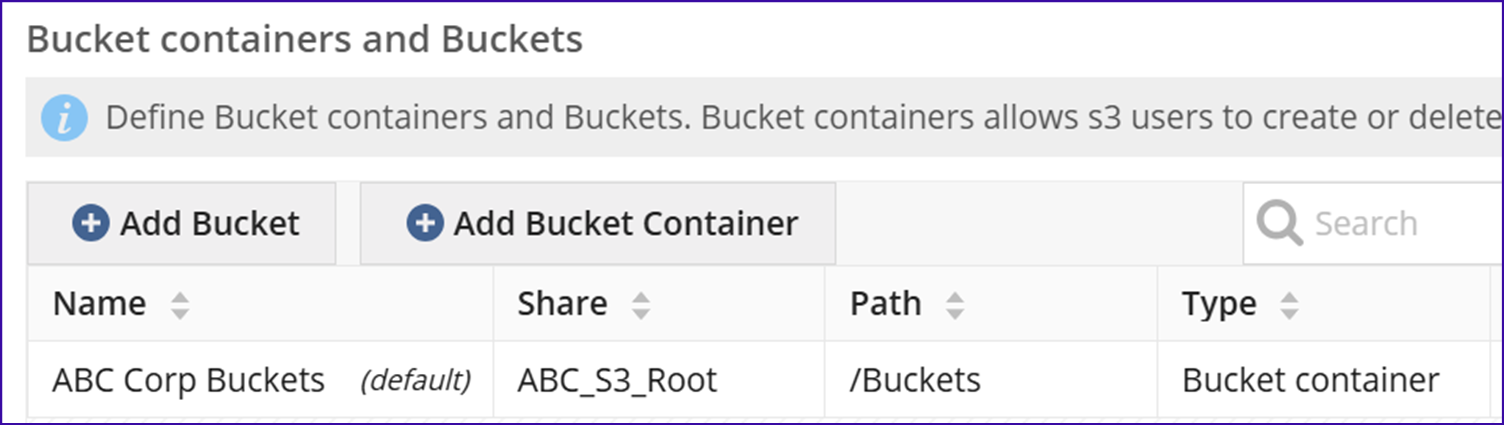 Figure 23. The bucket container displayed in the table
Click Next to continue to the next step, adding access keys.
-
Assign S3 Credentials: Users were created previously, in step 2. These users need access keys and secret keys to be able to authenticate to their S3 server. The assignment of these credentials happens in this step. Begin by clicking Add Access Key.
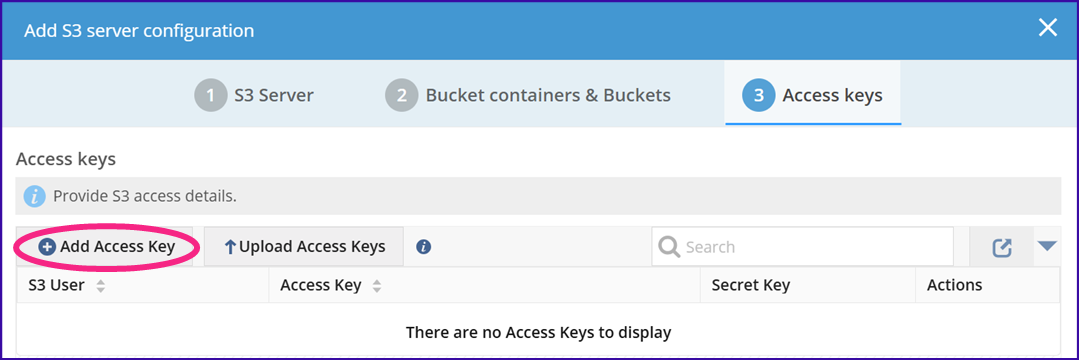 Figure 24. The Add Access Key button
On the next screen, choose the user 'abcuser' from the dropdown, and either leave the Access Key and Secret Key fields blank to have them automatically generated, or manually enter values.
Click Add to add the credentials, which will return you to the Access Keys step.
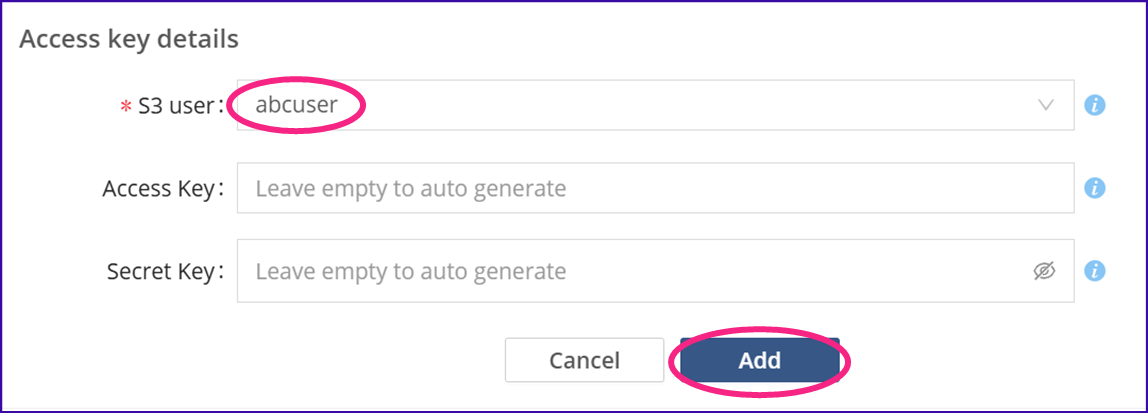 Figure 25. Adding an access key for the abcuser user
To finish creating the S3 server, including the bucket container and access keys, click Create. You can always edit the server later to add more buckets, bucket containers, or access keys, or to change the access permissions or other options.
Repeat steps 7, 8, and 9 to create another S3 server for tenant XYZ Corp.
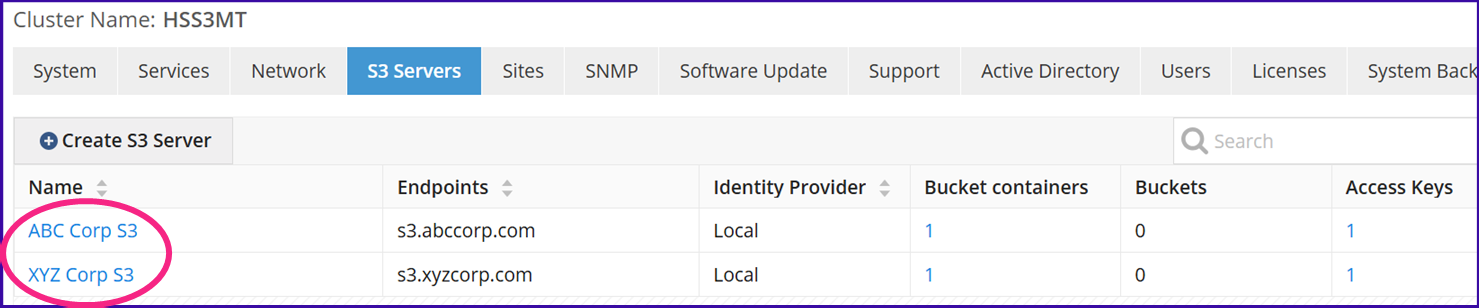 Figure 26. The two isolated tenant S3 servers
That completes the configuration for Example 2. The two tenants, ABC Corp and XYZ Corp, access separate S3 servers that each use isolated back-end storage. Basic data protection is provided by objectives that ensure two instances of every object exist in separate storage servers. Administration at the service provider is centralized, and the underlying storage infrastructure may be scaled or modified at any time with zero disruption to users.