Configuring Hammerspace in Microsoft Azure
The following examples describe common configuration tasks after deploying Hammerspace in Microsoft Azure, using both the Management GUI and the Admin CLI.
Changing the Admin User Password
Use the following procedure to reset the admin user password.
-
Navigate to Administration.
-
Select the Users tab.
-
Click Reset Password.
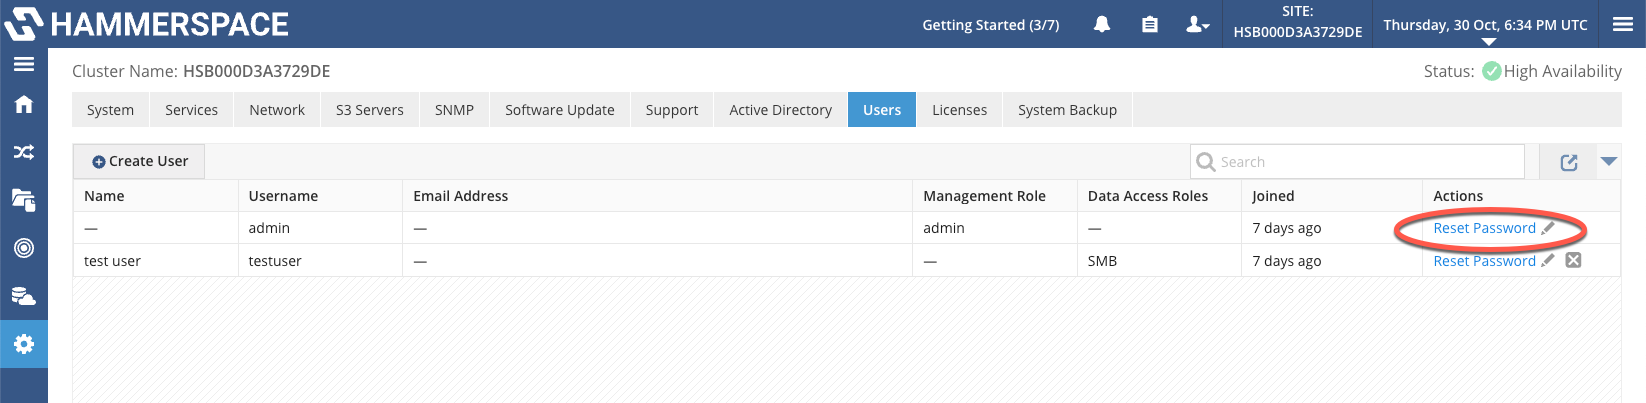 Figure 1. User management
Configuring DNS Server Settings Using the Admin CLI
View the DNS server settings:
dns-config --viewRemove the DNS server configuration:
dns-config --servers-clearAdd the DNS server configuration:
dns-config --servers 192.168.1.101,192.168.2.102Configuring NTP Server Settings Using the Admin CLI
View the NTP server settings:
ntp-config --viewRemove the NTP server configuration:
ntp-config --servers-clearAdd the NTP server configuration:
ntp-config --servers 0.north-america.pool.ntp.orgCreating a Share
Use the following procedure to create a share.
-
From the left navigation pane, select Data (the file-folder icon).
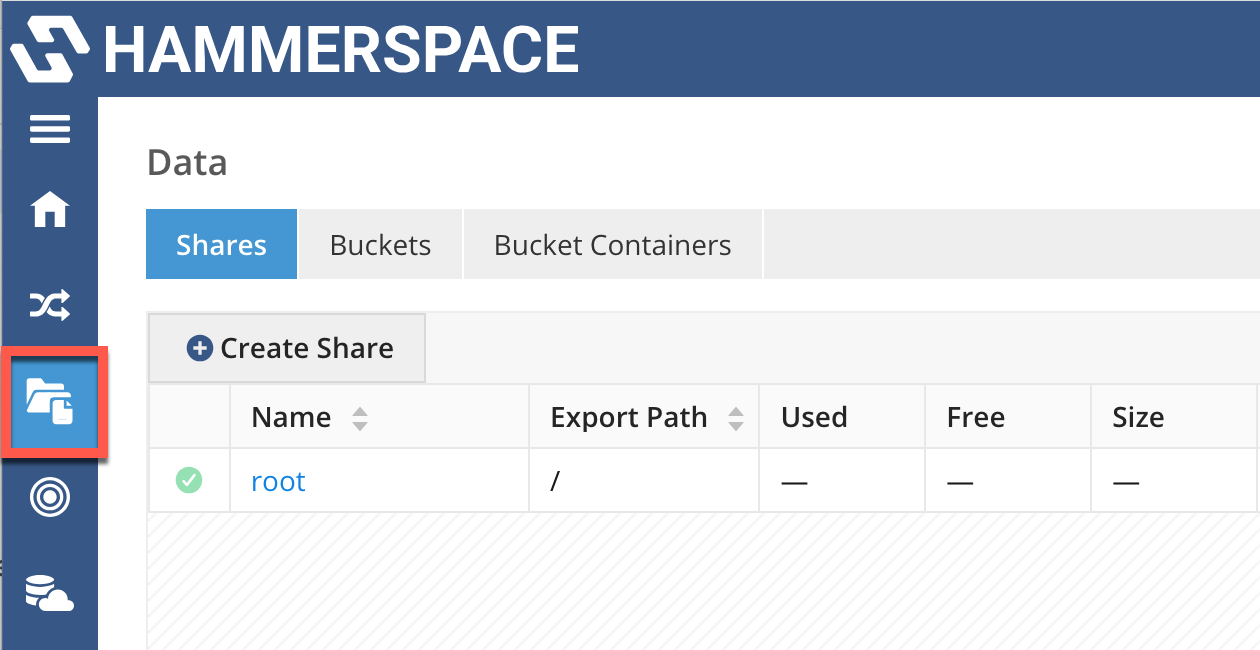 Figure 2. Location of the Data icon
 -
Enter share details in the Create Share wizard.
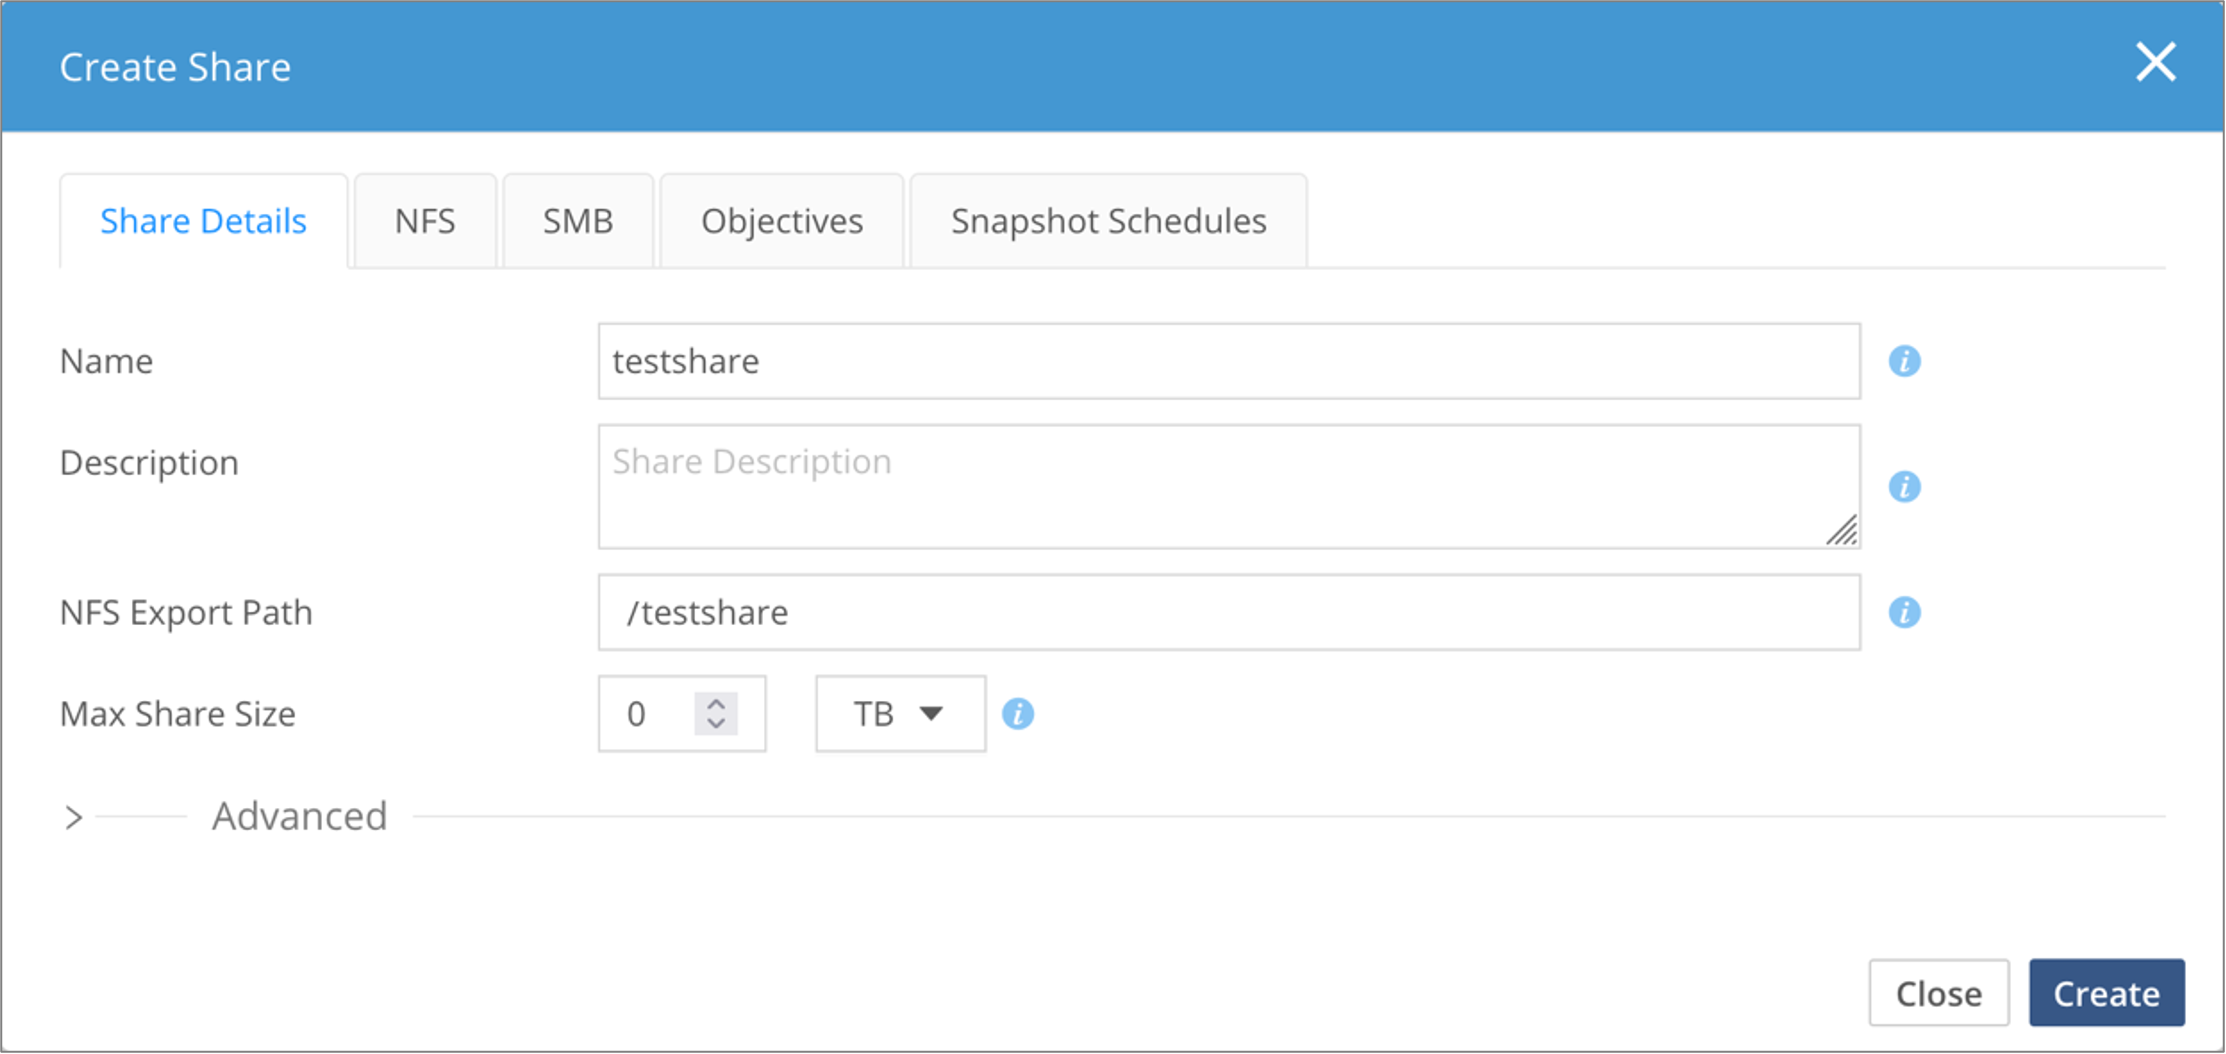 Figure 3. Create Share wizard
 -
In the Share Details tab, enter the information requested.
Table 1. Share details Item Value Name
Name the share.
Description
Optional description of the share.
NFS Export Path
The NFS export path for the root of this share. Must start with
/.Max Share Size
Implements a soft quota. A zero (0) denotes no quota.
Advanced (optional)
See the Hammerspace Licensing and Delivery Portal for the Administration Guide.
ABE
Lists files and directories based on the user’s permissions.
Access time update
Unchecking disables access-time updates.
Retain deleted files
Check to retain deleted files across the share.
Create versioned files
Check to implement event-based file retention.
File conflict resolution
See the Administration Guide for more information.
WORM
Implements Write Once Read Many on the share.
-
If your share is an NFS share, enter the information requested in the NFS tab.
Table 2. NFS details Item Value Client Specification
IP, CIDR subnet, hostname, subdomain, or
@netgroup.Permissions
Read-Only or Read-Write.
Root Squash
If checked, maps the NFS client
root(uid 0) to the anonymous uid.Secure Port
Unselecting this option disables the requirement that NFS client connections originate from a privileged source port (< 1024).
-
If your share is an SMB share, enter the information requested in the SMB tab.
Table 3. SMB details Item Value Alias
SMB share alias name.
Path
SMB alias path.
Browsable
Controls whether the share is browsable by clients.
-
Add objectives. Objectives provide powerful declarative control over your data throughout its lifecycle. Key aspects of data management — such as availability, durability, placement, movement, protection, workflow, and custom criteria — can be controlled with ease at a file-granular level. Refer to the Hammerspace Administration Guide, available in the Hammerspace Licensing and Delivery Portal, and the Hammerspace Objectives Guide, available in the Hammerspace Support Hub, to learn more about how to use objectives.
-
Add snapshot schedules. Snapshots can be scheduled directly upon share creation from this tab, by either creating a new schedule, adding a pre-defined schedule, or copying an existing snapshot schedule from another share.
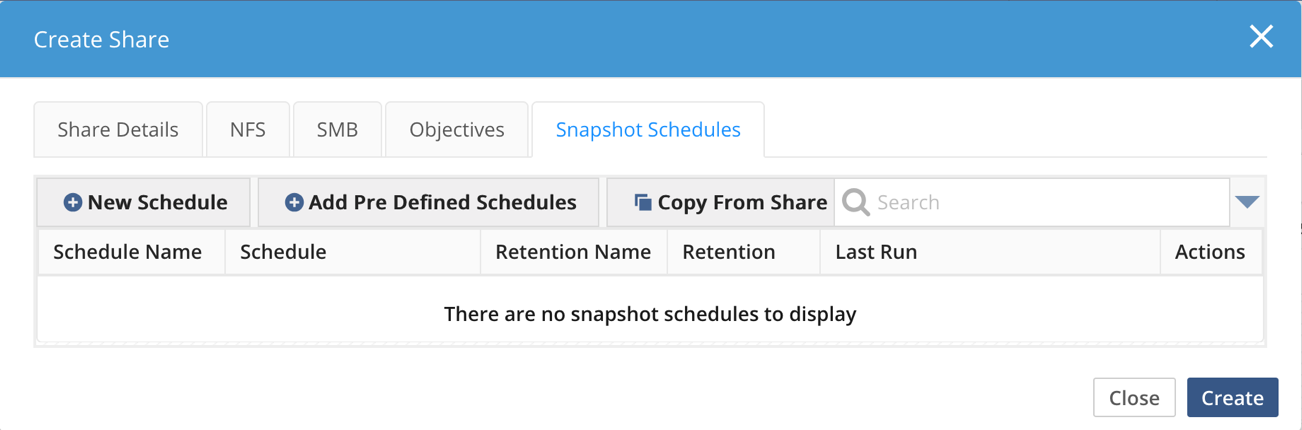 Figure 4. Adding a snapshot schedule for a share
Adding Azure Blob as a Storage System
-
Go to the Infrastructure > Storage Systems tab in the Hammerspace Management GUI.
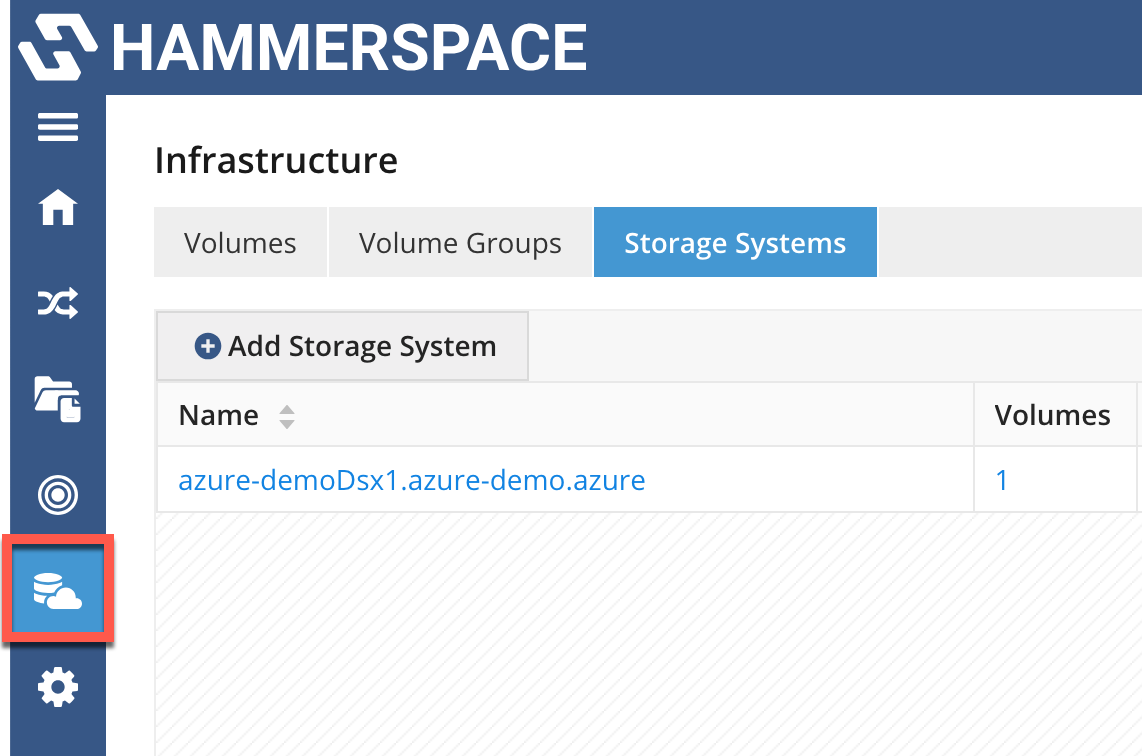 Figure 5. Storage Systems tab
 -
Select Storage Type and enter the requested information.
Table 4. Storage-type values Item Value Storage Type
Object Storage.
Type
Azure.
Storage Account Name
Enter the storage account name.
Secret Key
Enter the secret key.
Endpoint
Optionally, enter endpoint and port information.
Proxy Host
If a proxy is used.
Proxy Port
If a proxy is used.
Proxy Username
If a proxy is used.
Proxy Password
If a proxy is used.
Creating Volumes
-
Go to the Infrastructure > Storage Systems tab in the Hammerspace Management GUI. Click the + Volume button to open the Add Volumes wizard.
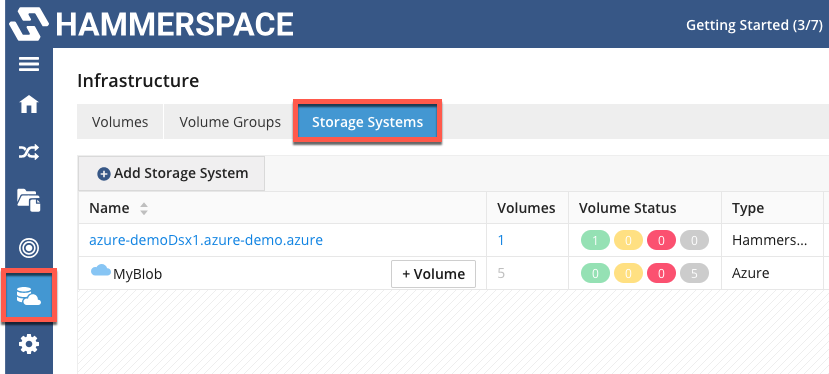 Figure 6. Location of the + Volume button
 -
Select the object storage containers you wish to add as Hammerspace volumes.
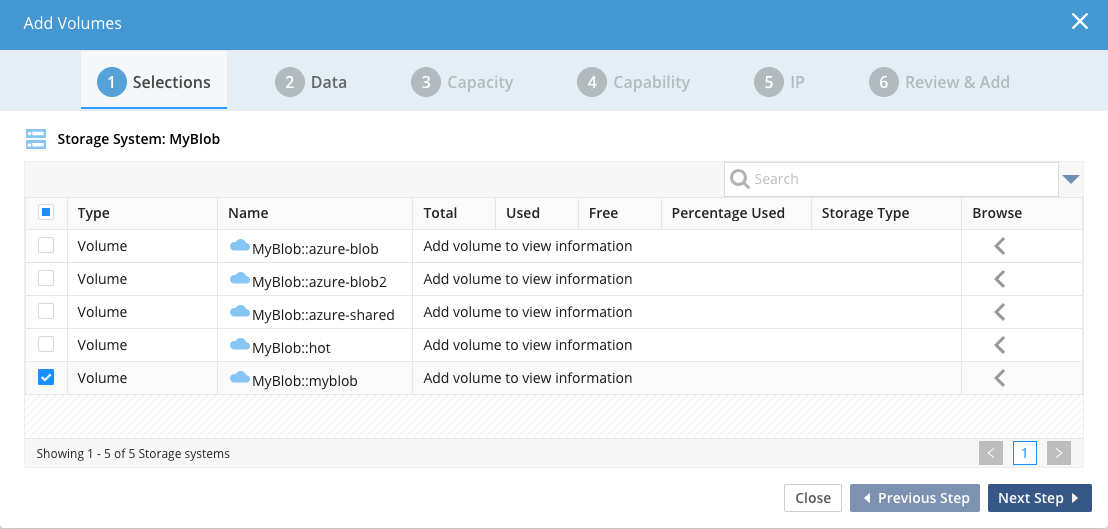 Figure 7. Selecting volumes
 -
Click through each tab of the wizard, using the volume-configuration settings below.
Table 5. Volume configuration settings Item Value Shared Volume
Uncheck (leave the checkbox empty).
Capacity
Default: Auto (choose a size to apply a quota).
Durability
Default: Auto.
Availability
Default: Auto.
Objectives
Check to automatically create associated objectives.
-
Review your selections and, if satisfied, click Add Volume to finalize.
-
Navigate to the Volumes tab to view the newly created volume.
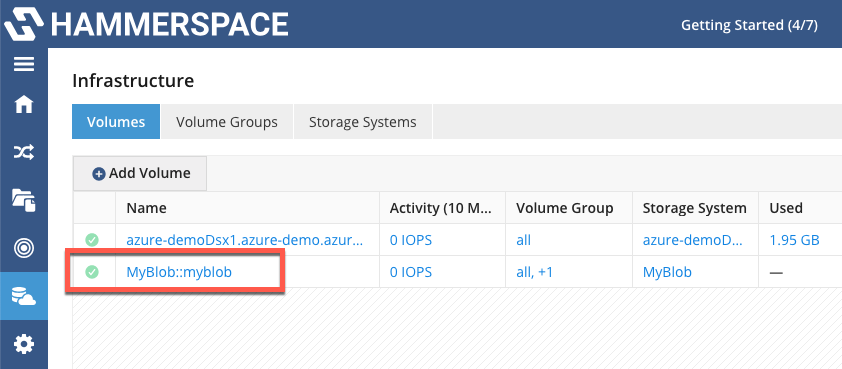 Figure 8. Newly added volume in the Volumes tab
Local User Configuration
Navigate to Administration by clicking the gear icon at the bottom of the left-side navigation pane. Select the Users tab, then click + Create User and enter the details described below.
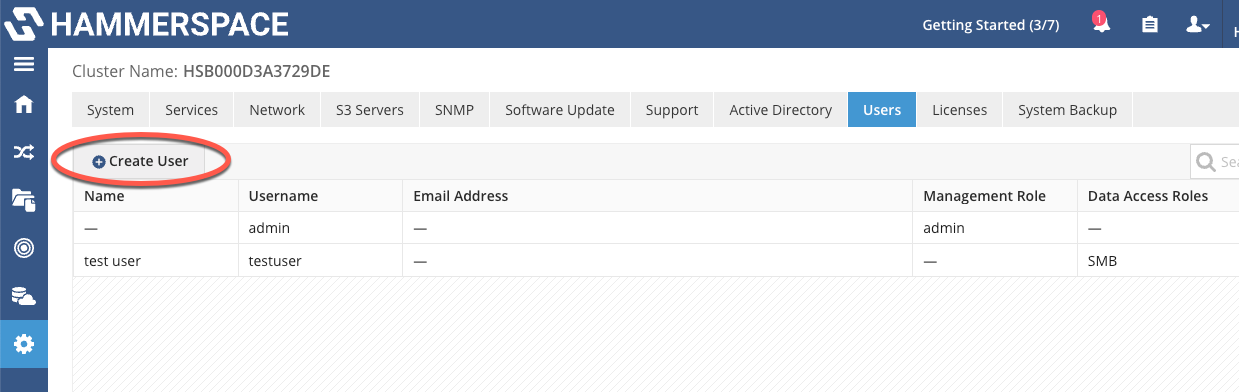
| Item | Value |
|---|---|
First Name |
Enter the first name (optional). |
Last Name |
Enter the last name (optional). |
Enter an email address (optional). |
|
Username |
Create a name for the user (or service). |
Password |
Enter a password. |
Confirm Password |
Confirm the password. |
Role Type |
Select the Data Access radio button. |
Data Access Role |
Select the SMB and/or S3 checkboxes. |
Active Directory Integration
-
Go to Administration (gear icon) > Active Directory tab.
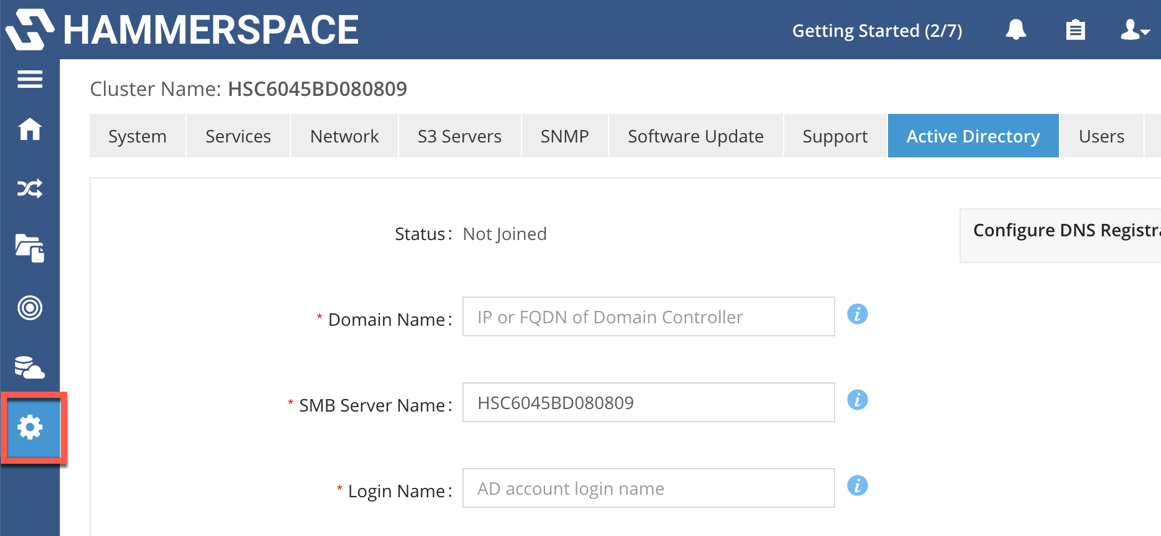 Figure 10. Location of the Active Directory tab in the Management GUI
 -
Enter the requested information using the table below as a guide.
Table 7. Active Directory details Item Value Domain Name
Enter the IP address or FQDN of the domain controller.
SMB Server Name
Enter the name desired for AD account registration.
Login Name
Enter the AD account name.
Password
Enter the AD account password.
Organizational Unit
Optionally add the OU to which this machine should be added.
AD Servers
Select Auto or Manual discovery of AD servers.
SMB–NFS User Mapping
Select the desired user-mapping option.
-
Optionally, add and configure Windows DNS registration.
Upgrading the System
-
Navigate to Infrastructure (gear icon), then select the Software Update tab.
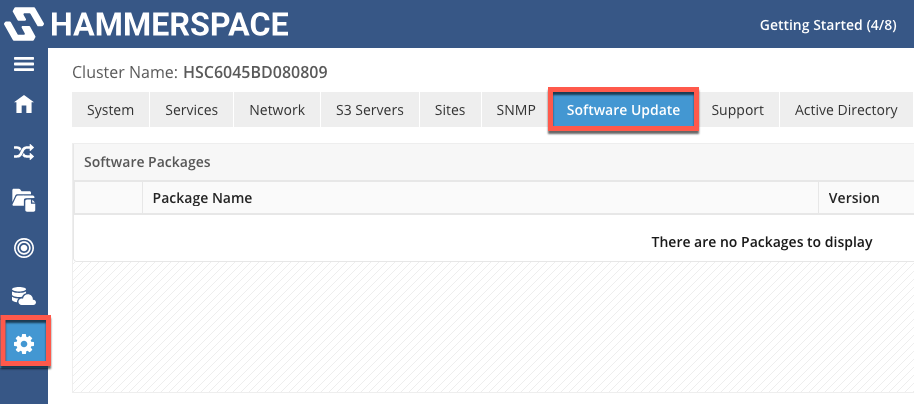 Figure 11. Software Update tab
 -
Click the Upload Software Package button.
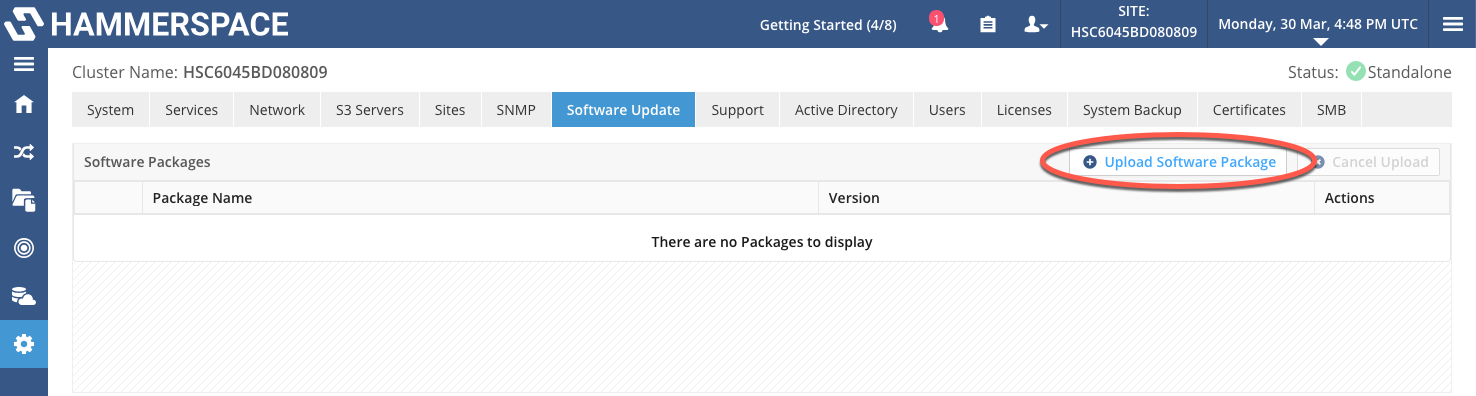 Figure 12. Upload Software Package
 -
Use the radio button to select how to upload the software upgrade package to the system.
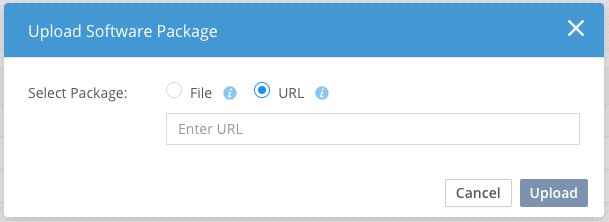 Figure 13. Select Software Package
Software upload packages can be obtained from Hammerspace. They can be identified by the .updfile-type extension. -
Once the software package has uploaded, select its radio button and click the Update All button.
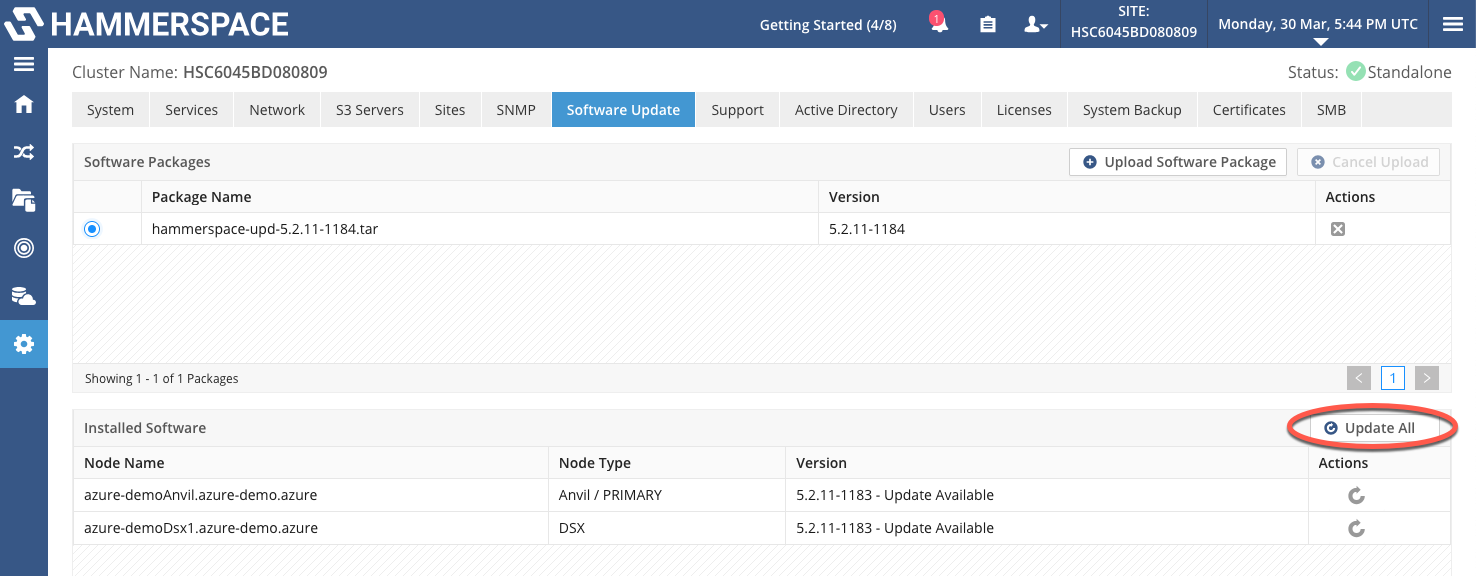 Figure 14. Update Nodes