Deploying Hammerspace in Azure
This section describes how to deploy the Hammerspace Data Platform from the Azure Marketplace, complete the post-deployment tasks, and validate the deployment using the Management GUI and the Admin CLI.
Deployment Steps
-
Open a web browser (Chrome recommended) and navigate to https://portal.azure.com to log in with your Azure account.
-
Navigate to the Marketplace.
-
Search for Hammerspace.
-
Select either the BYOL or PAYGO product listing.
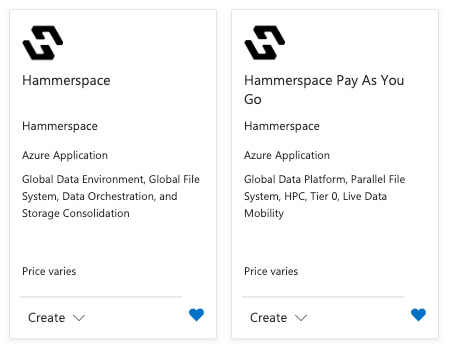 Figure 1. BYOL and PAYGO product listings in the Azure Marketplace
 -
Select the subscription to use for the deployment.
-
Select Hammerspace 5.2.
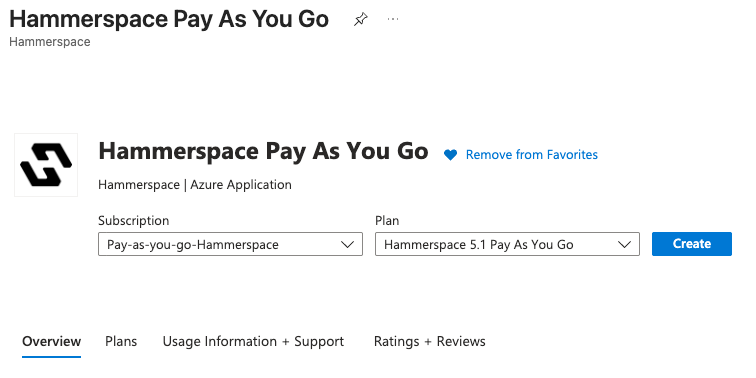 Figure 2. Selecting the Hammerspace 5.2 offer
 -
Click Create to begin the five-step deployment.
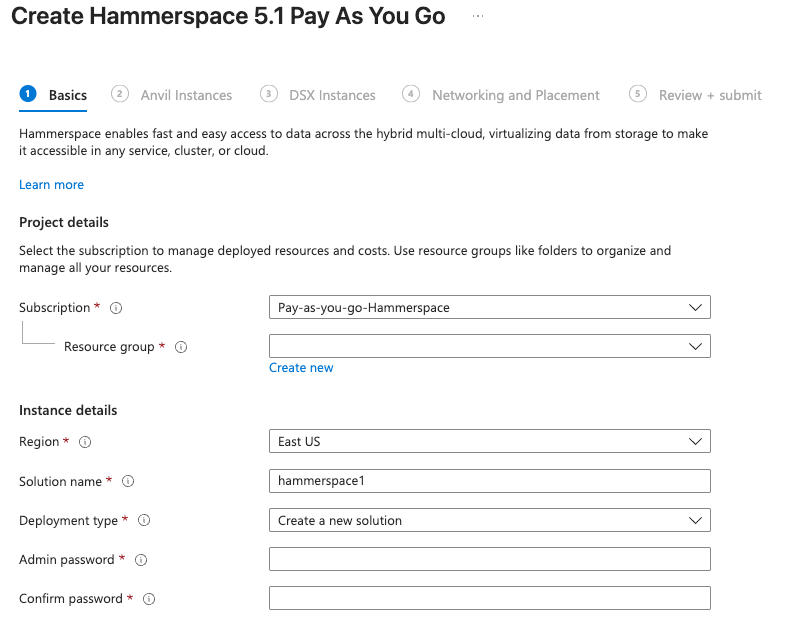 Figure 3. Starting the deployment
Table 1. Settings for the Basics tab Setting Value Project details
Subscription
Select the desired subscription.
Resource group
Click Create new and provide a name in the pop-up menu.
Instance details
Region
Select a region from the dropdown menu.
Solution name
Give the deployment a name.
Deployment type
Select Create a new solution (unless you are adding DSX nodes).
Admin password
Create a password.
Confirm password
Confirm the password.
-
Click Next at the bottom of the page.
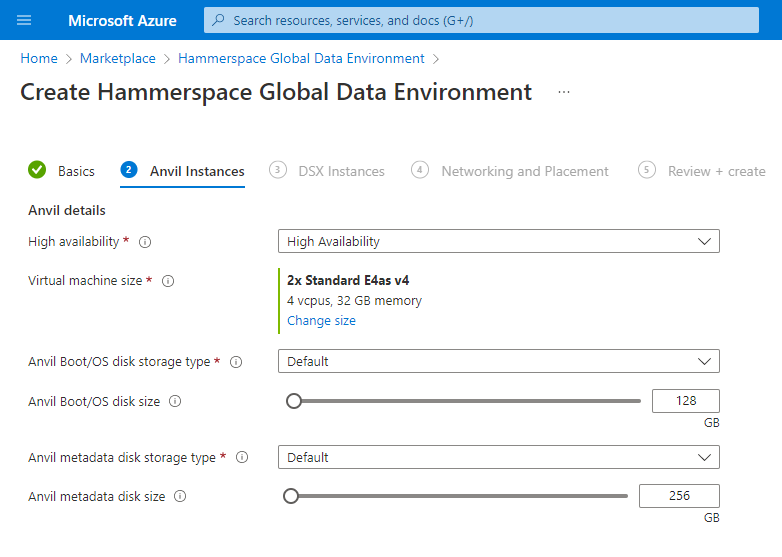 Figure 4. Settings for the Anvil Instances tab
Table 2. Settings for the Anvil Instances tab Setting Value High availability
Select High Availability or Standalone from the dropdown menu.
Virtual machines
Accept the default selection or click Change size.
Boot/OS disk type
Select the disk type for the system binaries and libraries.
Boot/OS disk size
200 GB recommended minimum.
Metadata disk storage type
Select the disk type to suit performance and cost requirements.
Metadata disk size
200 GB recommended minimum.
-
Click Next at the bottom of the page to proceed to the DSX Instances tab.
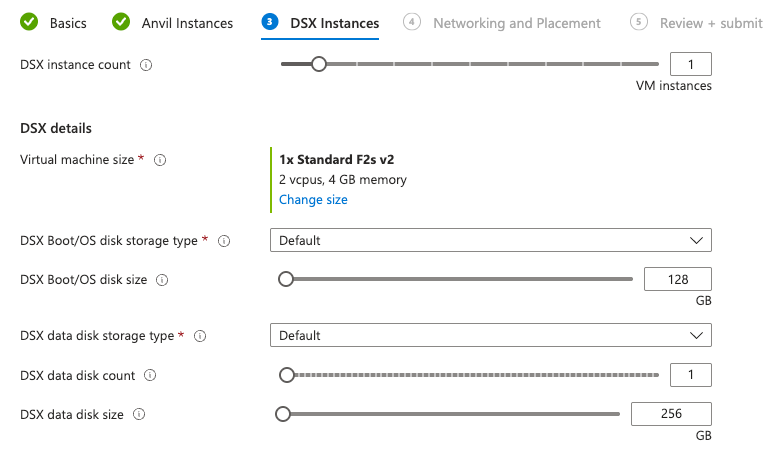 Figure 5. Settings for the DSX Instances tab
Table 3. Settings for the DSX Instances tab Setting Value DSX instance count
Select the number of DSX VM instances to deploy.
DSX details
Virtual machine size
Accept the default selection or click Change size.
Boot/OS disk type
Select the disk type for the system binaries and libraries.
Boot/OS disk size
100 GB recommended minimum.
Data disk storage type
Select the disk type to suit performance and cost requirements.
DSX disk size
500 GB recommended minimum.
-
Click Next to proceed to the Networking and Placement tab.
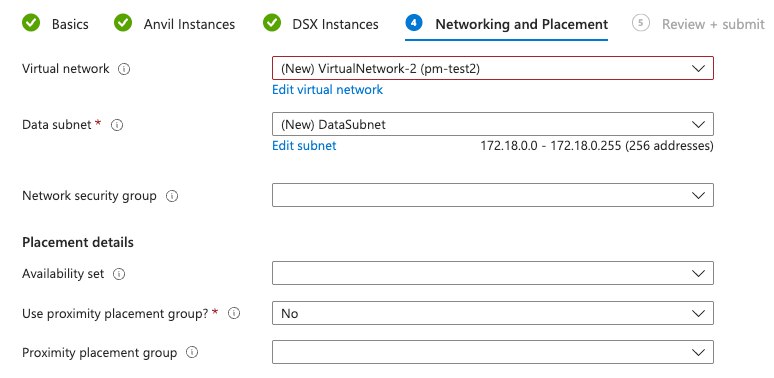 Figure 6. Settings for the Networking and Placement tab
Table 4. Settings for the Networking and Placement tab Setting Value Virtual network
Select from the dropdown menu.
Data subnet
Select from the dropdown menu.
Network security group
Select from the dropdown menu or leave blank.
Placement details (optional)
Availability set
Select an existing availability set or leave blank to create a new one.
Use proximity placement group
Optional.
Proximity placement group
Optional.
-
Click Next to review the configuration.
-
Click Create (or use the Previous button to make edits).
Post-deployment Tasks
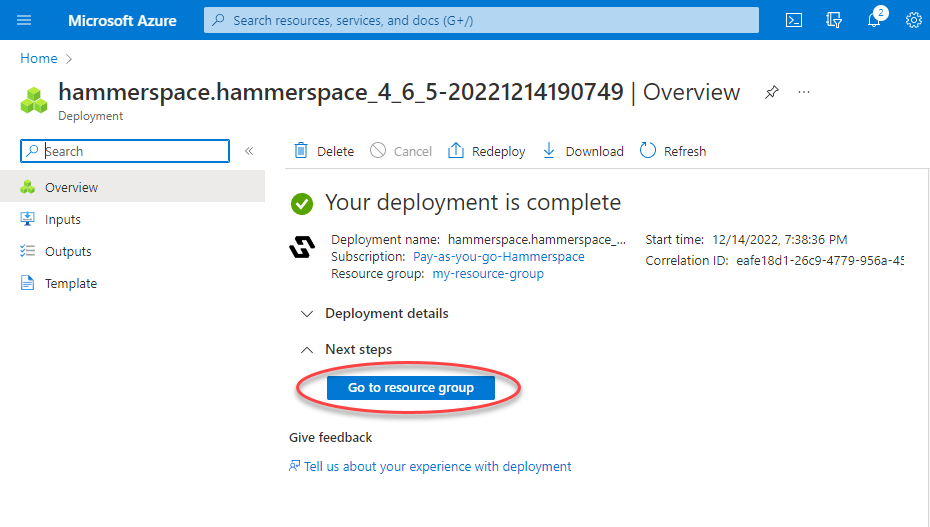
Once the deployment completes, you should see the following screen.
-
Click Go to resource group to proceed.
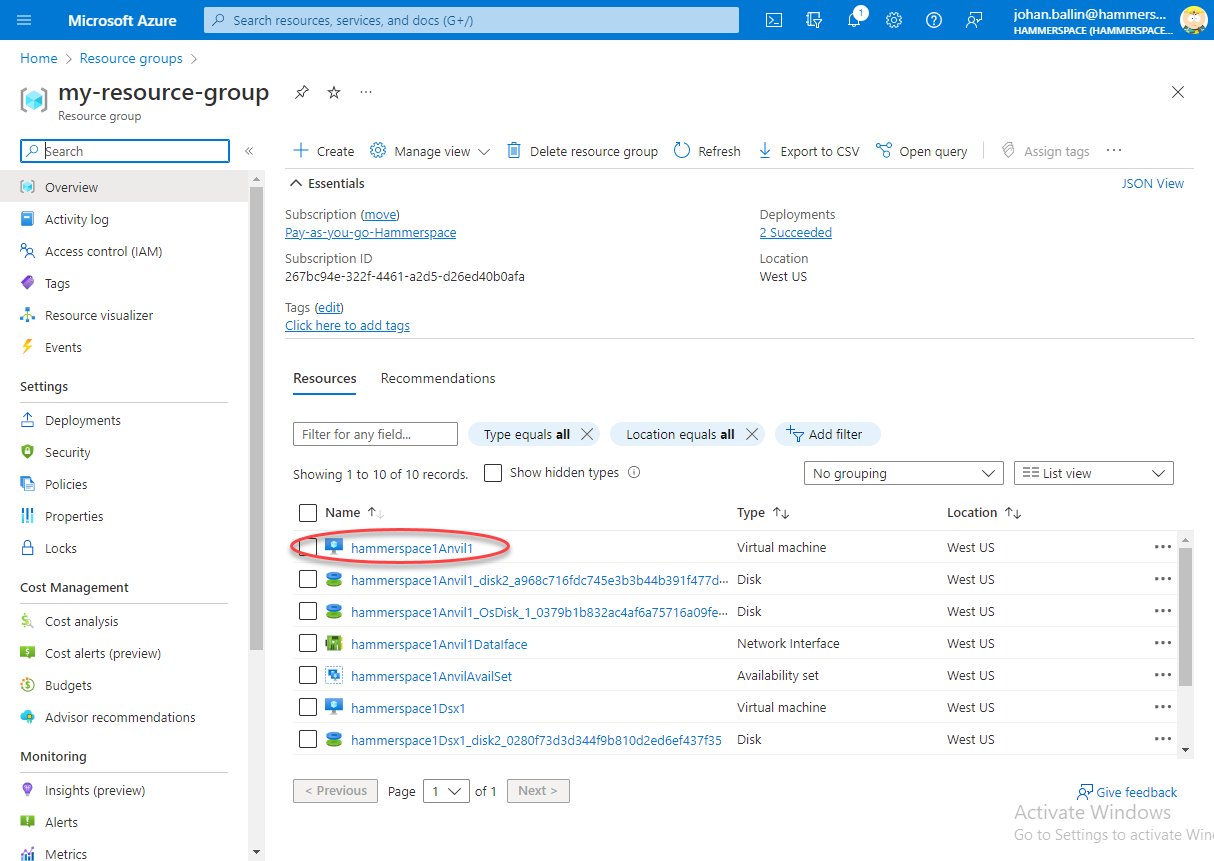 Figure 8. Resource group
 -
Click the Anvil hyperlink in your resource group to obtain the IP address of the Management GUI and CLI.
Hammerspace Management GUI
Point your web browser (Chrome recommended) to the IP address obtained from the Anvil virtual machine in your resource group. The IP address alone is usually sufficient, as Hammerspace redirects to HTTPS on TCP port 8443 — for example, https://10.41.1.6:8443.
Enter the username and password in the form fields:
-
Username:
admin -
Password: the password you created in the Basics tab during deployment.
When you initially log in, a pop-up window prompts you to accept the Hammerspace End User License Agreement (EULA). This occurs only once.
Validating the Deployment with the Management GUI
From the gear icon in the left navigation pane, select the Network tab. All Anvil and DSX nodes provisioned through the deployment template should be visible here.
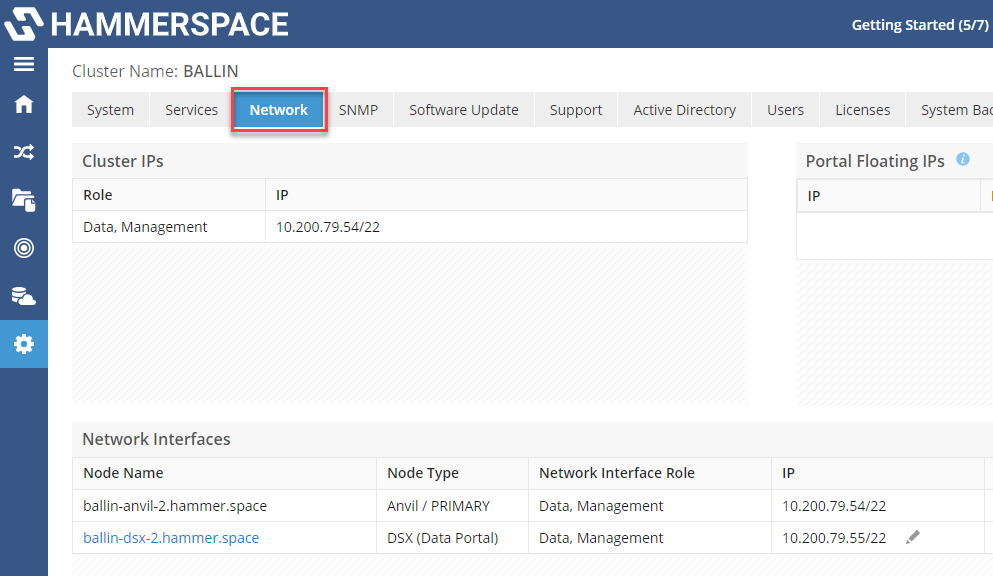
| Take note of the DSX IP addresses and/or hostnames. The DSX nodes should contain the key term Data Portal. This is the mount point for all front-end protocols, such as SMB (v1, 2, and 3), NFS (v3.0 and 4.2), and the Kubernetes Container Storage Interface (CSI driver). |

The Services tab validates that the Data Portal, Data Mover, and Store, as well as the SMB and NFS protocols, are up and running and ready to use.
Hammerspace Admin CLI
The Admin CLI provides command-line control of system configuration and provides parity with the Management GUI. It is a restricted shell, also known as a CLISH. To access the Admin CLI, open a terminal session (or use an SSH client) to connect over SSH.
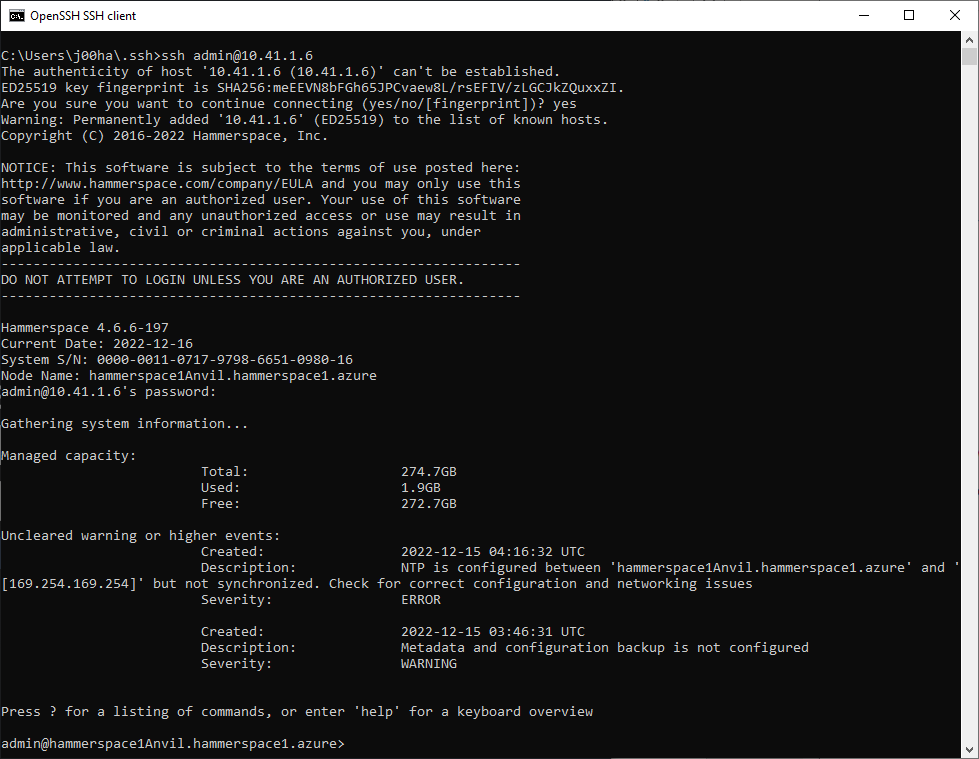
If using a terminal client, the command is:
$ ssh admin@<anvil-hostname-or-ip-address>The terminal window also notifies you if the NTP configuration is erroneous or missing. Correct it by using the Hammerspace Admin CLI to enter the following commands:
ntp-config --servers-clear
ntp-config --servers <ntp-server>| You can replace the value with an NTP server or server pool of your choice. The examples use the NTP Pool Project. Choose the option that best suits your organization. |