Installing Data Services (DSX)
DSX is installed from an ISO image that contains the operating system and DSX software.
-
Confirm that the VM or bare-metal server meets the minimum system requirements.
-
Load the ISO image and power on the VM or bare-metal server.
As with the Anvil nodes, confirm that the CD/DVD device sits above the hard drive in the server’s firmware boot order, and that a virtual CD/DVD drive is set to connect at power on. Otherwise the server boots from its own drives and the installer never appears. -
Select the Install Hammerspace option and press Enter.
The boot menu defaults to Boot from next device in boot order and acts on that default after a short countdown. Press an arrow key as soon as the menu appears to stop the countdown before making your selection. -
The installation program discovers local storage devices. Select the boot device for installation, then click INSTALL to continue.
Boot device capacity should be at least 100GB. See the DSX requirements table for bare-metal sizing guidance. Choose the boot device by its size rather than accepting whichever device the installer arrives with selected. On a DSX node with a separate data drive this matters more than on an Anvil, because the pre-selected device is sometimes the larger data drive rather than the boot drive.
Selecting a device other than the first one listed adds a caution that the installation may fail to boot unless the firmware can boot from that device. The caution names the device concerned. This is a general warning rather than a detected fault.
All discovered block devices will be overwritten during the installation. Any existing data on these devices will be erased. 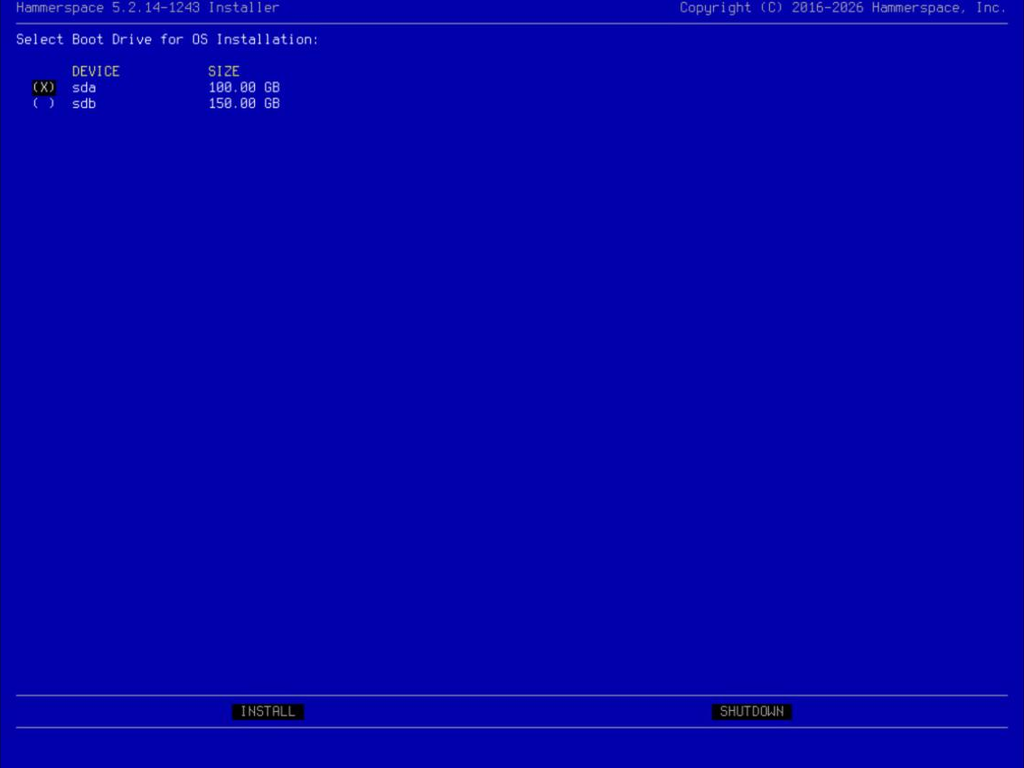 Figure 1. Boot drive selection
 -
A confirmation dialog asks you to approve overwriting the drives. It names the device the boot image will be written to and defaults to No. Check the device name, then select Yes and press Enter.
-
Review the End User License Agreement (EULA), then select Accept and press Enter. The EULA is the same as that which was seen in the Anvil installation.
-
Select for Product type, Hammerspace Data Services (DSX).
The installer usually arrives at this screen with a product type already selected, based on the resources it detects. Confirm the selection before continuing. -
The Virtual Hardware Validation screen displays. Confirm that the discovered hardware is validated, select Proceed, and press Enter.
As on the Anvil nodes, undersized resources are reported as cautions rather than errors, and Proceed remains available. Allocate memory somewhat above the documented minimum rather than exactly at it: a guest sees slightly less memory than the hypervisor allocates, so a VM built to the exact minimum is still flagged. 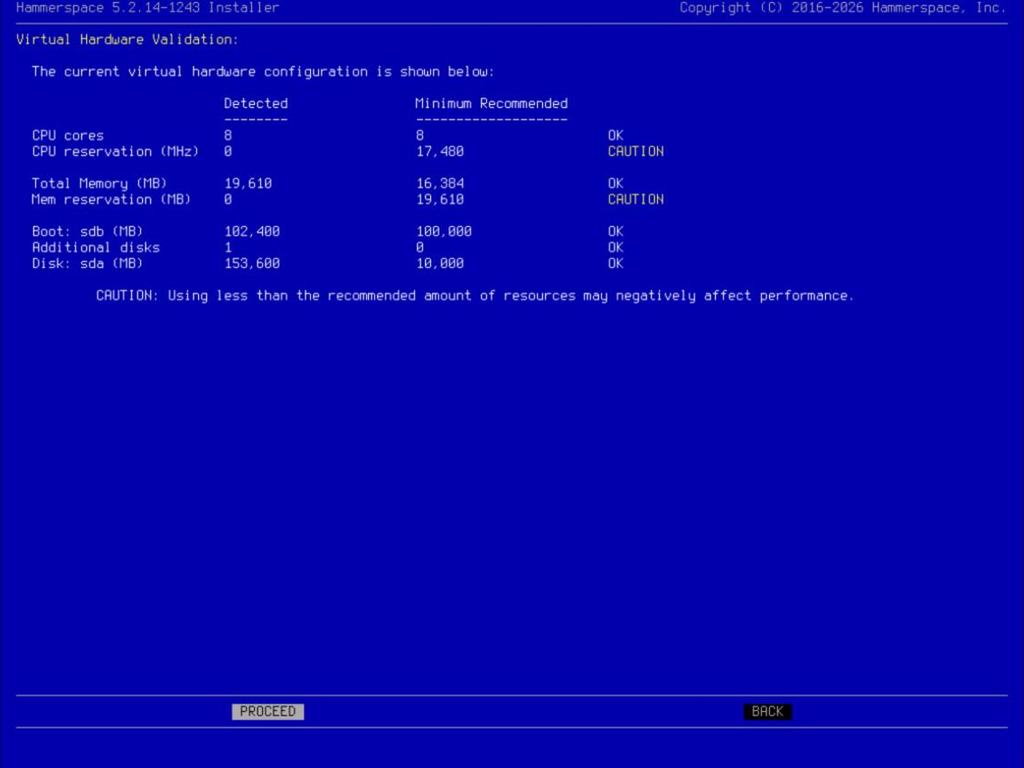 Figure 2. Virtual hardware validation
 -
Configure networking by optionally bonding interfaces together and then assigning roles to the available network interfaces.
-
To create a bond, use the tab or arrow keys to select an entry in the BONDING PEER column and then press Enter. Then use the arrow keys to select an interface to bond with and press Enter.
-
To assign roles, use the tab or arrow keys to select an entry in the NETWORK ROLES column and then press Enter. Use the arrow keys to choose from the list of role combinations, and press Enter to assign the highlighted combination. When all interfaces have been assigned, select NEXT and press Enter.
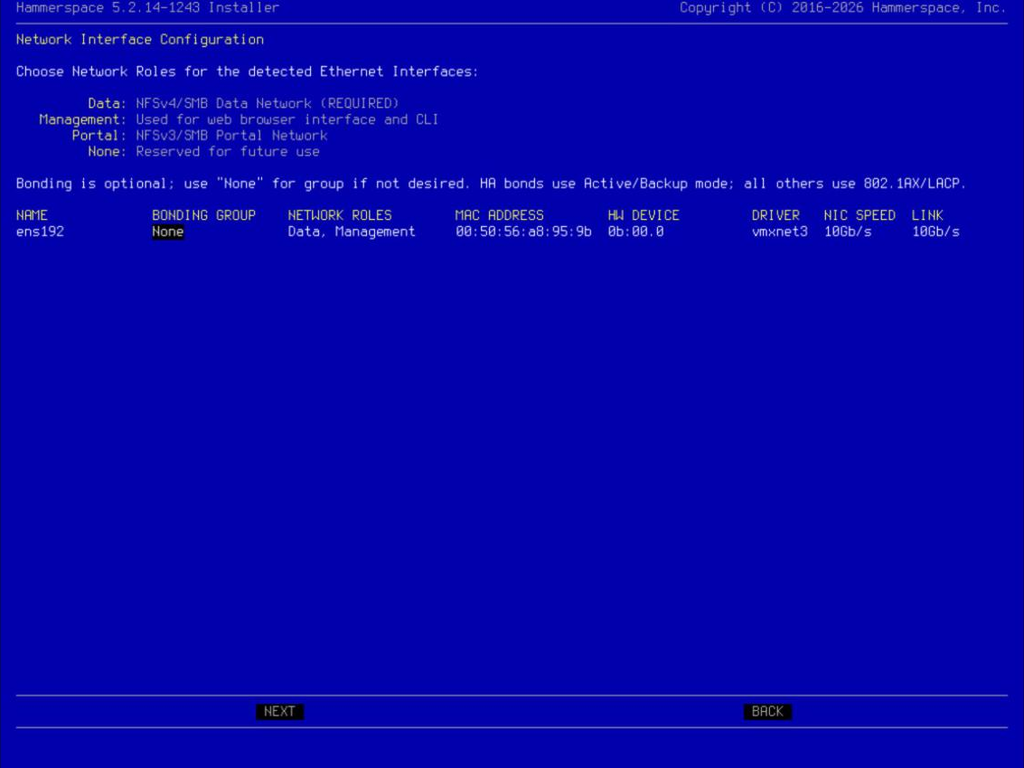 Figure 3. Network role selection
Roles are assigned as predefined combinations rather than as individual roles you switch on and off, and the combinations offered for one interface narrow once another interface has claimed a role. On a DSX node with a single network interface, the installer may arrive with Data, Managementalready assigned, and the Portal role is not offered because there is no second interface to carry it.The network roles provide the following functionality:
-
Data: Used to connect all storage clients and servers (including DSX nodes). NFS and SMB data traffic flows across the data network, as well as some inter-node communication. Floating IP Addresses and additional Data interfaces can be configured after the installation is complete.
-
Management: Used for management and monitoring tasks. This role is not used for file sharing, data movement, or HA-cluster communications.
-
Portal: Optionally used for NFSv3 and SMB network traffic to clients. If it is not configured, then the Data network will be used for client traffic.
All installations require management and data roles. This can be configured with only one interface if it is configured to share data and management traffic.
It is also possible to configure additional interfaces once the system is installed. DSX supports floating IP addresses for high-availability configurations and VLAN assignment to interfaces.
All configuration settings are accessible from the Admin CLI after installation is complete.
-
-
Fill in the following settings for the DSX:
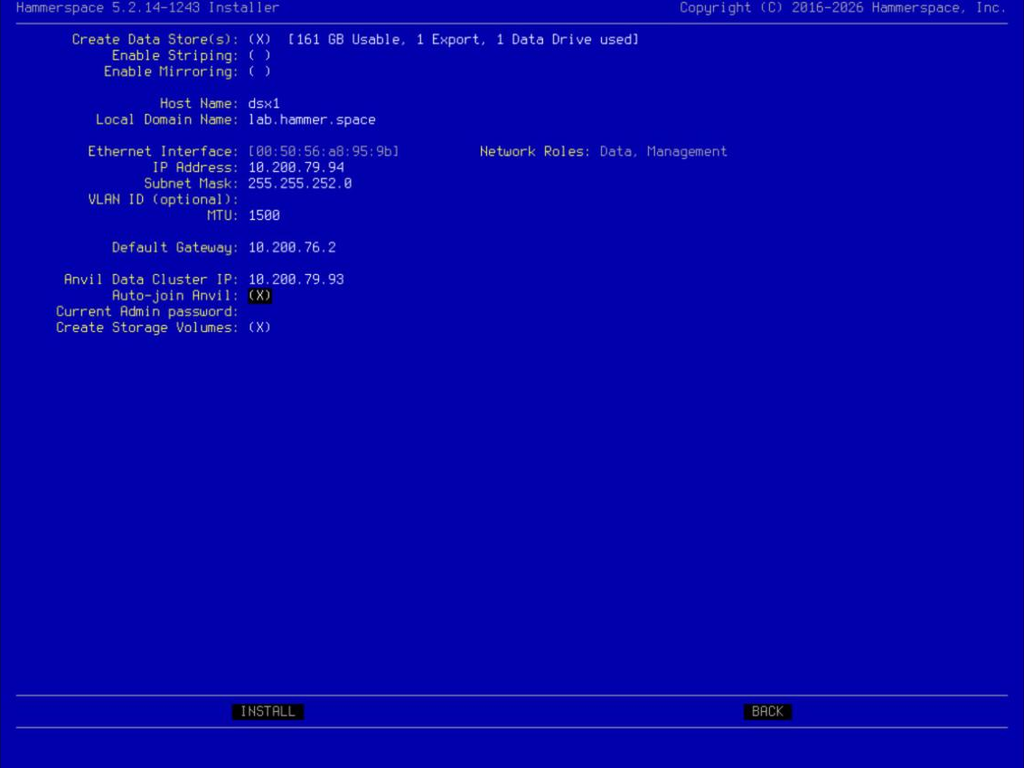 Figure 4. Create Data Store settings
Where:
-
Create Data Store(s): Enables locally attached block storage to be used as storage volumes.
-
Enable Striping: (Optional) Enables data striping across locally attached block storage. For local drives, this can only be done during installation.
-
Enable Mirroring: (Optional) Enables mirroring of data to locally attached block storage. For local drives, this can only be done during installation.
Striping and mirroring each require two or more data drives, and for local drives both are install-time decisions only. Neither can be enabled after the installation completes, so decide before committing the configuration. -
Host Name: Enter the DSX host name.
-
Local Domain Name: Enter the name of the local domain.
-
Ethernet Interface: For each network Interface, configure the following:
-
IP Address (each interface needs to be on a different subnet)
-
Subnet Mask or CIDR
-
VLAN ID (optional)
-
MTU size (default is 1500), 9000 for Jumbo Frames.
-
IP address of the Default gateway
-
IP address of the Anvil Data Cluster IP (set during Anvil installation)
The Anvil Data Cluster IP is the cluster’s floating address, not the address of either individual Anvil node.
-
-
Auto-join Anvil: Enables the DSX to join the Anvil automatically. Requires the Anvil admin password.
-
Current Admin Password: Anvil admin password.
-
Create Storage Volumes: Let the DSX automatically create volumes on data drives and add them to the configuration. Using this option will speed up and simplify the initial setup of DSX nodes.
The DSX configuration form has no DNS or NTP fields. This is expected, and differs from the Anvil form, where DNS is required. DSX nodes take their time from the Anvil servers, which act as NTP servers for them.
-
-
Review the configuration for accuracy. If all settings are correct, select Install and press Enter.
-
Select Yes and press Enter.
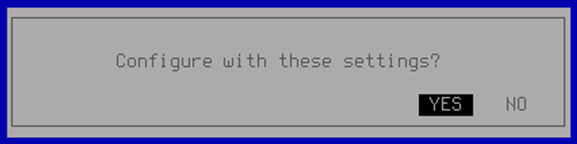 Figure 5. Confirming the DSX configuration
The installer configures the networking and installs the DSX software. Once the installation completes, the ONLINE dialog displays.
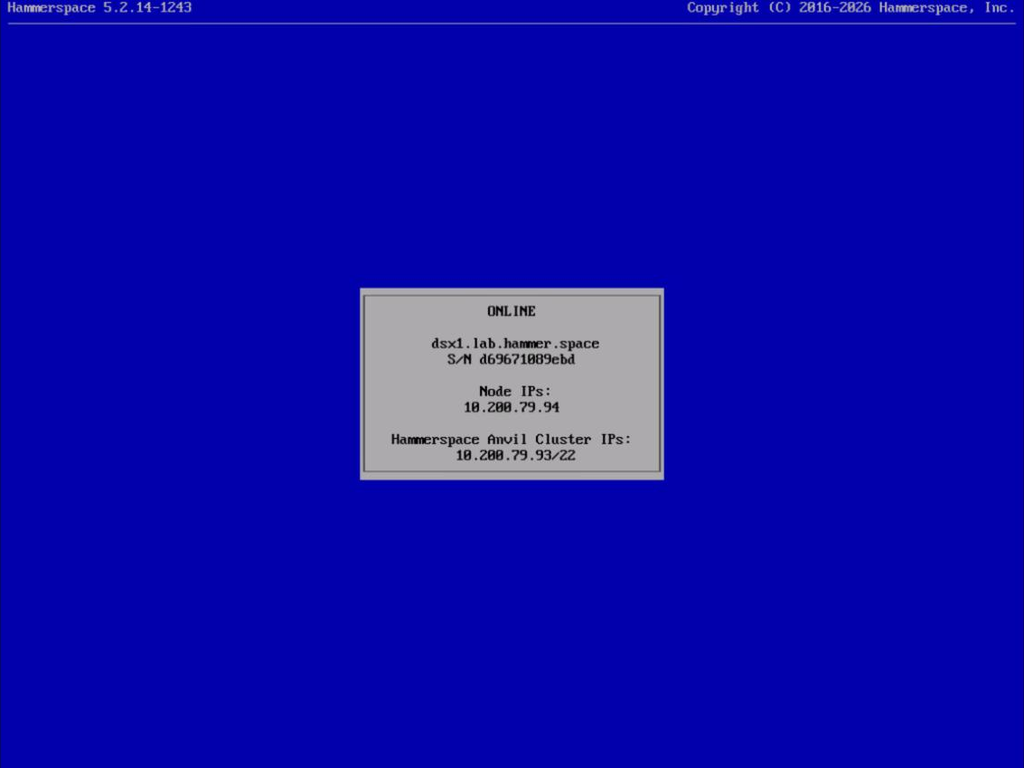
| If you install DSX concurrently with the Anvils and the Anvil installation has not yet completed, the DSX configuration process will pause for 60 seconds and retry until it is successful. |
You can also verify the installation was successful by checking the DSX configuration in the Management GUI. Log in to the GUI using a browser, then select . The DSX node is listed under its host name, with Type Hammerspace.
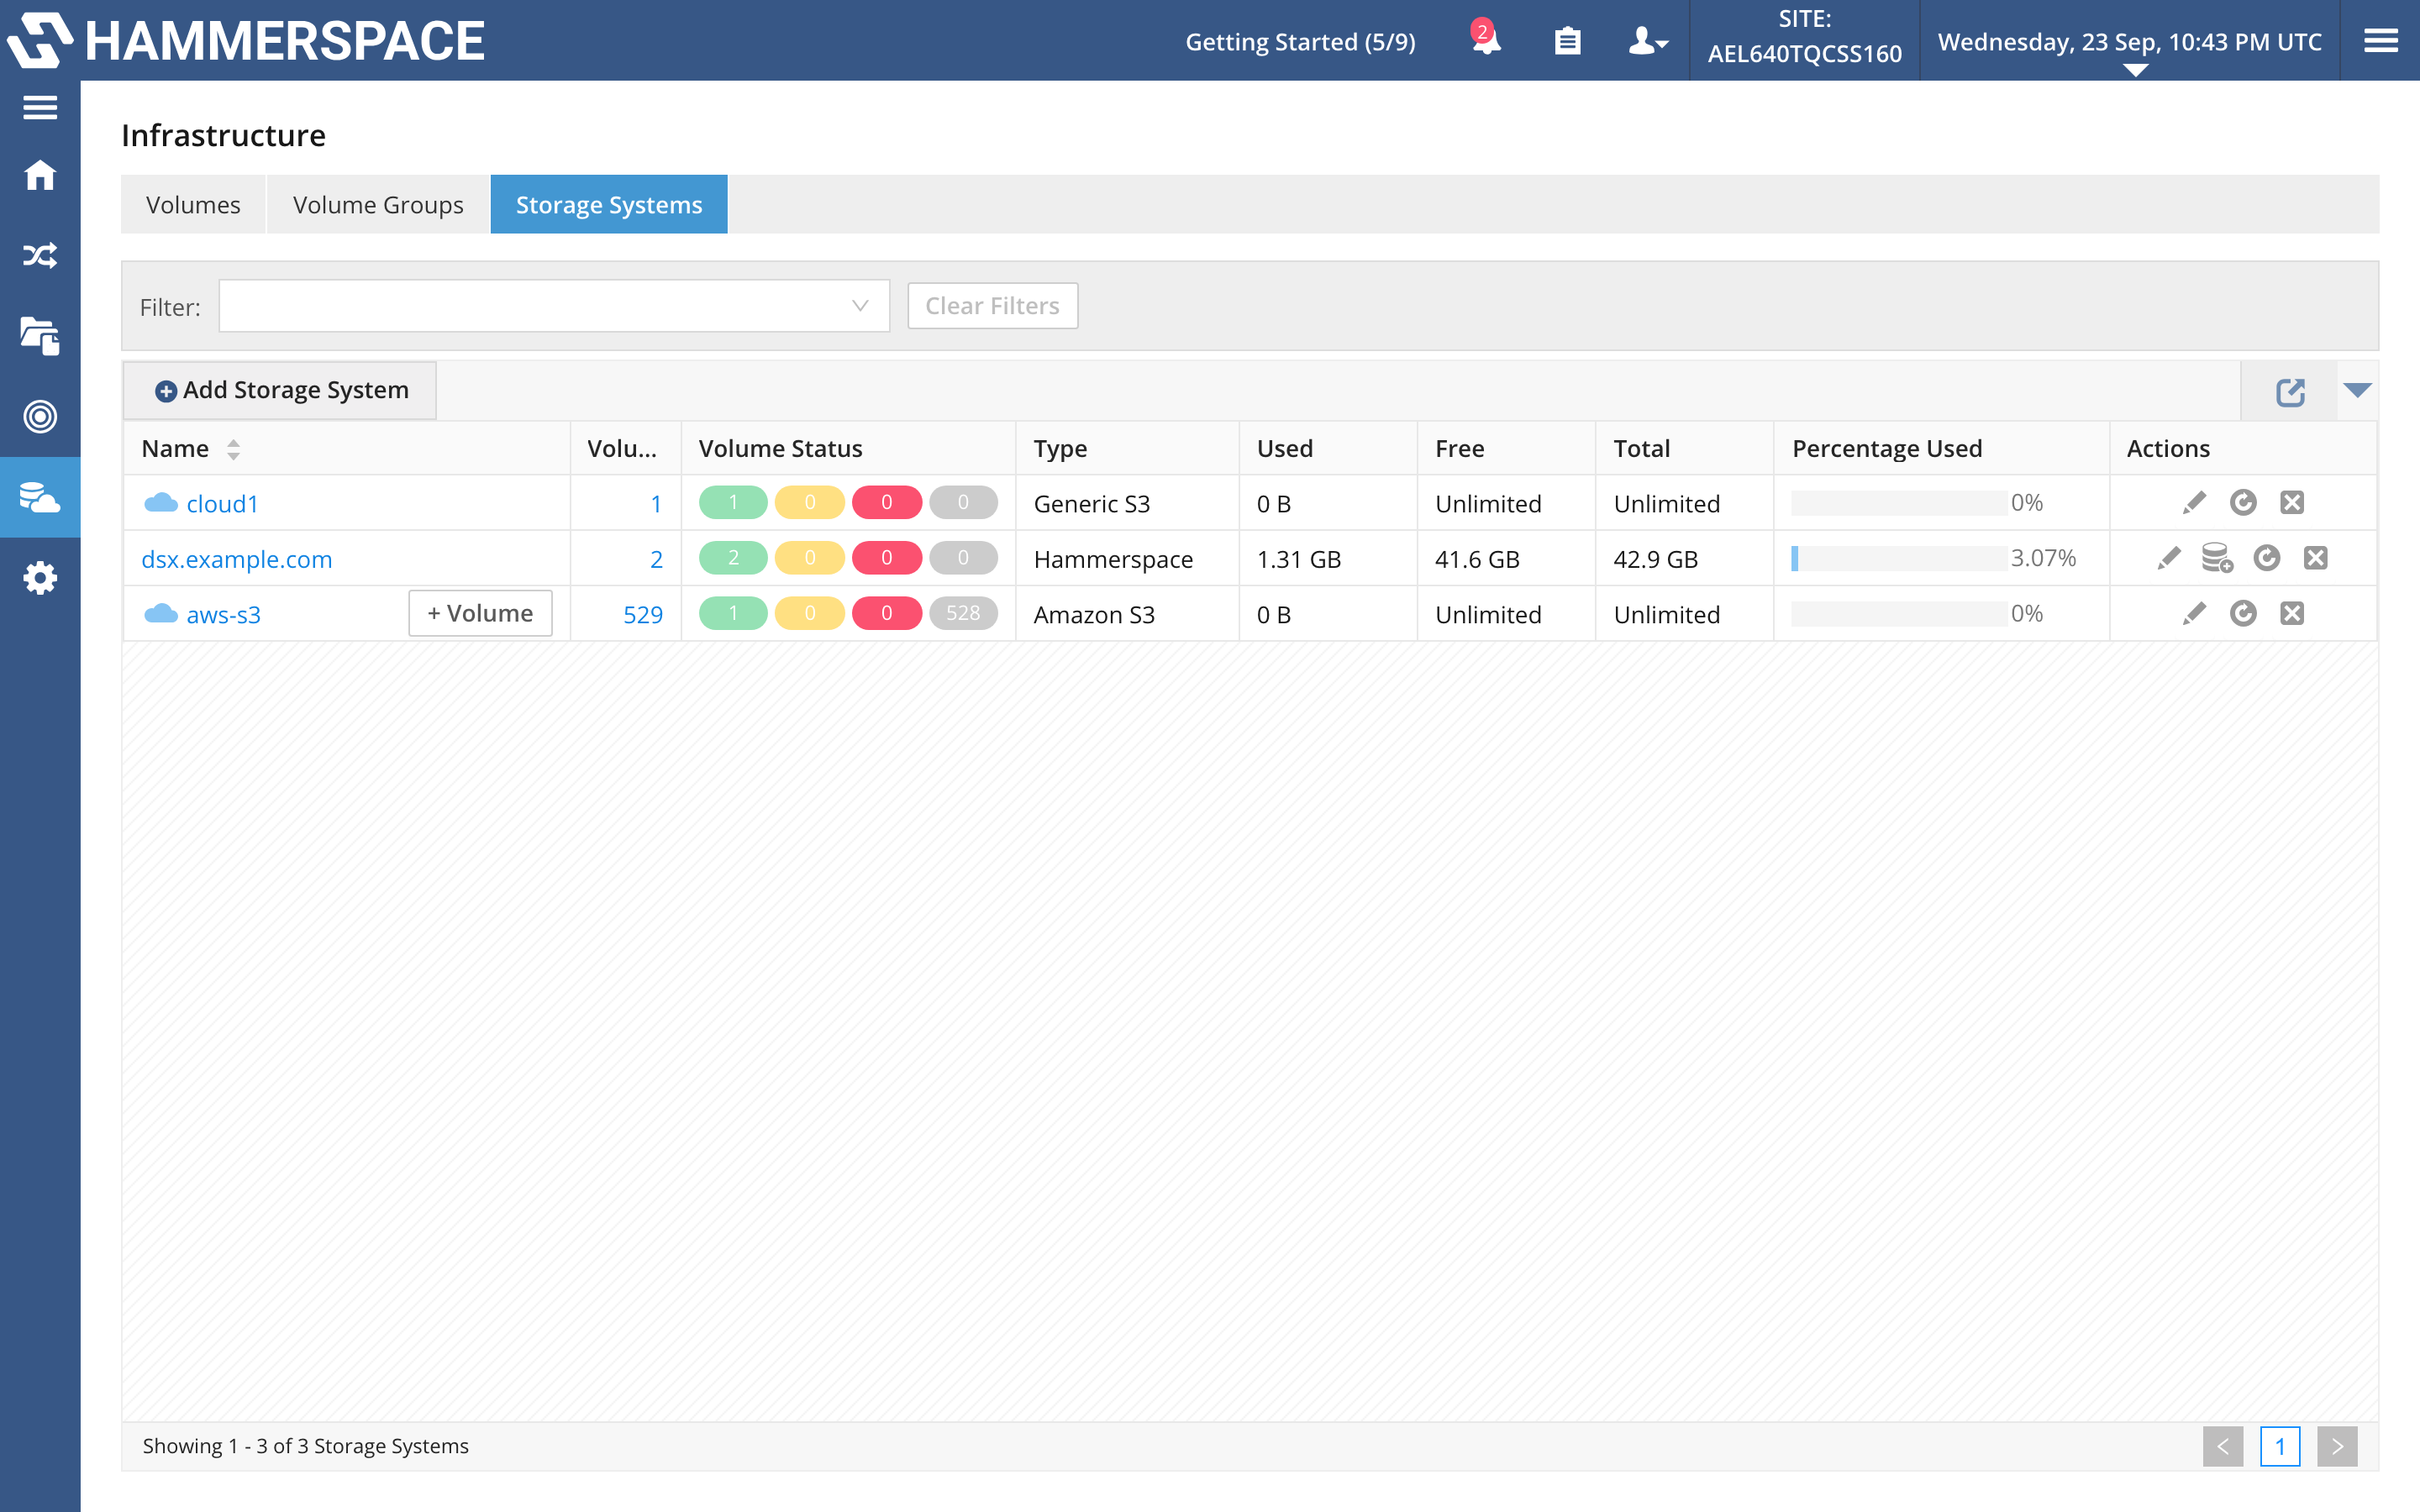
The DSX node is automatically added if the admin credentials are specified correctly during installation.
| After the installation has completed successfully, eject the CD-ROM or remove the ISO image from the virtual machine, particularly if you moved the CD/DVD device above the hard drive in the boot order. |