Licensing
Hammerspace requires a valid license to operate beyond the initial trial period. Without a license, the BYOL version of the software will operate as a 30-day trial. At the end of the trial period, client access to the data will be disabled; however, the data itself will remain unaffected. A license key is required to continue using the software after the trial period.
Each customer is provided an account on the Software Delivery & License Portal, where software and documentation can be downloaded. Information about entitlements associated with the customer account is also available.
An entitlement email is sent to the account owner and lists one or more Activation IDs associated with each product when an entitlement is created, updated, or renewed. It will include information like this example:
Subject: Entitlement ID(s): zzzz-yyyy-xxxx-wwww-vvvv-uuuu-tttt-ssss from Hammerspace

ActivationID: aaaa-bbbb-cccc-dddd-eeee-ffff-0000-1111

Product Name: Hammerspace

Version: 5.2.0

Total Quantity: 10

Start Date: Jan 1, 2026

Expiration Date: Jan 1, 2027

Duration: 365 Days
On installations with connectivity to the Software Delivery and Licensing portal, licenses can be activated using the Management GUI or the Admin CLI. If the Anvil is not connected to the licensing server, see the section on using Offline licensing.
| Only a single license can be applied to a system at a time. If changing a license, the old license must be removed first. |
Licensing Connectivity Requirements
Connectivity to the licensing service is required to use online licensing. If that cannot be configured due to networking restrictions, you must use Offline licensing.
Online Licensing Connectivity Requirements
Online licensing requires connectivity to hammerspace.compliance.flexnetoperations.com. The port is 443 (TCP/HTTPS).
| If using an IP Allow list, use a network block instead of individual IP addresses because these may change from one call to the next. |
The following network block(s) should be whitelisted:
-
IPv4: 64.14.29.0/24 (Deprecated end of January 2026)
-
IPv4: 185.146.155.0/24 (Starting end of January 2026)
|
It is currently not supported to use security appliances that intercept HTTPS requests and replace them with their own connections (e.g., Zscaler). It will cause the session to become invalid, and licensing will not complete. If it is not possible to avoid this, then it is recommended to use Offline licensing. |
Online License Activation
The activation ID from the entitlement email is required to license the product. The same activation ID is also available in the Software Delivery and Licensing portal and can be copied from there. Please contact support if you did not receive the activation ID or cannot locate it.
Online licensing automatically checks in with the license server every 24 hours. If the expiration date changes (after a software renewal, for example), it will be picked up automatically, and no further action is required.
If the license server cannot be reached, then the existing expiration date will continue to be used.
Using the GUI
Complete the following steps to activate your license using the Management GUI.
-
Navigate to tab.
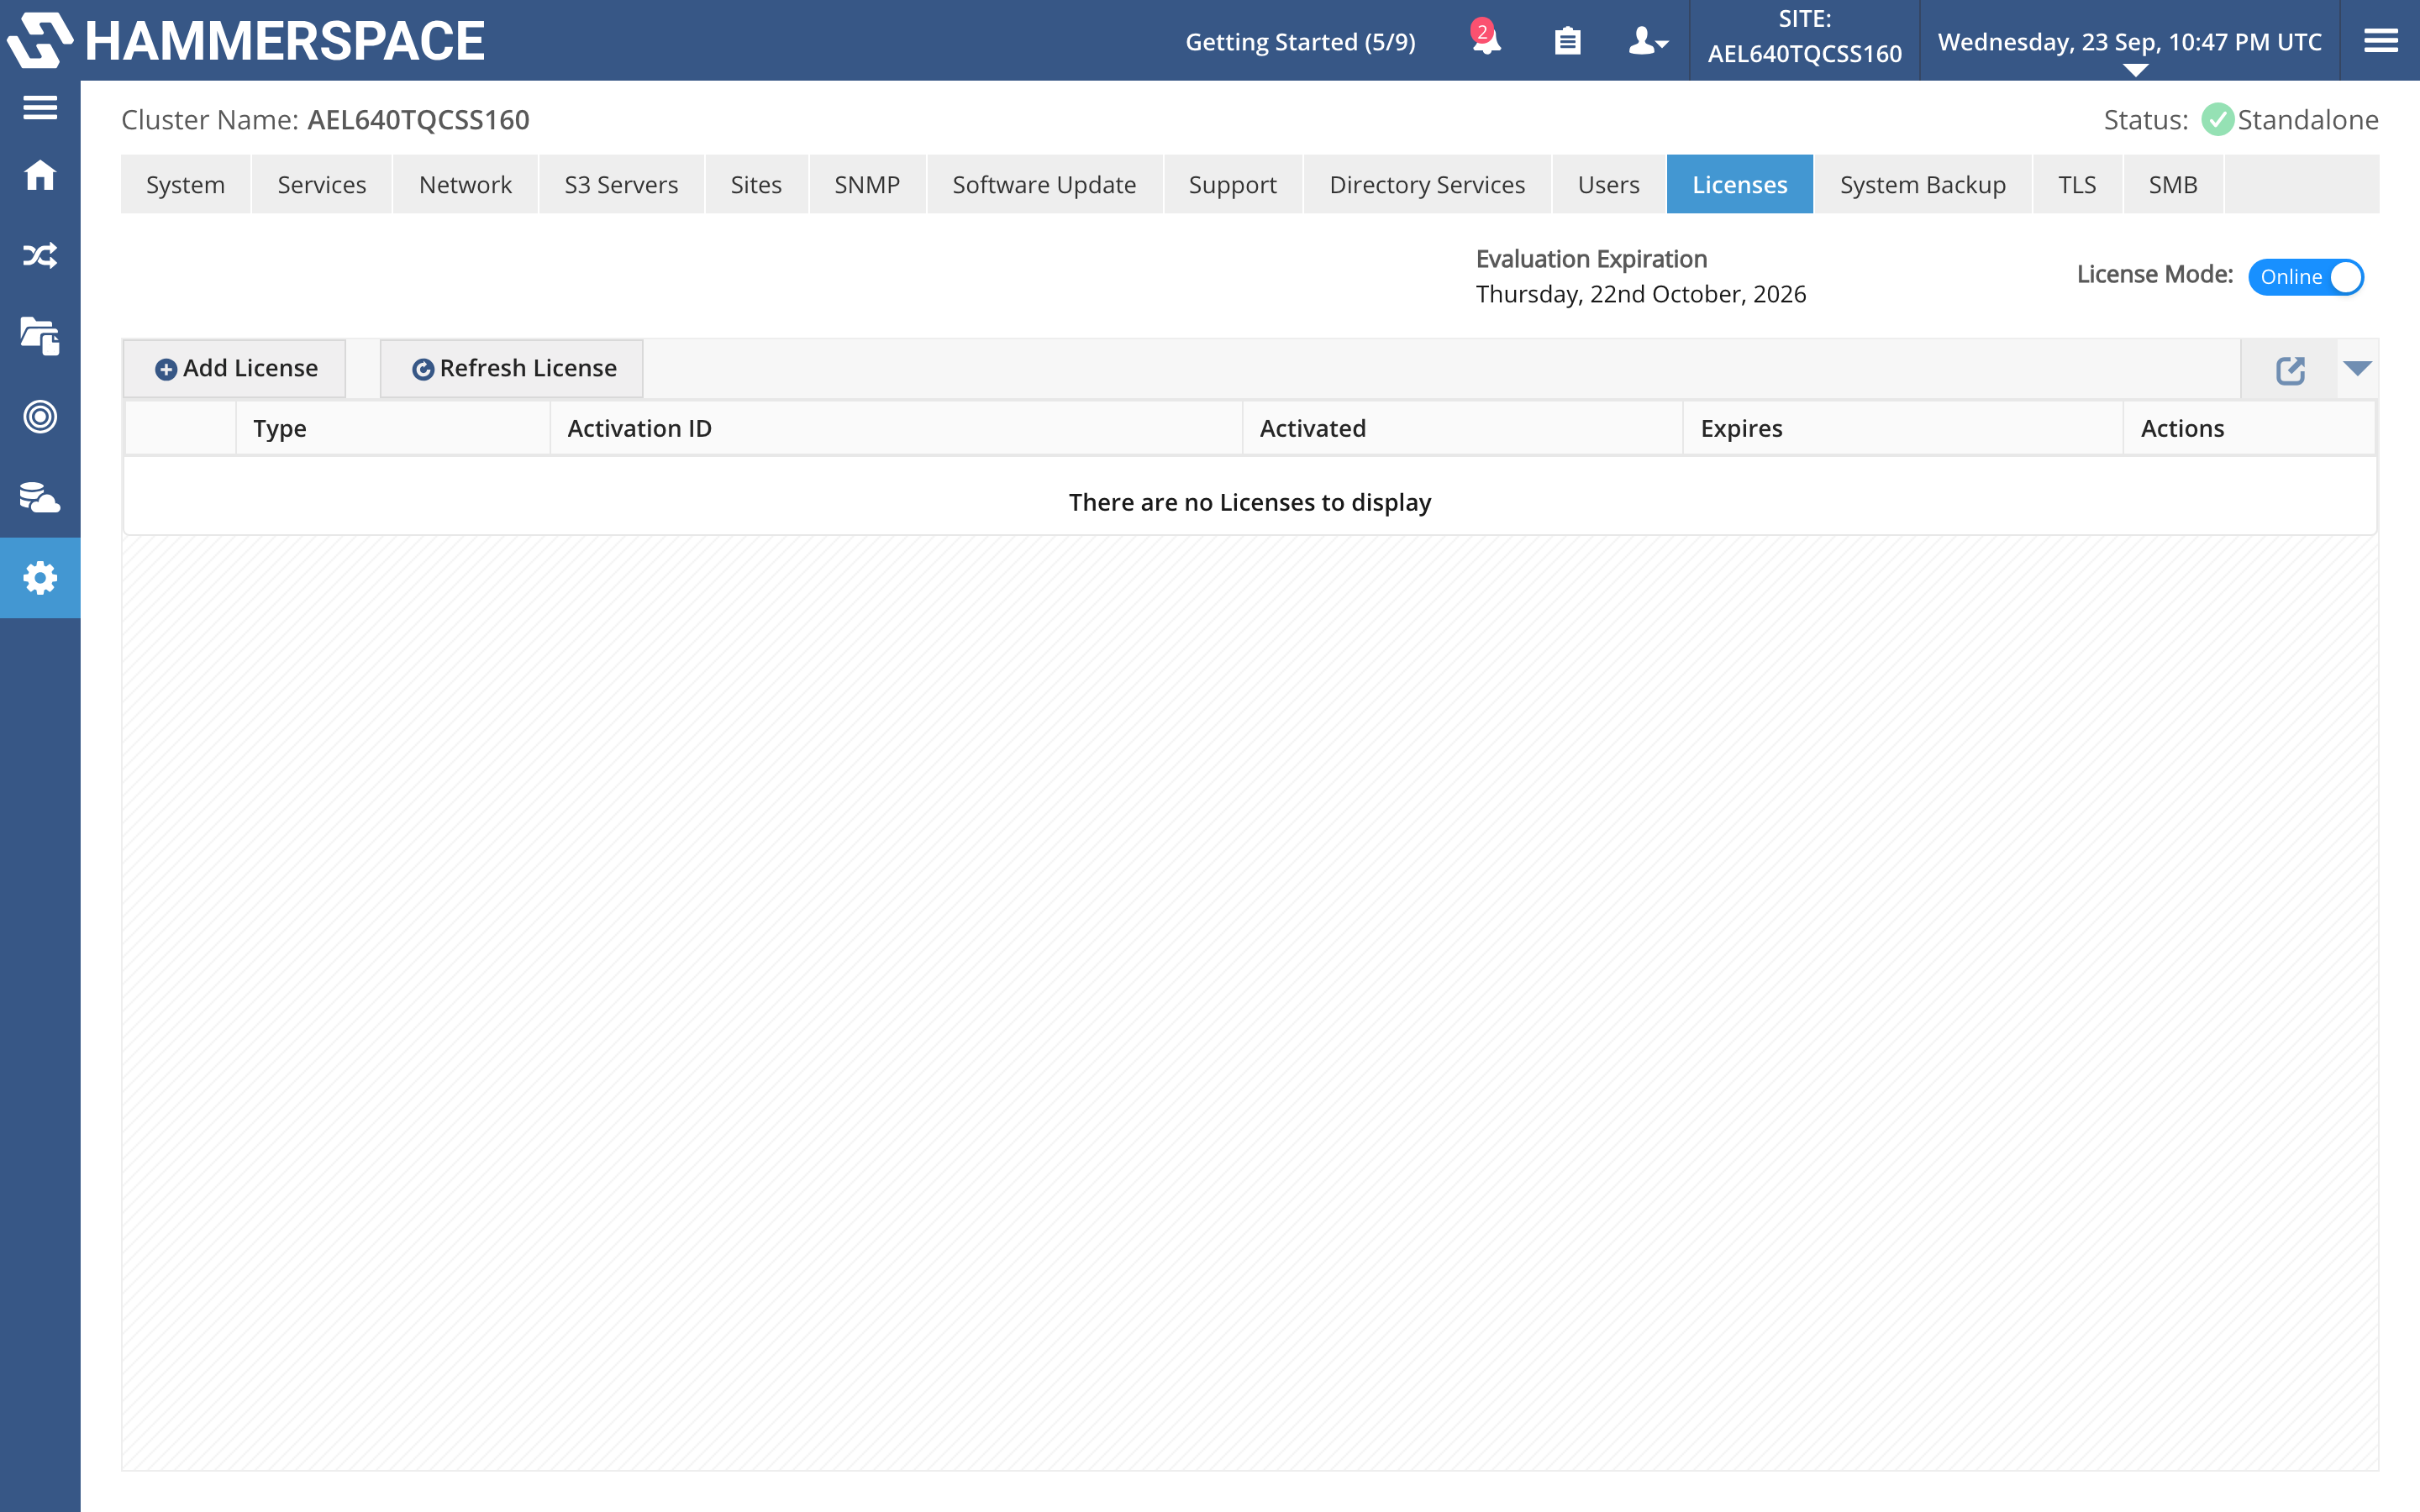 Figure 1. View license
 -
Click Add License and add the activation ID. The default license type is Node based. It is normal for the Activation to take up to several minutes. It is safe to navigate away from the page after the job has been submitted.
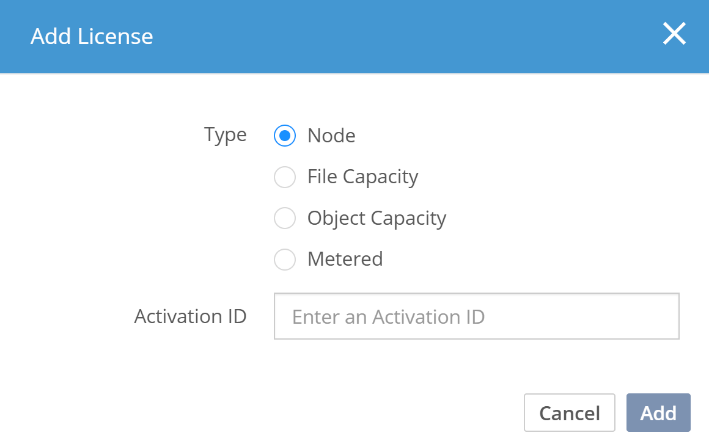 Figure 2. Add license
 Figure 3. License view with a license installed
After a successful activation, the license is installed and appears in the Licenses tab.
Using the CLI
You can access your license using the command line:
-
Log in to Hammerspace via SSH as an admin user, then add the license with the
license-addcommand.Command:
license-add --type NODE --activation-id aaaa-bbbb-cccc-dddd-eeee-ffff-0000-1111Expected output:
Activation ID: aaaa-bbbb-cccc-dddd-eeee-ffff-0000-1111 Type: Node Status: Valid Activated: 2026-02-22 19:48:30 UTC Expires: 2027-08-14 23:59:59 UTC Number of acquired licenses: 2 -
Review the installed license(s).
Command:
license-listExpected output:
total 1
Activation ID: aaaa-bbbb-cccc-dddd-eeee-ffff-0000-1111
Type: Node
Status: Valid
Activated: 2026-02-22 19:48:30 UTC
Expires: 2027-08-14 23:59:59 UTC
Number of acquired licenses: 2
Offline License Activation
Licensing in offline mode is required when a Hammerspace installation cannot reach the licensing service endpoints.
Licensing is a cluster operation and does not need to be executed on each node, even in offline mode.
| With offline licensing, the expiration date will not change after the license is installed. When the license expiration changes, such as after a software renewal, a new offline license key must be generated and installed following the Update Offline License process. |
Using the GUI
You can use the Management GUI to update your license in offline mode. This involves setting offline licensing mode and then uploading a new license from the License & Delivery Portal. Complete the following steps to activate a new license in offline mode using the GUI.
-
Start by switching the product to Offline License Mode. Click the License Mode toggle.
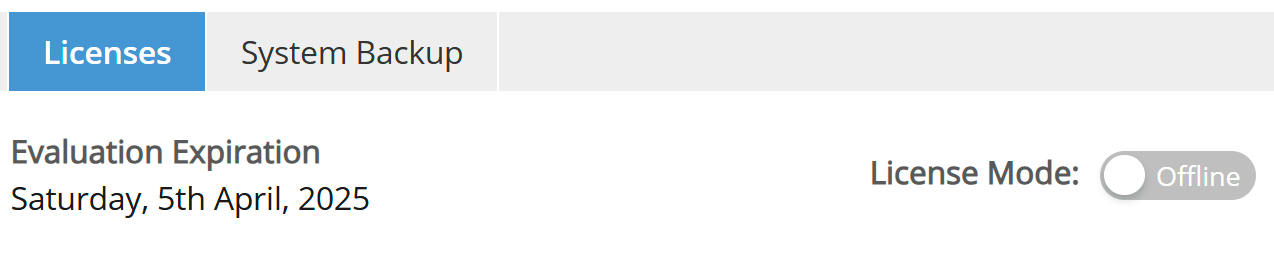 Figure 4. Offline licensing - Switching licensing mode to Offline
 -
Click Add License and input the Activation ID into the dialog.
-
Click Add and a request file will be automatically downloaded using your browser action.
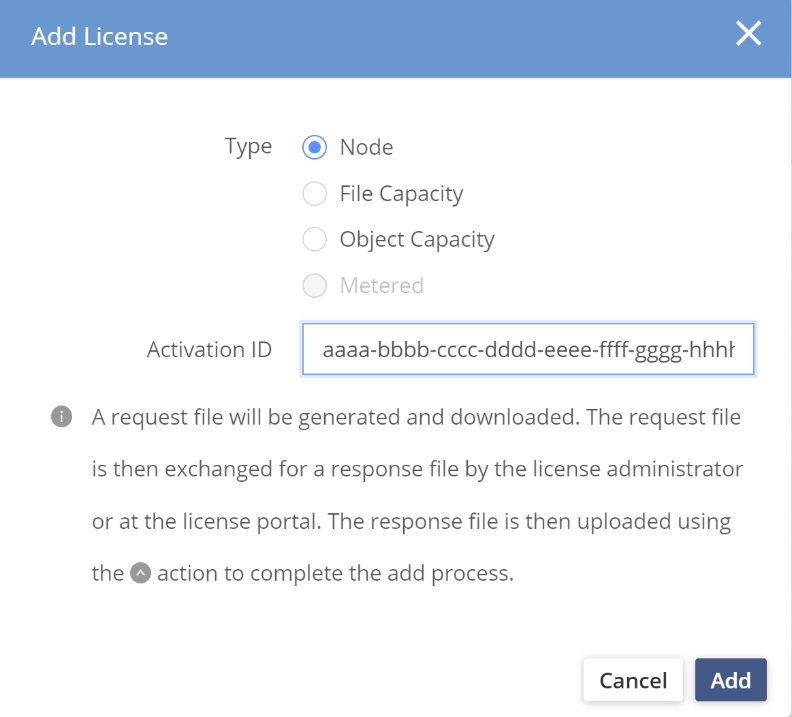 Figure 5. Adding the activation ID
 -
Use that request file to generate a license file. Log in to the Software Delivery and Licensing portal (Flexera), then navigate to Devices > Offline device management.
-
Select the license-add-request.bin file from the previous step and click Upload.
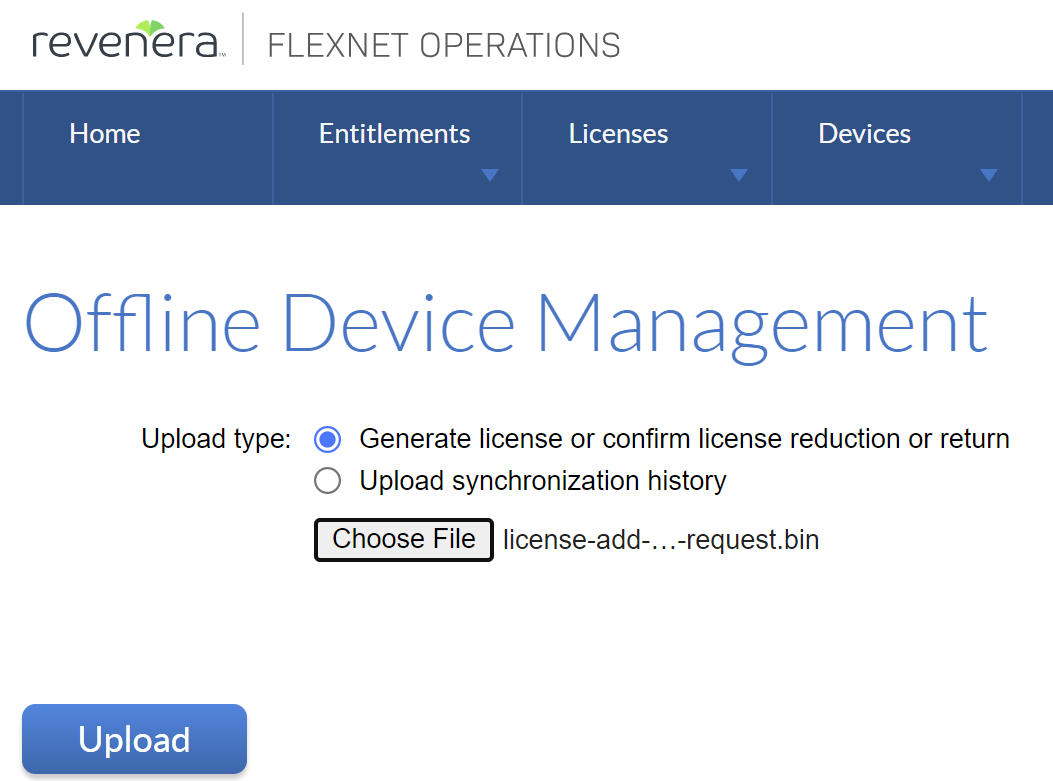 Figure 6. Selecting .bin file to upload
 -
After clicking Upload, the license file is generated and can be downloaded by clicking on the here link.
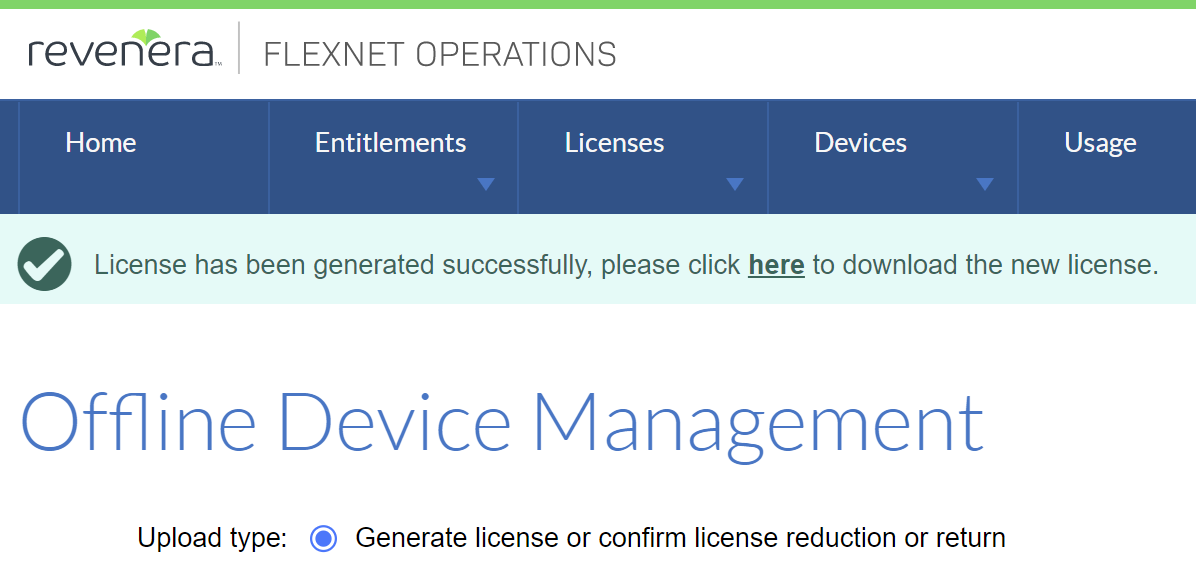 Figure 7. Click "here" link to download license file
 -
Navigate back to the Licenses tab in the GUI and upload the license file by clicking on the ^ icon in the Actions column.
 Figure 8. Uploading the license file
 -
The system is now licensed until expiration date.
|
To avoid disruption to data access, ensure a new license file is generated before the previous one expires. |
Using the CLI
You can activate a license for offline deployments using the command line:
-
Mount the share that will be used to save the license information. This can be any share in the system except the root share, which is typically exported read-only.
-
Create a subdirectory for the license information and set its permissions to 777. On Linux this can be done by issuing
chmod 777 <sub-directory>. -
In SMB, ensure everyone has full access to the directory. The license file must be stored in a subdirectory, not at the root of a share.
-
Execute the following command on the Anvil using a user with the admin role. The share name in this example is data. Make sure you add
/hs/before the share name if using a file: path.Command:
license-offline-add --type node --activation-id aaaa-bbbb-cccc-dddd-eeee-ffff-0000-1111 --export-uri file:/hs/data/license/request.binExpected output:
The license request file has been exported to file:/hs/data/license/request.bin. Exchange the request file with your license admin or at your license portal for a license response file, and then upload the response file to complete the license add process.The request file is written by the management layer, not by your user, which is why the subdirectory needs the permissions set in step 2. Until the response file is imported,
license-listshows the activation as a pending offline request:Command:
license-listExpected output:
total 1
Activation ID:               aaaa-bbbb-cccc-dddd-eeee-ffff-0000-1111
Type:                        Node
Pending offline response:    Add
Status:                      LicenseStatus.PENDING
If the license has already expired, the share will not be accessible. There are two options:
-
Manually enable the protocols for temporary use by going to tab in the Management GUI.
-
After manually enabling the protocols, use the share and start at Step 1 above (RECOMMENDED APPROACH).
If enabling the protocols fails, follow the workflow below. Use it only if the license is expired and the protocols cannot be enabled:
Command:
license-offline-add --type node --activation-id aaaa-bbbb-cccc-dddd-eeee-ffff-0000-1111 --export-uri file:/opt/pd/mgmt/webapps/webui/request.binExpected output:
The license request file has been exported to file:/opt/pd/mgmt/webapps/webui/request.bin. Exchange the request file with your license admin or at your license portal for a license response file, and then upload the response file to complete the license add process.You can navigate to the Management GUI and access the local directory by going to
https://<anvil-management-ip>/request.binin a browser. The request.bin file will be saved there and can be downloaded.
-
-
After the request.bin file has been generated and downloaded to the local desktop, log in to the Software Licensing and Delivery Portal and under Devices, select Offline Device Management. If you do not have access to the portal, contact your license administrator to execute the next steps.
-
Upload the request.bin file. This will generate a response file, capabilityResponse.bin, that can be downloaded from this page and used to activate the license.
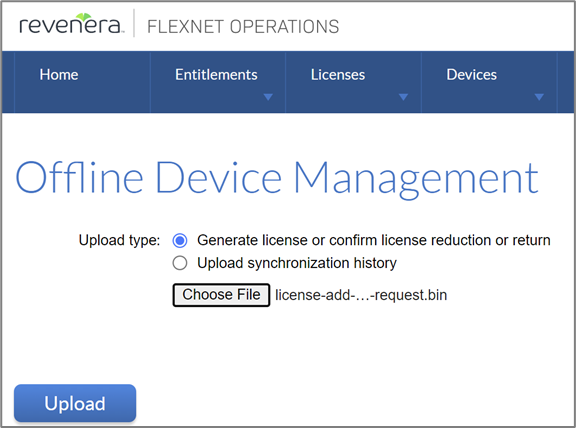 Figure 9. Upload request.bin file
 -
Enable NFS/SMB protocols to be able to copy in the response file. Copy the
capabilityResponse.binfile to the subdirectory under the share. This can be done using NFS or SMB. -
Run the following command to activate the license (the share named data is used in the example below).
Command:
license-offline-add --activation-id aaaa-bbbb-cccc-dddd-eeee-ffff-0000-1111 --import-uri file:/hs/data/license/capabilityResponse.binExpected output:
Process started. To monitor progress, use: task-list --id bcc076a6-1bbd-4b1f-8a78-c14eaba4d999 -
Once the license-add task has completed, validate that the license was installed successfully by running the
license-listcommand:Command:
license-listExpected output:
total 1
Activation ID: aaaa-bbbb-cccc-dddd-eeee-ffff-0000-1111
Type: Node
Status: Valid
Activated: 2026-01-03 17:34:03 UTC
Expires: 2027-08-14 23:59:59 UTC
Number of acquired licenses: 1
What Information Is in the Capability Response .bin File?
The capability response file .bin is encoded, making it difficult to read with standard text editors. The contents can be deciphered with the license library SDK (available upon request).
Below is an example of the contents of the capabilityResponse.bin file:
MessageType="Capability request"

Vendor=primary

RequestHostID=21173e83-783a-4deb-b09a-be246191b996

ResponseTime="Jul 10, 2025 10:13:10 AM"

ForceResponse=true

IdentityName=datasphere

DesiredRights=(ActivationID=aaaa-bbbb-cccc-dddd-eeee-ffff-0000-1111:1)

RequestHostIDType=String

MessageTime="Jul 10, 2025 10:16:01 AM"

MachineType=Virtual

IsServer=false

SourceIds=21173e83-783a-4deb-b09a-be246191b996

RequestOperation="Normal request"

ServerInstance=1
Updating an Offline License
An offline license installation requires a new license key to update the expired license. This is non-disruptive to the system and can be done at any time.
Using the GUI
-
Navigate to the Licenses tab in the Management GUI.
-
Click the Edit (pen icon) of the installed license key.
-
Download the request file and follow the process starting at Step 2 of the Offline License Activation, Using the GUI section.
Using the CLI
If using the Admin CLI, use the license-offline-update command and follow the same process, starting at Step 2 of the Offline License Activation, Using the CLI section.
Removing a License
| Be aware that removing a license will disable protocol access to data if the initial grace period has expired. |
Removing an Online License
Click the Remove icon or use the Admin CLI to remove the license. The product will contact the license service and automatically update the information in the system.
Removing an Offline License
Removing an offline license requires the same process as adding a license. After clicking the Remove icon in the Management GUI or running the Admin CLI command, license-offline-remove, download the request file and upload it to the Flexera Offline Device Management page.
Download the response file and apply it to the Product. This will remove the license and keep the licensing up to date in the Software Licensing and Delivery Portal.
License Troubleshooting
If you attempt to use a license that is already in use, you will see similar results to those shown below:
Command:
license-add --type NODE --activation-id aaaa-bbbb-cccc-dddd-eeee-ffff-0000-1111Error:
license-add: An entity (license activation) named ' aaaa-bbbb-cccc-dddd-eeee-ffff-0000-1111 ' already exists.If you attempt to use an already expired license, you will see similar results to those shown below:
Command:
license-add --type NODE --activation-id aaaa-bbbb-cccc-dddd-eeee-ffff-0000-1111Error:
license-add: License activation failed: The activation ID was denied, All features of entitlement, aaaa-bbbb-cccc-dddd-eeee-ffff-0000-1111, are expired.If you attempt to use a license with the wrong format, you will see similar results to those shown below:
Command:
license-add --type NODE --activation-id aaaa-bbbbError:
license-add: activationId invalid activation-id format
Try 'license-add --help' for more information.