Upgrading Hammerspace
The Hammerspace product (Product) supports upgrading an existing, running version without scheduled downtime for applications.
| High-availability deployment is required with configured floating IPs; IP failover will occur as part of the upgrade. |
The basic workflow to upgrade the cluster software includes the following steps:
-
Download the update file.
-
Upload the update file to the cluster.
-
Install the new software on the nodes in the cluster.
-
Monitor the installation progress.
Downloading the Update File
The update (.upd) file can be downloaded from the Download Packages page of the Software Delivery and Licensing portal.
-
Go to the linked page and click the link for the software version you are using, for example, Hammerspace-5.x.
-
Agree to the export license agreement.
-
Then select the version of the update (
.upd) file you wish to download.-
You can download the
.updfile by clicking on the filename download link on the right side of the page. -
You can check boxes on the left side of the page to download multiple software packages at once.
-
On the left side of the page, click the + button for the software package to see the MD5 signature and SHA256 CheckSum for the file(s) you download.
-
Continue to the section, Uploading the Update Package to the Cluster, for the next steps.
| The product Release Notes specify which versions are compatible for upgrade. The release notes are available to download on the Software Delivery and Licensing portal. |
Uploading the Update Package to the Cluster
Start by uploading the update file to the cluster. You can upload the file using the Management GUI or the Admin CLI.
| It is recommended to use the GUI upload method for most use cases. |
Using the GUI
-
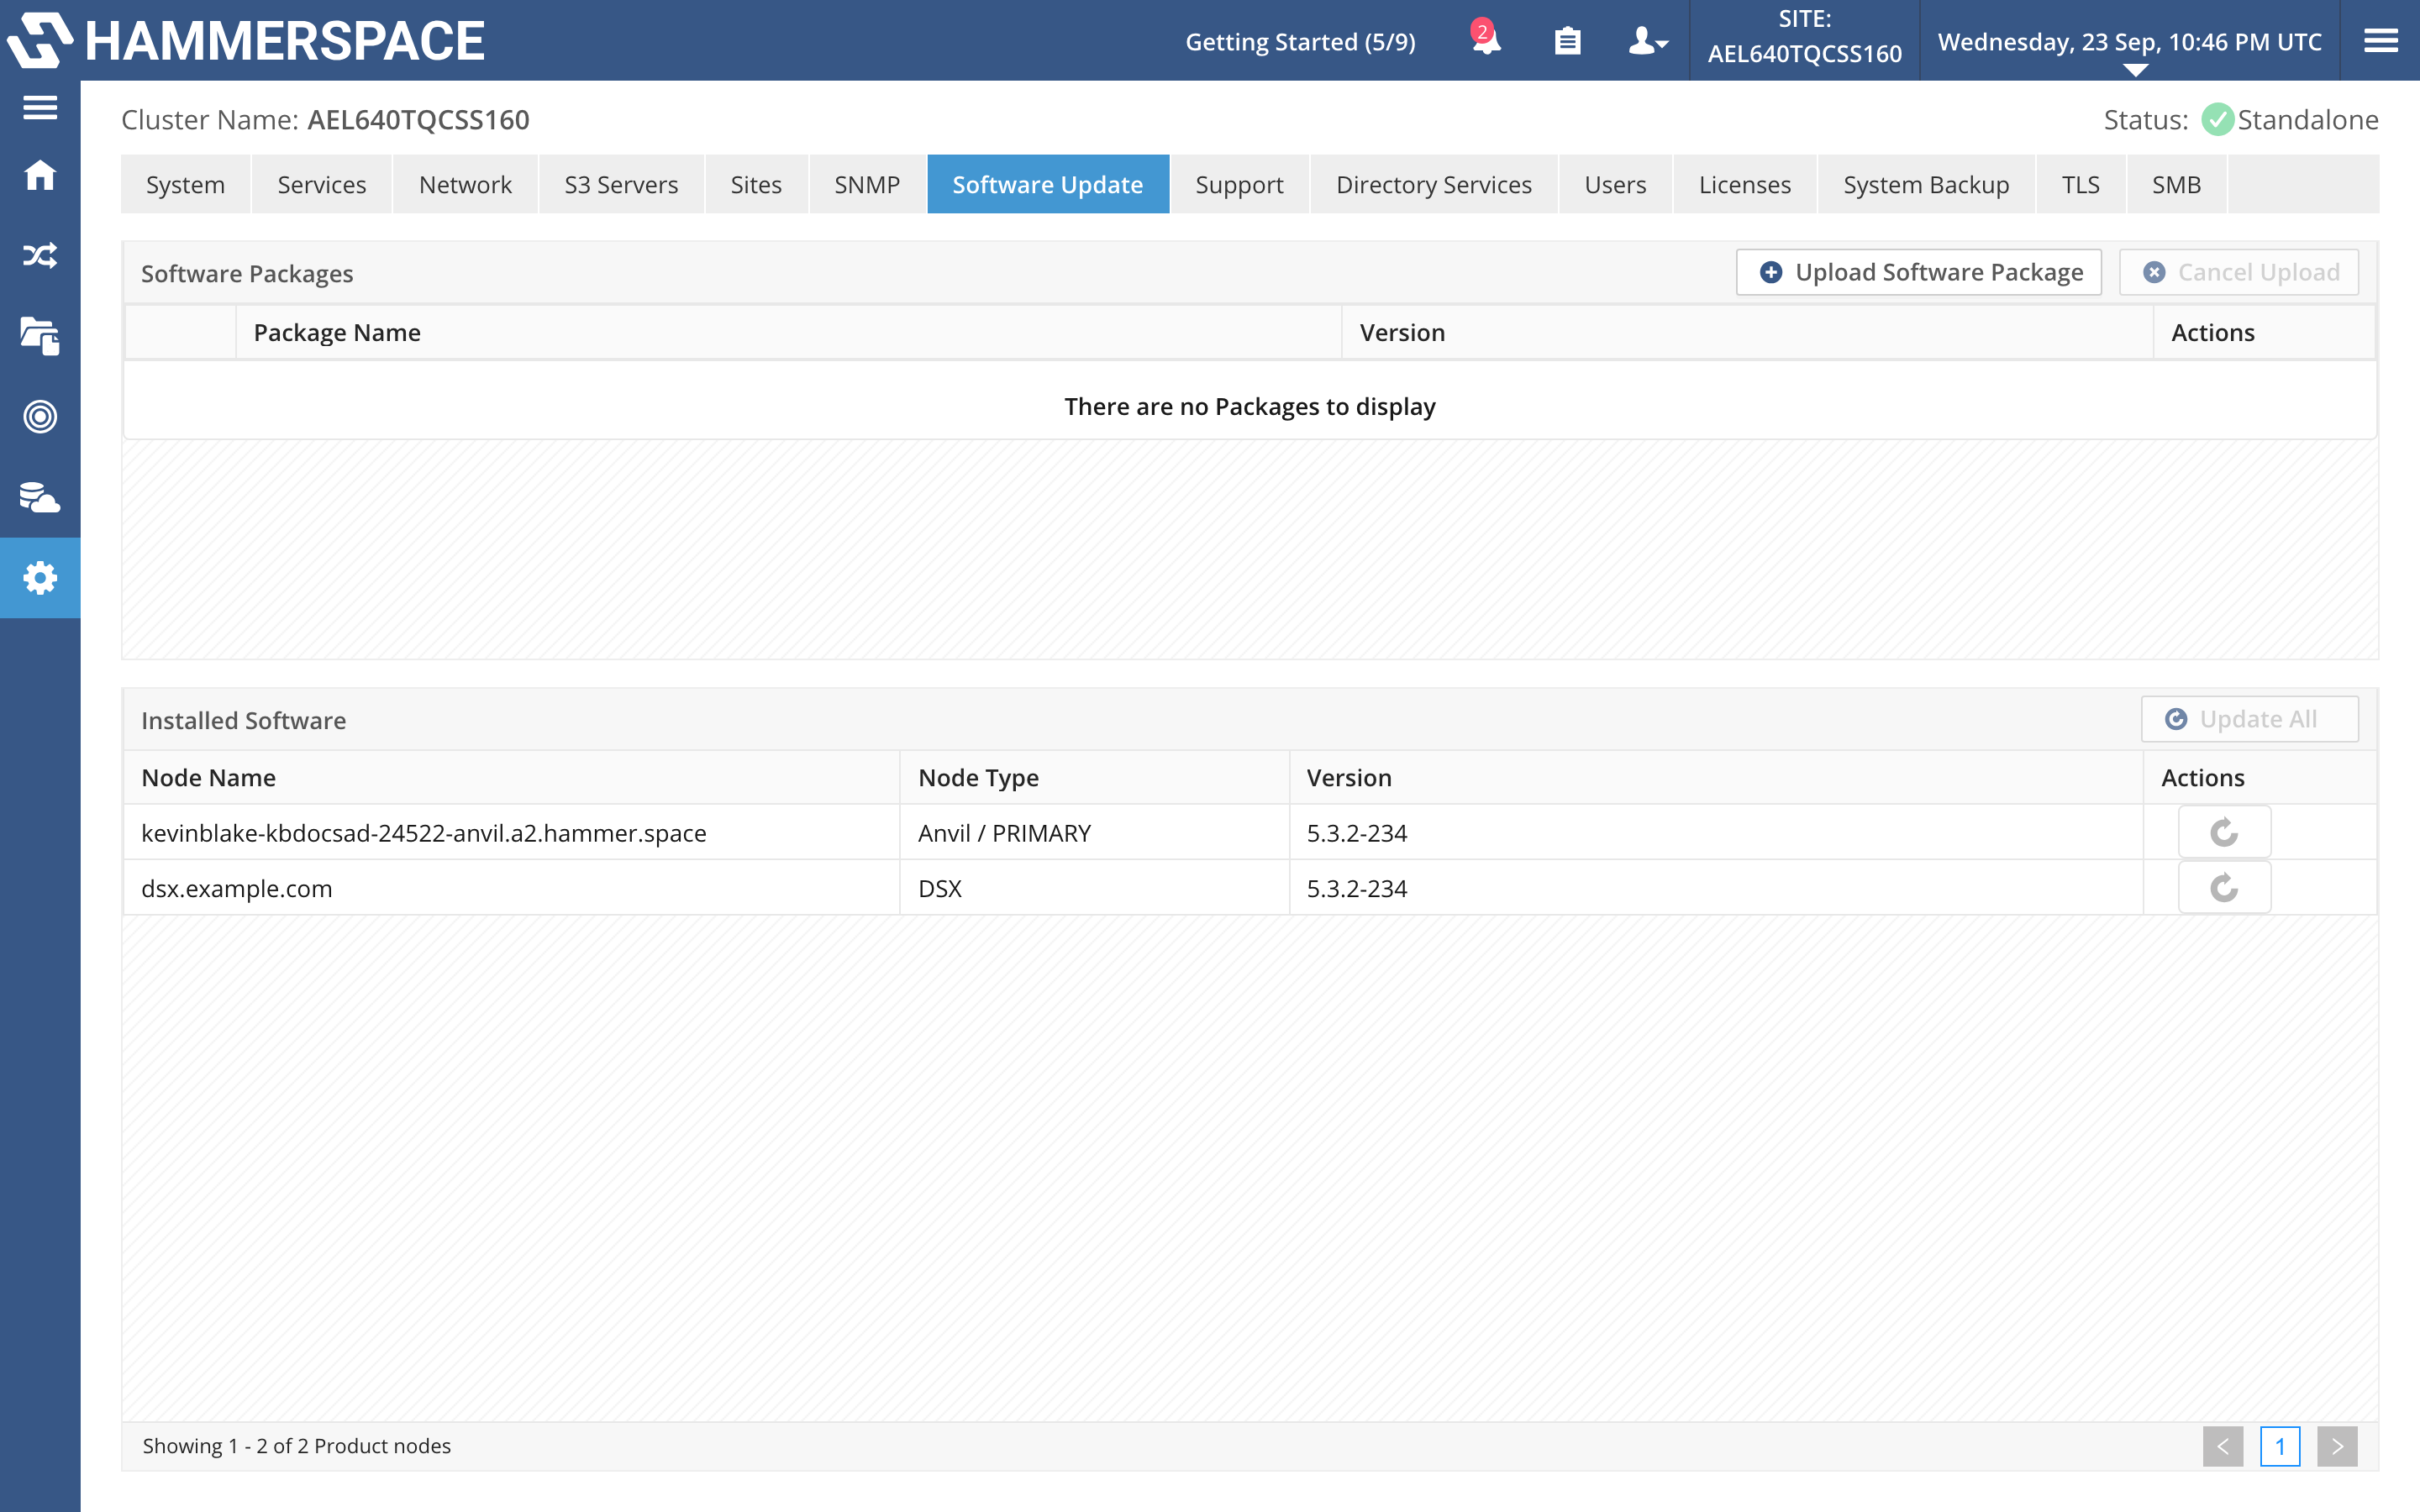
In the Management GUI, navigate to Administration in the left navigation menu and then select the Software Update tab:
-
Click on Upload Software Package to select the update file. Once the file is selected, it will start uploading, and a progress bar will appear.
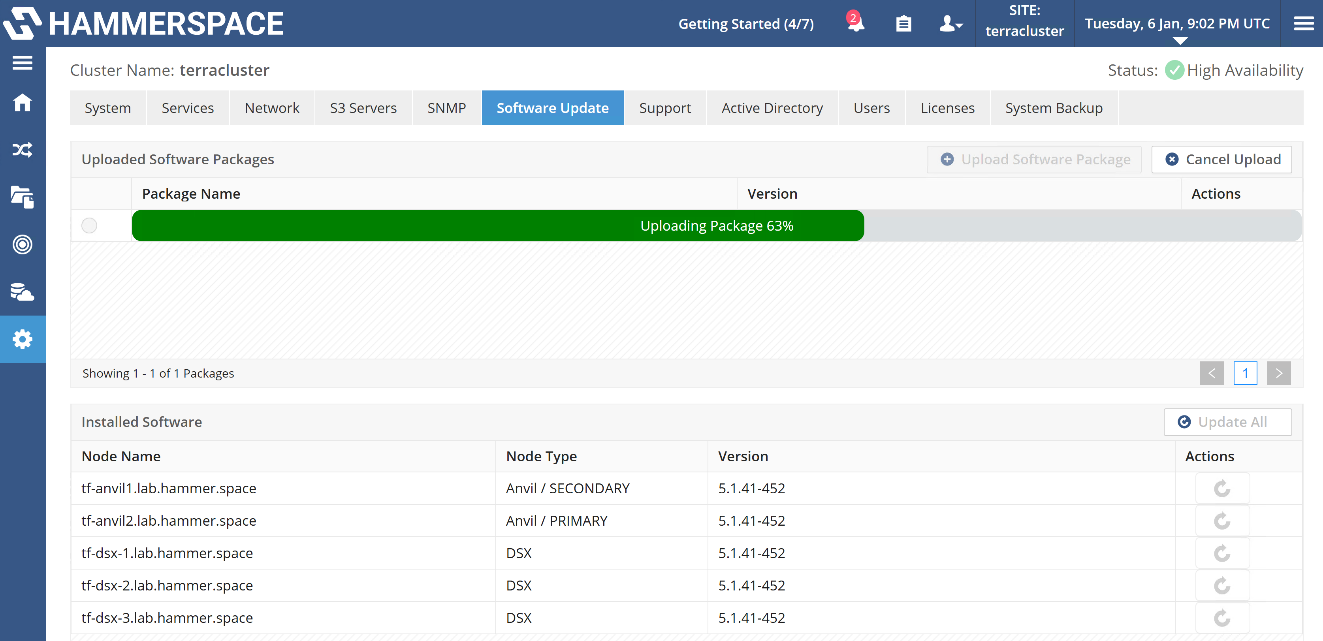
Once the upload is complete, the Update actions become enabled.
Using the CLI
To update the Hammerspace cluster using the CLI, you must first upload the UPD software package to the cluster using a supported URI. The cluster does not host a local file browser, so the update package must be accessible via a network-reachable location.
Prerequisites
Ensure the update package (.upd file) is stored in a location accessible by the cluster.
The cluster supports the following URI schemes:
-
http://
-
scp://
-
ftp://
-
file://
| You must ensure that the cluster has network access to the server or file share hosting the package. This may require configuring routing, DNS, or firewall rules to allow access. |
Example command
Command:
software-upload --package-location <URI>Expected output:
successThe command returns once the package has been fetched and stored on the cluster, which can take several minutes for a package of a few gigabytes. Replace <URI> with the full path to the update package, for example
-
HTTP:
software-upload --package-location http://updates.example.com/path/to/hammerspace-5.2.8-145.upd -
SCP:
software-upload --package-location scp://user@host:/path/to/hammerspace-5.2.8-145.upd -
FTP:
software-upload --package-location ftp://user:pass@ftp.example.com/pub/hammerspace-5.2.8-145.upd -
Local file (when using file://) the file is located in share called data:
software-upload --package-location file:///hs/data/hammerspace-5.2.8-145.upd
Once the package is uploaded, proceed with the software installation instructions provided in the next section.
Example: Uploading the UPD File from a Local Path on the Cluster
Uploading the file from a local file path on the cluster requires additional steps. The following workflow example uploads the UPD file to a Hammerspace share named ‘data’. This is a user-configured share in your environment and can be named anything.
-
Mount the Hammerspace data share on the workstation.
-
Download the UPD from the Hammerspace Software & Delivery site and save it to the data share.
-
Execute the following command in the Admin CLI:
Command:
software-upload --package-location file:///hs/data/hammerspace-5.2.8-145.updExpected output:
successNote the triple ///and the addition of hs to get to the root of the file system. Also, be aware that the permissions on the UPD need to be readable by other (chmod o+r) since the management layer reading the update file does not have root access.
Troubleshooting a UPD local-path upload
If the file is not readable by other, the upload fails. In this example the share is mounted on a Linux client at /mnt/data and the file is a placeholder named hammerspace-docs-test.upd; ls -l on the client shows the permissions:
Command:
ls -l /mnt/data/hammerspace-docs-test.updExpected output:
-rw-r----- 1 root root 0 Sep 23 22:20 /mnt/data/hammerspace-docs-test.updThe system then returns the following error message:
Command:
software-upload --package-location file:///hs/data/hammerspace-docs-test.updError:
software-upload: URI '/hs/data/hammerspace-docs-test.upd' not found.| The same message is returned when the file does not exist at the path given, so check the path and the file name as well as the permissions. |
Solution
You must change the permissions on the UPD to make sure that non-root users (other) can read the file. This can be done from a Linux or Windows client.
# chmod o+r hammerspace-docs-test.updUpdating the Nodes
After the UPD file is uploaded to the cluster, you can begin updating the nodes.
Using the GUI
In this example workflow, we will update a reference installation currently running 5.1.41-452 to 5.2.8-145, which is available for the upgrade.
| It is recommended to use the Update All action in most configurations, as Hammerspace will automatically determine the correct order for applying updates. |
| In configurations where Mirroring is used via Objectives, it is recommended to first upgrade the Anvil nodes, then upgrade each DSX individually, and wait between upgrades for any re-silvering operations to finish. Re-silvering can be monitored by checking the alignment status of the share/files. |
-
In the Software Update tab, press Update All (in the Installed Software panel; the button is unavailable until a package upload has completed) to start the process. It may take up to a few minutes for the process to show progress in the UI. The reference configuration is an HA config, and it will start by upgrading the secondary node first.
Once the secondary node is upgraded, the primary node upgrade will begin, and the Management GUI will be unavailable for a few minutes.
| Close the Management GUI tab or window to minimize the effects of browser cache. |
Using the CLI
Use the following commands to initiate the software update on the nodes using the Admin CLI.
-
List the uploaded package to confirm its version:
Command:
software-listExpected output:
total 1 Version: 5.3.1 Build: 1209 Package name: hammerspace-upd-5.3.1-1209.tar Full version: 5.3.1-1209 Product name: Hammerspace -
Start the update on every node, naming the version shown by
software-list:Command:
software-apply --all --version 5.3.1-1209Expected output:
Software update started.
The progress may be monitored using software-update-status --task-id 873a8a88-62ce-4df5-8a19-a9d653aa8f4d
The task ID identifies this update in
software-update-status(next section) and insoftware-update-cancel.
Monitoring the Update Progress
Progress can be monitored from the Tasks icon in the top bar of the Management GUI, on the Software Update page, or in the Admin CLI using the software-update-status command.
The end-to-end, non-disruptive upgrade process takes approximately 60 minutes for a four-node installation; however, this estimate can vary depending on the configuration. For example, bare-metal environments usually take longer because a physical server boots more slowly than a virtual server.
Using the GUI
After logging back in, navigate to the Software Update page and check the status.
Even though the management UI is not available for a few minutes, file operations are minimally affected by the upgrade process.
The table with nodes will show progress; it may take a few minutes for the page to refresh. Progress can also be monitored from the Tasks icon (the clipboard) in the top bar, which lists the running and recent tasks and links to View All Tasks.
Using the CLI
More detailed results of the upgrade are available in the Admin CLI. The software-update-status command lists the update task with one Items entry per node. While the update runs the task shows Status ACTIVE; the node being updated shows IN_PROGRESS with its percentage complete and a progress message (for example Applying package updates), and the nodes still to come show PENDING. The nodes are updated one at a time, in the order described under Manual Upgrade Order later in this chapter. When every node has finished, the task shows COMPLETED with its end time and each node shows SUCCESS with its start and end times:
Command:
software-update-statusExpected output:
total 1
ID:                      873a8a88-62ce-4df5-8a19-a9d653aa8f4d
Version:                 5.3.1-1209
Status:                  COMPLETED
Started:                 2026-09-23 21:42:25 UTC
Ended:                   2026-09-23 22:10:28 UTC
Items:
                         [Node name: anvil1.example.com, Status: SUCCESS, Completed: 100%, Started: 2026-09-23 21:42:36 UTC, Ended: 2026-09-23 21:51:37 UTC]
                         [Node name: anvil2.example.com, Status: SUCCESS, Completed: 100%, Started: 2026-09-23 21:51:37 UTC, Ended: 2026-09-23 22:01:27 UTC]
                         [Node name: dsx.example.com, Status: SUCCESS, Completed: 100%, Started: 2026-09-23 22:01:27 UTC, Ended: 2026-09-23 22:10:07 UTC]
Manual Upgrade Order
If updating the cluster manually, update one node at a time: in the Management GUI, use the update icon in the Actions column of the Installed Software table on the Software Update tab; from the Admin CLI, run software-apply --node-name <node name> --version <version> for each node. The supported order is:
-
Update the Anvil secondary node.
-
Update the Anvil primary node.
-
Update the DSX nodes.
| The DSX nodes can generally be updated in any order after Steps 1 and 2. Floating IP addresses will automatically fail over to other DSX nodes during the upgrade. |
| If you are using the built-in mirror capability in the product, then it is recommended to ensure that the shares reach full alignment before upgrading the next DSX node. |
Upgrading Global File System Environments
When upgrading an environment with replicated shares (Global File System), the version change to 5.2 will stop metadata replication until ALL participating sites have been upgraded to 5.2.
| Upgrade all sites simultaneously to minimize the metadata replication delay during the upgrade. |