File Versioning
The file versioning functionality creates versions of files when changes to file data occur. Although file versioning is like snapshots as both generate copies of data, it has a fundamentally different triggering mechanism. Whereas a schedule triggers snapshots, file versions are triggered by changes to file data. File versions are created when changes to a file are saved.
Configuring File Versioning Using Objectives
File versioning is configured using objectives. The versioning configuration can be applied to an entire share, a directory, or using a selection mechanism, whereby it is triggered by metadata. New file versions are stored in the following format:
<filename>[#M=<YYYYMMDD.HHMMSS.SSSSS #S=n-nn>].<suffix>
For example, if we create a file named testfile.txt in the engineering share, a subsequent version will look as follows:
testfile[#M=20211028.224602.46490 #S=0-88].txt
| For the system to delete expired versioning files, the share must be configured with a snapshot schedule or as part of a global file system. |
Configuring File Versioning in the GUI
This procedure outlines the steps to configure file versioning in the Product Management GUI. By following these steps, you can set a file versioning objective at the share, folder, or file level with customizable retention periods, ensuring data availability and easy recovery from accidental changes or deletions.
-
Enter the cluster IP in your browser to open the Hammerspace GUI.
-
Select Data from the left-side panel and see the Shares tab.
-
Locate the share you want to configure and click the pencil icon for that share in the Applied Objectives column.
 Figure 1. Editing a share
 -
In the popup, click Add Objective, then in the Filter box type “versioning” and press Enter to see the options available for file versioning.
-
Check the box for a version retention period that best suits your requirements and click Apply.
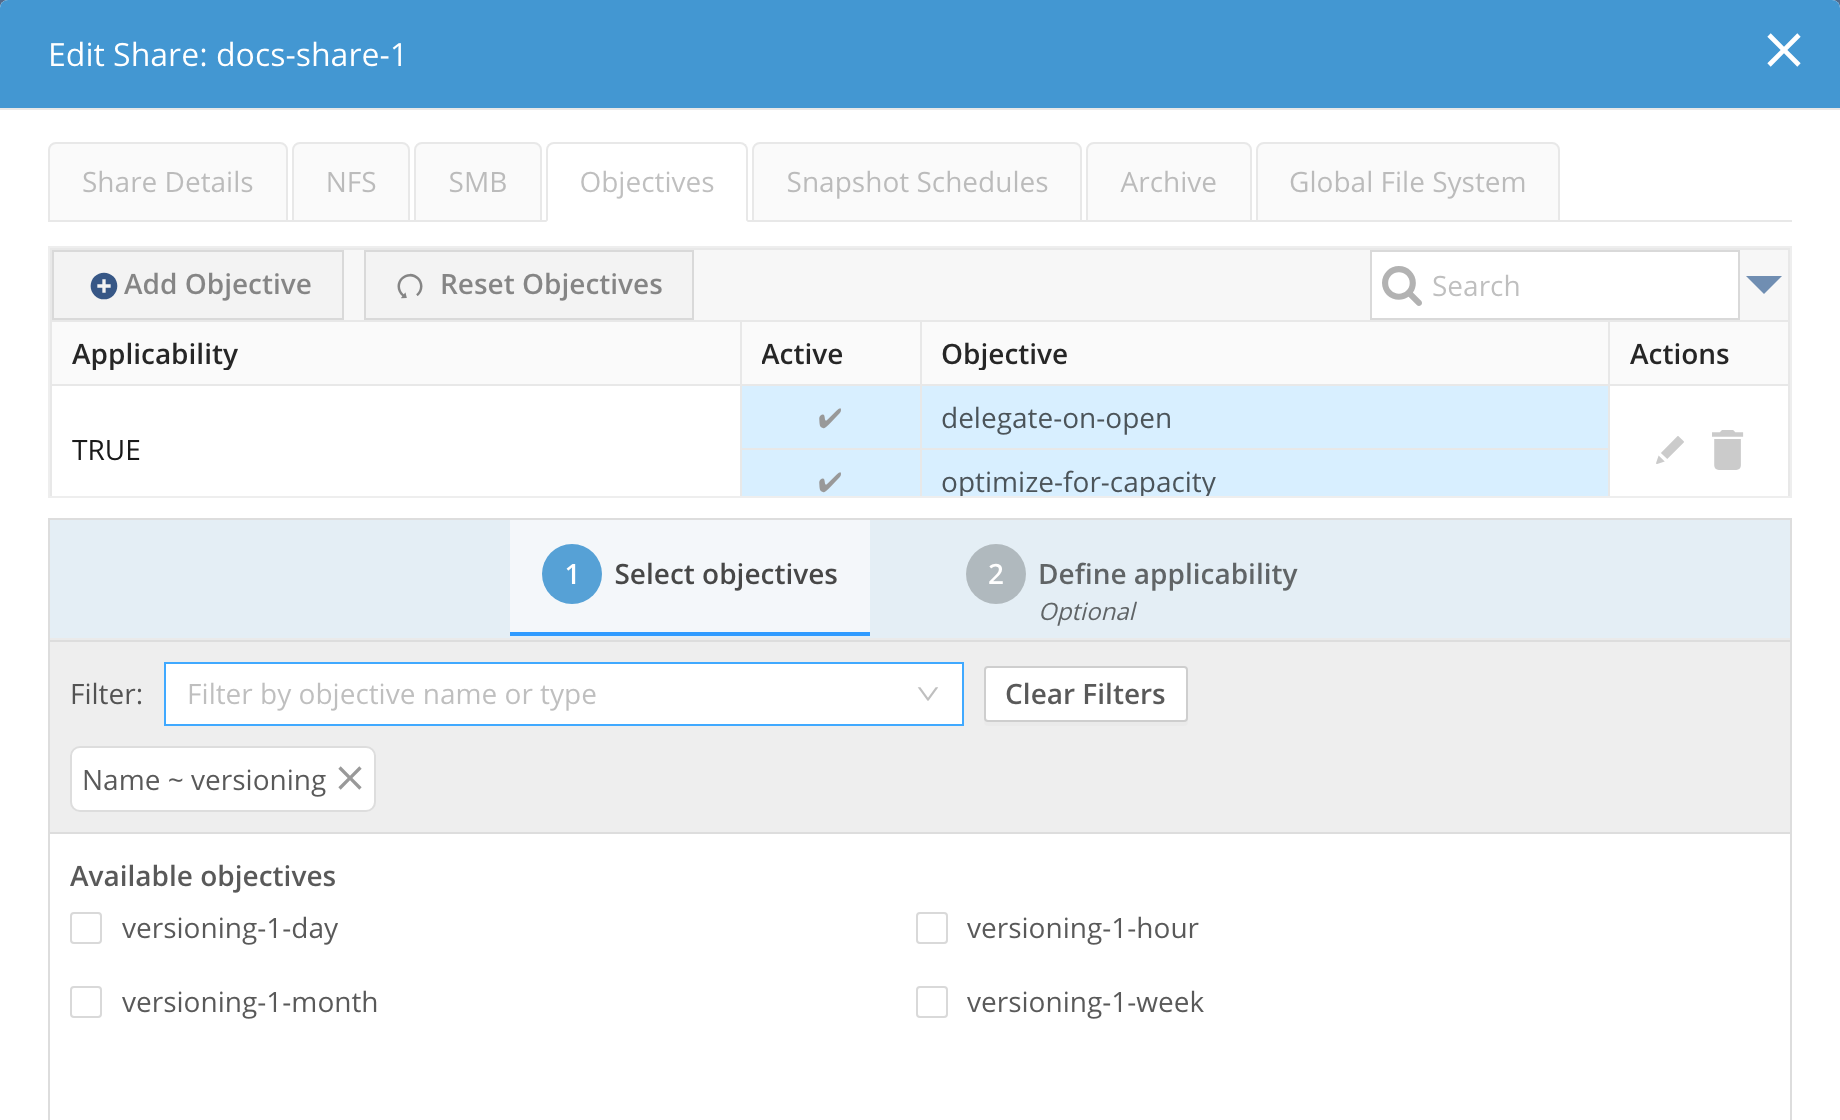 Figure 2. Filtering a set of objectives
 -
You can see the objective is set and active. Click Close to exit.
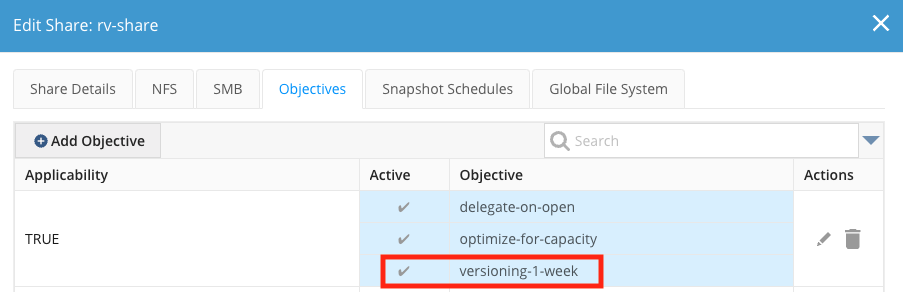 Figure 3. Verifying an objective is active
In the example above, all the directories and files within the share are protected with file versioning and new versions are retained for one week. File versioning protection can be set for a file, folder, or share for the specified duration.
Locating Versioned Files
Find versioned files using the following steps in the GUI:
-
Open the Management GUI and click on Data in the left side panel.
-
In the Shares tab, which is active by default, click on the name of the share with the files you want to view.
-
At the top of the Dashboard page for the share, click the Files tab.
-
In the Files/Directories column, click on the
.snapshotdirectory. -
In the Name column, click on the current directory.
-
View the available directories and files with active backups.
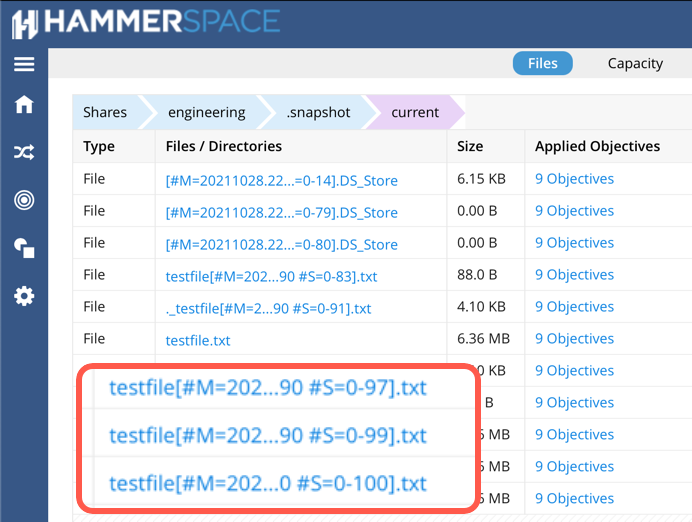 Figure 4. Viewing the list of available backups
Restoring a Previous Version of a File
The Product provides a simple and efficient way to restore files through the GUI. This procedure will guide you through the steps to quickly recover a file from an earlier version.
-
Open the Management GUI and select Data from the left-side panel. By default, you will see information in the Shares tab.
-
Click on the share on which you want to restore a file version. This opens the dashboard for the share.
-
Click Files at the top of the page and navigate to the menu:.snapshot[current] directory.
-
Versioned files are easily and quickly restored by selecting the Restore icon to the right of the version you want to recover, as shown below:
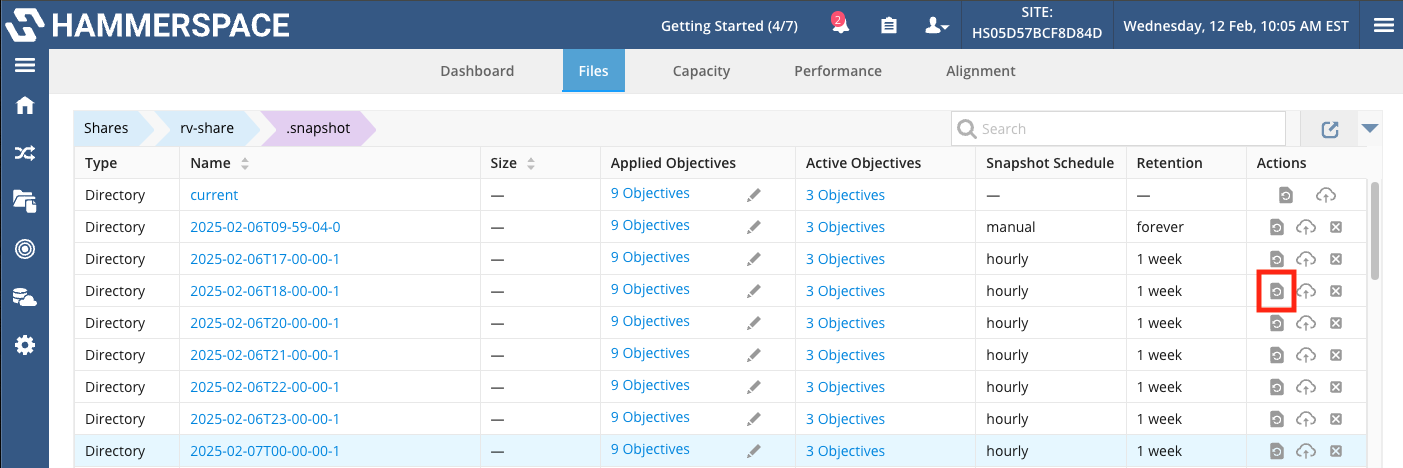 Figure 5. Location of Restore icon
 -
In the Restore Snapshot popup, select to restore files to their original location, or specify a different location within the share. You can also select to overwrite the contents of the restoration target directory or to create a new target directory for the restored data.
-
Click Restore and you will see a notification in the GUI that the restore operation is in progress.
-
You can click the Tasks icon to confirm that the restore operation is successful.
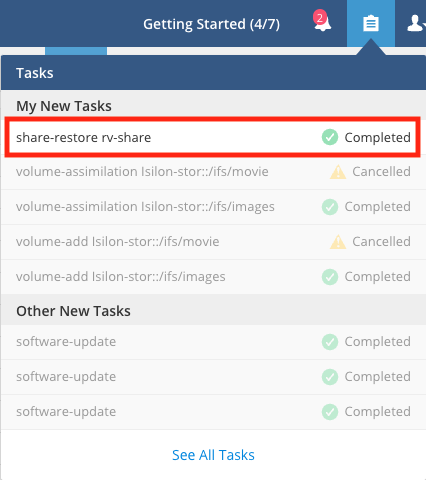 Figure 6. Viewing task-completion status
Protecting Files from Deletion
The Undelete objective enables you to protect file data from deletion for a specified period. Granular options enable protection from accidental or intentional deletion, from a single file up to entire shares. Undelete can also be applied to Multipurpose Internet Mail Extension (MIME) types or through custom metadata tagging and descriptors.
How Undelete Works
When an undelete objective (for example, undelete-1-day) is active and a file is deleted:
-
The deleted file immediately appears in the share’s
.snapshot/currentdirectory, preserving its original path. -
The file remains recoverable there until the objective’s retention period — an hour, a day, a week, or a month — has elapsed.
-
After the retention period expires, the file is eligible for cleanup. The storage it occupies is freed when the system next processes the share — through a snapshot delete or, on global file system shares, through replication.
|
The expiration of an undelete retention period by itself does not reclaim space. For the system to delete expired undelete files, the share must be configured with a snapshot schedule that includes a retention (delete) policy, or be part of a global file system. If you enable an undelete objective on a share that has neither, files that pass their retention period continue to consume storage capacity indefinitely. When you apply an undelete objective to a share, also configure a snapshot schedule with a retention policy on that share. See Snapshots. |
| Undelete files captured inside a share snapshot remain available for as long as the snapshot is retained, even past the undelete retention period. |
|
Deleting a share removes all data in that share, including files protected by an undelete objective and files protected by WORM. Share deletion does not honor any undelete retention or WORM expiration policies. Before deleting a share, confirm it contains no data you need to keep. |
Configuring Undelete Using the GUI
Complete the following steps to enable undelete protection in the GUI. By configuring undelete protection, you can safeguard important data against accidental deletion by retaining deleted files for a specified duration—ranging from an hour to a month—allowing for quick and easy recovery when needed.
-
Open the GUI and select Data from the left side panel. By default you will see information in the Shares tab.
-
Click on the share from which you want to restore a file version. This opens the dashboard for the share.
-
Click Files at the top of the page.
-
Locate the file or directory you want to protect with undelete and click the pencil icon in the Applied Objectives column, as shown below.
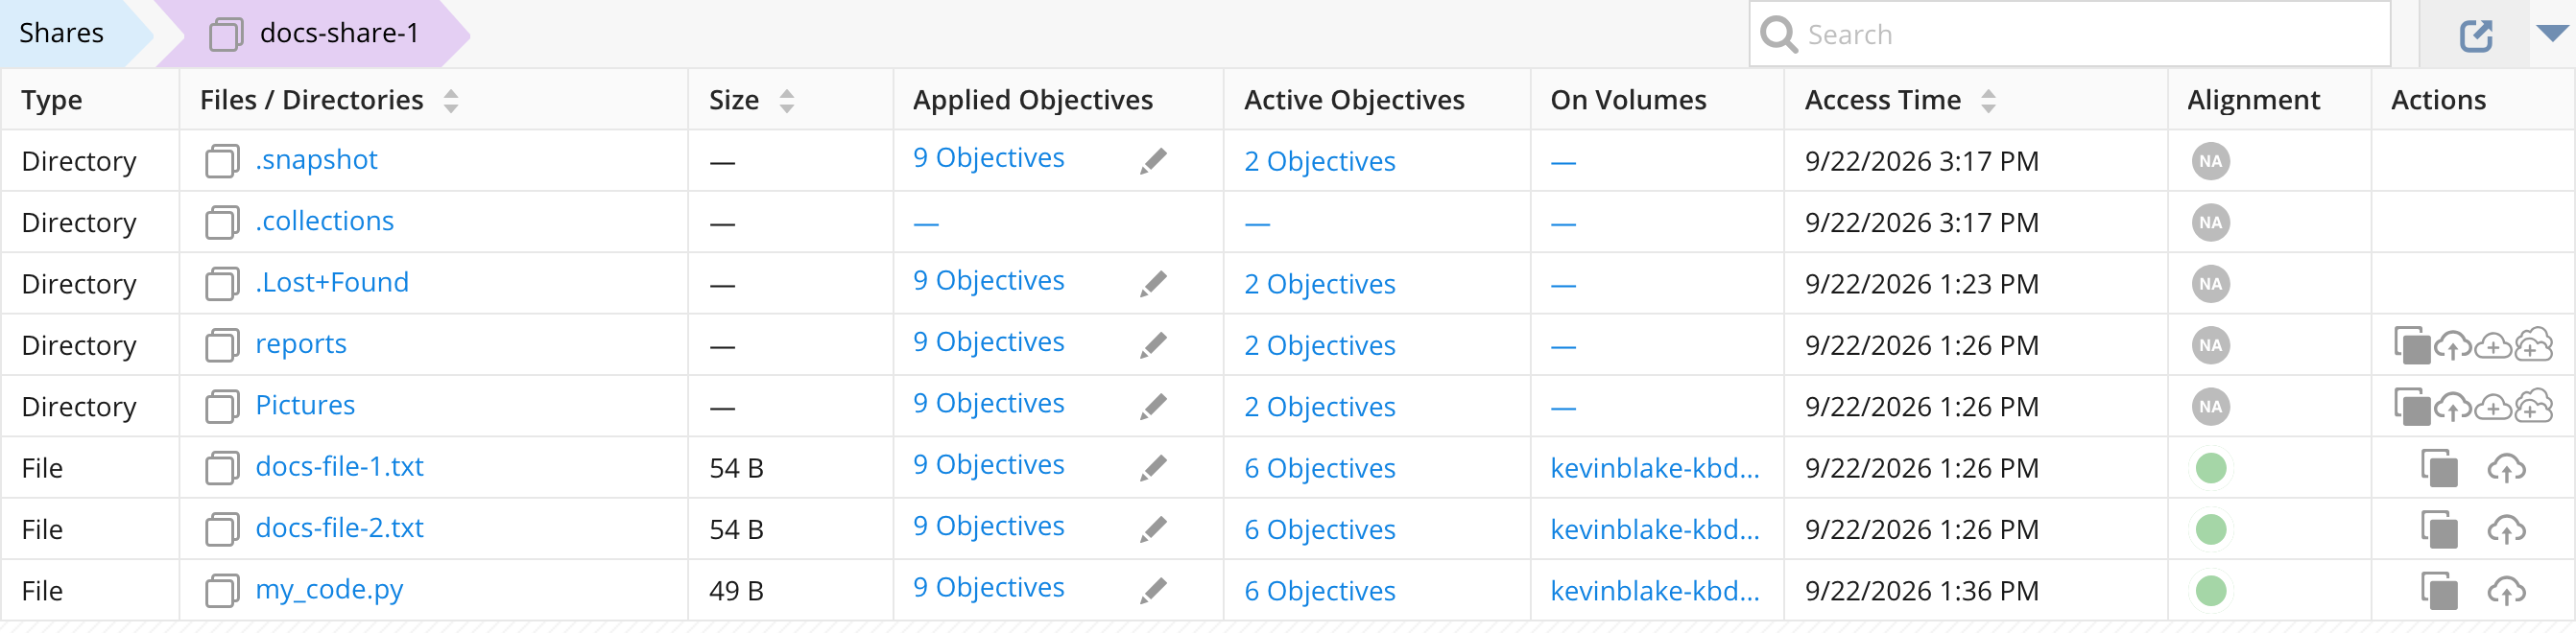 Figure 7. Protecting a directory with undelete
 -
In the popup, click Add Objective, then in the Filter box type “undelete” and press Enter to see the options available.
-
Check the box for a undelete duration that best suits your requirements and click Apply.
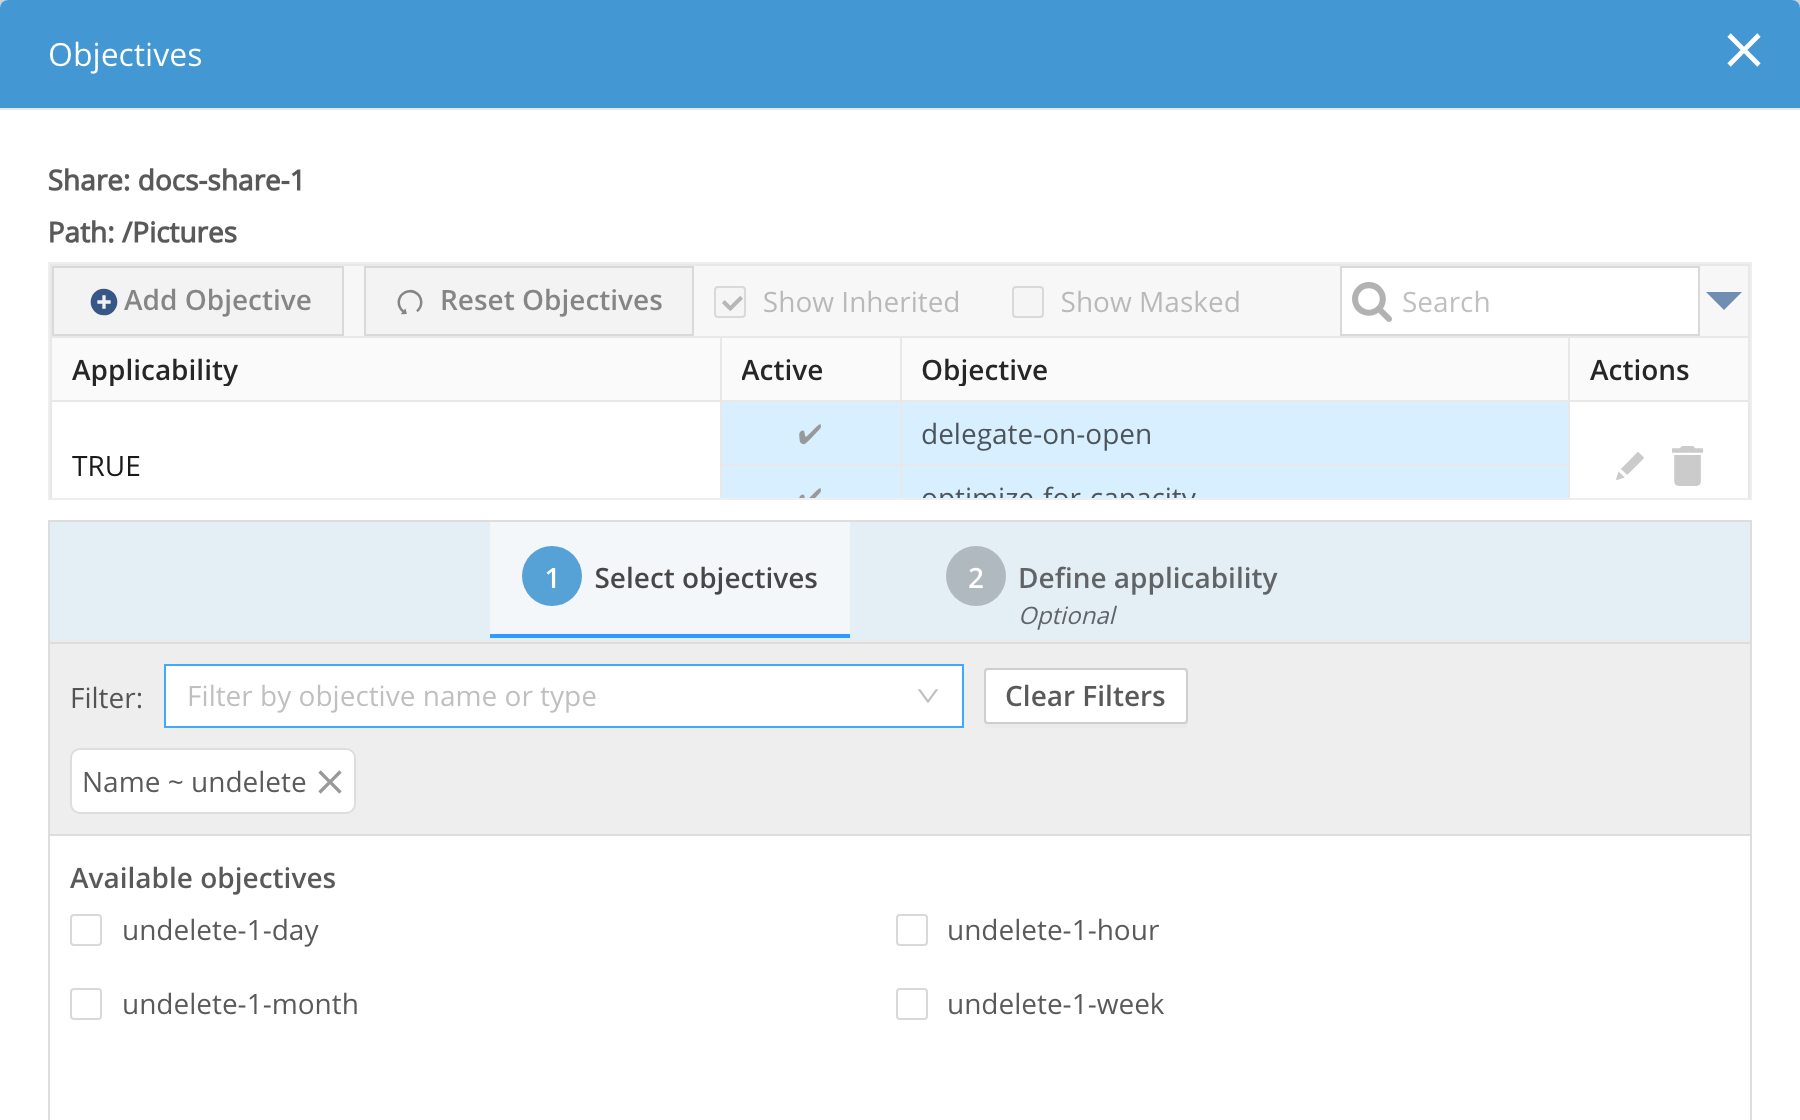 Figure 8. Selecting the term for undelete protection
 -
You can now see the objective is set and active. Click Close to exit.
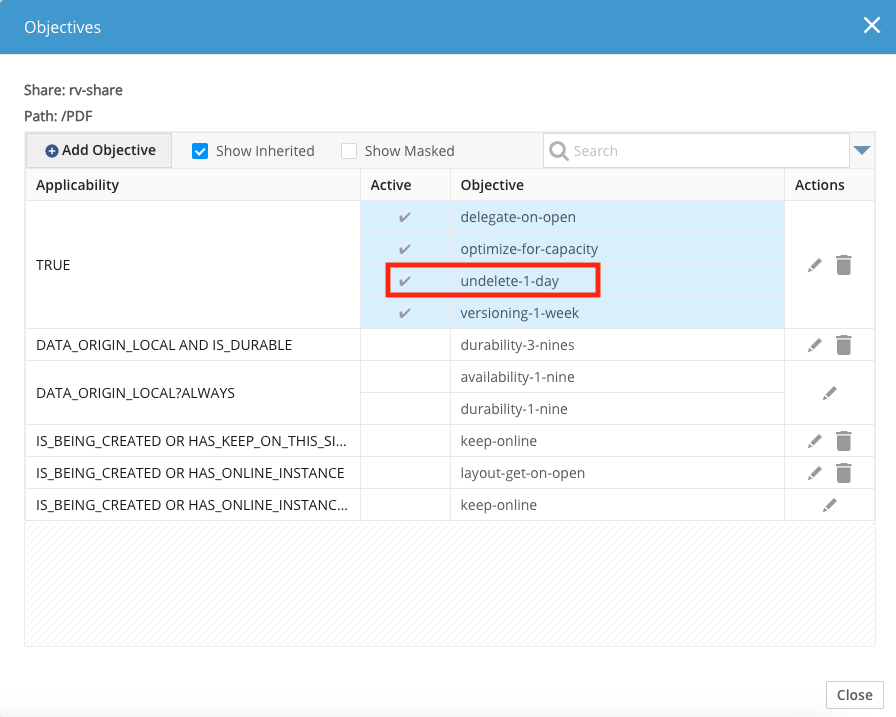 Figure 9. Verifying the objective is active
Configuring Undelete Using the CLI
Deleted share data can be recovered instantly from the <share-name>/.snapshot/current directory in a share. Files protected with undelete will have the following format:
<filename>[D=<YYYYMMDD.HHMMSS.SSSSS>].<suffix>This procedure explains how to configure undelete protection using the Admin CLI. By following these steps, administrators can set undelete objectives for specific shares, folders, and files, ensuring that deleted files are retained for a designated period—ranging from an hour to a month—providing an added layer of data protection and recovery.
-
Log into the Admin CLI via SSH and enter the associated password:
Log in as adminssh admin@<hostname|ip address> -
Configure the undelete objective using the following syntax:
Configure undeleteshare-objective-add --name <share name> --objective undelete-<duration> -
You can set the duration to an hour, a day, a week, or a month. For example, setting an undelete objective for the engineering share for a week would look this way:
Set undelete durationshare-objective-add --name engineering --objective undelete-1-week
Recovering Deleted File Using the GUI
This procedure guides you through the process of restoring files protected by the undelete feature in the GUI. By following these steps, you can locate and recover deleted files from the .snapshot/current directory, ensuring quick restoration to their original location.
-
Open the GUI and select Data from the left side panel. By default, you will see information in the Shares tab.
-
Click the share where you want to restore a file version. This opens the dashboard for the share.
-
Click Files at the top of the page and navigate to the
.snapshot/currentdirectory.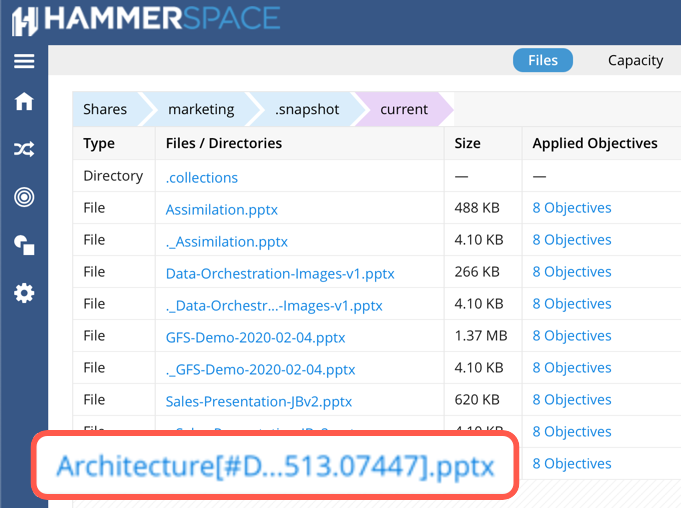 Figure 10. Locating a protected file
 -
Locate the undelete-protected file. Notice that a timestamp has been inserted between the filename and its suffix. Mousing over the filename will reveal the entire string, which in this example is
Architecture[#D=20211030.1513.07447].pptx.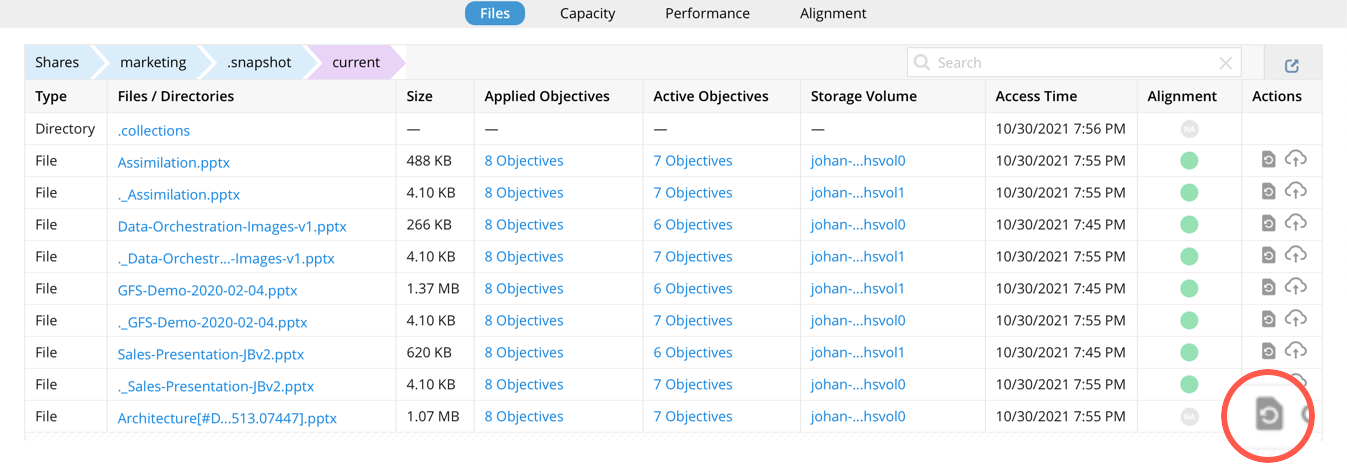 Figure 11. Restoring the file
 -
Click on the Restore icon in the Actions column to begin the file recovery.
-
When the pop-up window opens, click the Restore button to finalize the recovery of the file to its original location.
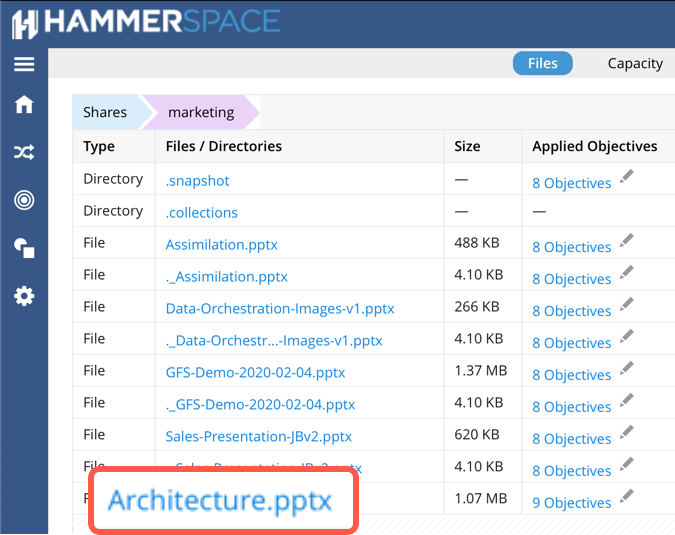 Figure 12. Locating the recovered file
You can navigate back to the original location to find the recovered file.