Managing Shares
A share in Hammerspace is similar in concept to an export in a traditional NAS filer in that NFS and/or SMB clients with permission can mount and access the data within the share.
The Product supports multiple shares, making it easy to manage data and securely isolate data between clients and applications.
The default size of a share is limited only by the capacity of the file-backed storage. Shares automatically grow as new file storage capacity is added. Shares can also be set to a logical size that is unrelated to the physical space in the system.
The file-backing storage is a common resource pool across all shares unless objectives have been applied to control where data is located.
Administrators can apply objectives to shares, directories, and/or files within a share to ensure that data in the share is stored on storage that meets its objectives.
Creating a Share
Complete the following steps to create a share:
-
Select Data from the left side panel. By default you will see the Shares tab.
-
On the Shares tab, click Create Share.
-
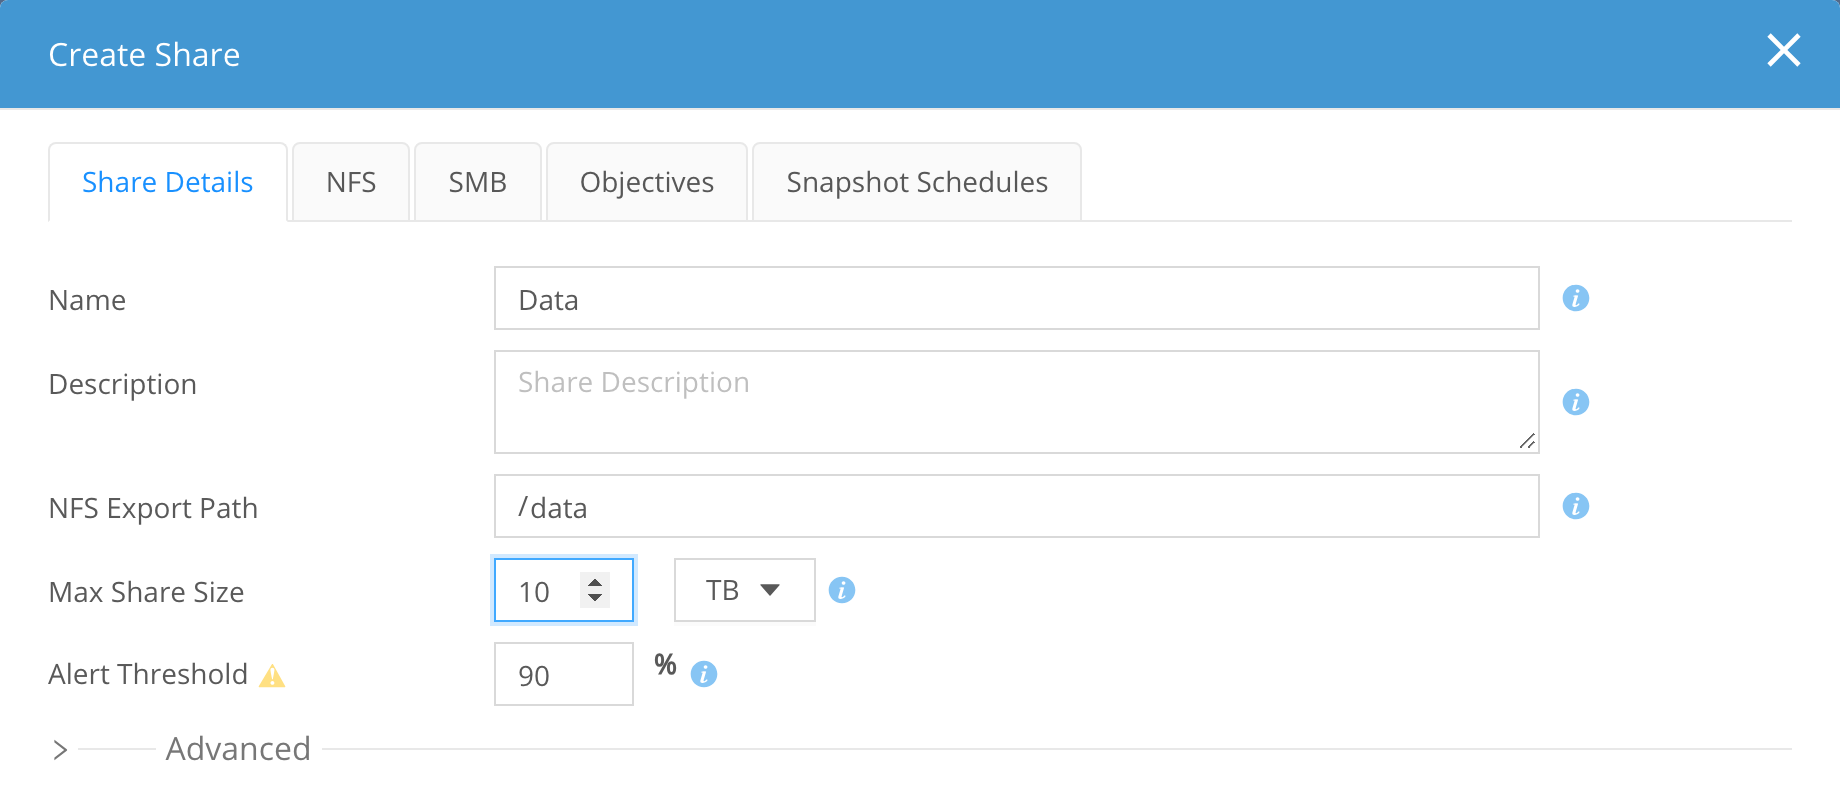
On the Share Details tab, enter the following information about the share:
-
Name that will identify the share for SMB clients. The name represents the SMB share name, which is case insensitive. The name is also used to reference and manage the share within Hammerspace GUI, CLI, and REST API.
-
Description (Optional) free text describing the share.
-
NFS Export Path for the share in the namespace for use with NFS. The path is filled in from the name as you type it (for example, a share named
Datagets the export path/Data); edit it if you want a different path. If the path does not already exist, it is automatically created. -
Max Share Size (Optional) maximum size for the share. This is the capacity limit that an NFS or SMB client would see when using the share. This limit cannot be exceeded. The share size can be increased or decreased later by editing the share. The size cannot be decreased below the actual amount of data stored in the share.
The default share size is the total physical capacity across file-based storage volumes and does not include cloud/object volume capacity. The setting for max share size is not constrained by available capacity and can be set to the desired size. -
Alert Threshold (Optional) triggers warning events for share usage when the specified percentage of max share size is reached. Note that this field is only visible when a Max Share Size is specified.
The Advanced section, collapsed by default, holds additional settings that are not required to create a share.
-
-
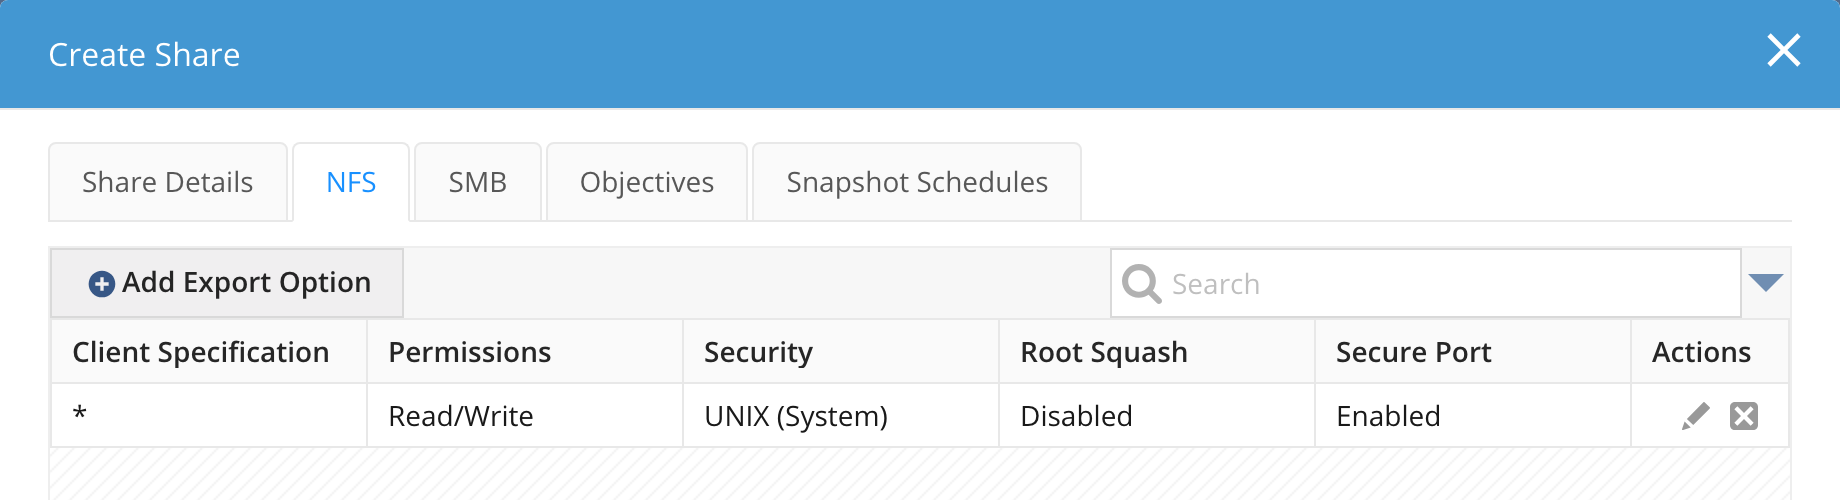
(Optional) To control which NFS clients can access the share, select the NFS tab. The tab is unavailable until a name and NFS export path have been entered. By default the share has one export option that grants Read/Write access to any client (
*). Click + Add Export Option to add an export option, and enter the following:-
Client Specification: the clients the option applies to, as an IP address, a CIDR subnet, a hostname, a subdomain, or a netgroup (
@netgroup). -
Permissions: Read-Only or Read/Write.
-
Security: the NFS security flavor,
UNIX (System),Krb5,Krb5i, orKrb5p. -
Root Squash: select the checkbox to enable root squash.
Root squash reduces the access rights of remote root users (superusers). Enabling it blocks remote root users from certain operations that are determined by which client they are using. -
Secure Port: whether clients must connect from a privileged (secure) port.
Repeat for each additional client specification. These settings only affect NFS access.
-
-
Click Create. Shares are created as a background operation. Once the operation is complete, the share will appear in the list on the Shares tab.

SMB aliases create additional SMB shares on the system from an existing share. See Setting Aliases for SMB for details.
The Objectives tab is empty until after the share has been created.
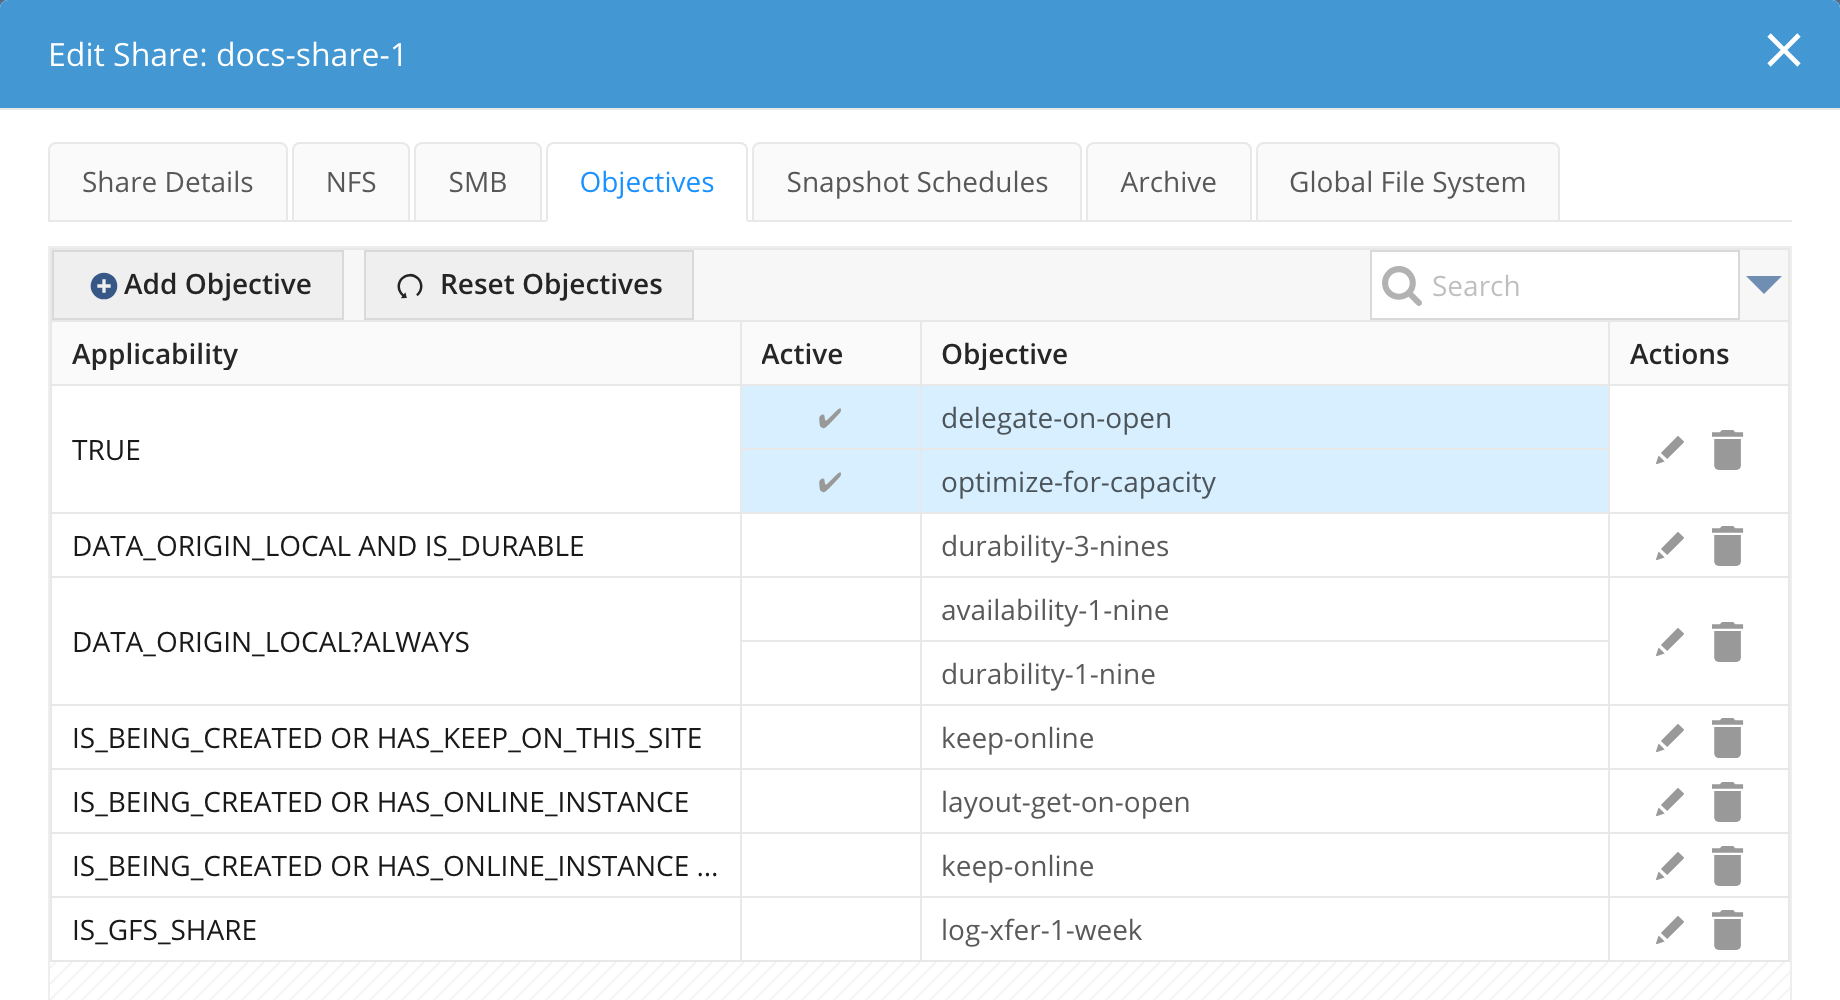
Once a share is created, the default objectives are applied. The default objectives do not need to be modified. Instead, it is a best practice to create and add new objectives using Add Objective.
Deleting a Share
You can delete a share and its contents using the Admin CLI or the Management GUI.
| When a share is deleted, all the data for that share is also deleted. |
-
You can only delete a share with a confirmation prompt.
-
By default, the share delete will not be executed for 24 hours.
-
If you have a share snapshot schedule, the share delete is not allowed.
Using the Admin CLI
Command:
share-delete --helpExpected output:
Usage: share-delete [options]
Delete a share

  Options:
    --async         Causes the command to be executed asynchronously. A
                    reference task identifier will be returned
    --delay         Postpone share space reclaim for period of time (for example
                    24h). Mutually exclusive with "--now"
    --delete-path   Delete the share path directory when the share is purged.
                    Directory must be empty in order to be deleted
    --help          Display this help and exit
  * --id            The ID of the share to delete. Required unless any of the
                    following is specified:
                    --internal-id, --name
  * --internal-id   The internal ID of the share to delete. Required unless any
                    of the following is specified:
                    --name, --id
  * --name          The name of the share to delete. Required unless any of the
                    following is specified:
                    --internal-id, --id
    --no-timeout    When running a task-based command synchronously, monitor for
                    task completion indefinitely
    --now           Share space will be reclaimed immediately. Mutually
                    exclusive with "--delay"
Changing the Default File Placement Behavior
By default, directories and files inherit the system’s default objectives, which automatically distribute files across all available file-based storage volumes, such as NAS exports and DSX volumes. This behavior can be easily modified by selecting additional objectives for the share.
| An objective can be applied to a share, directory, or file. |
To apply additional objectives to a share, follow these steps:
-
Select Shares from the left side panel.
-
Locate the share either by scrolling through the list or by using the search function.
-
In the Applied Objectives column, click the edit (🖉) icon. Alternatively, click the Edit pen for the share and navigate to the Objectives tab.
-
In the Objectives tab, click Add Objective.
It is recommended to create a new objective rather than modifying predefined objectives. -
Select the objective(s) you wish to add to the share and then click the Define Applicability tab to further refine the objective.
-
The system will automatically begin realigning data based on the additional objective(s) you selected.