Adding an NVMe-oF Enclosure and Subsystems
Add an NVMe-oF enclosure to a DSX node using the Management GUI.
-
Log in to the Management GUI and open the Infrastructure page.
-
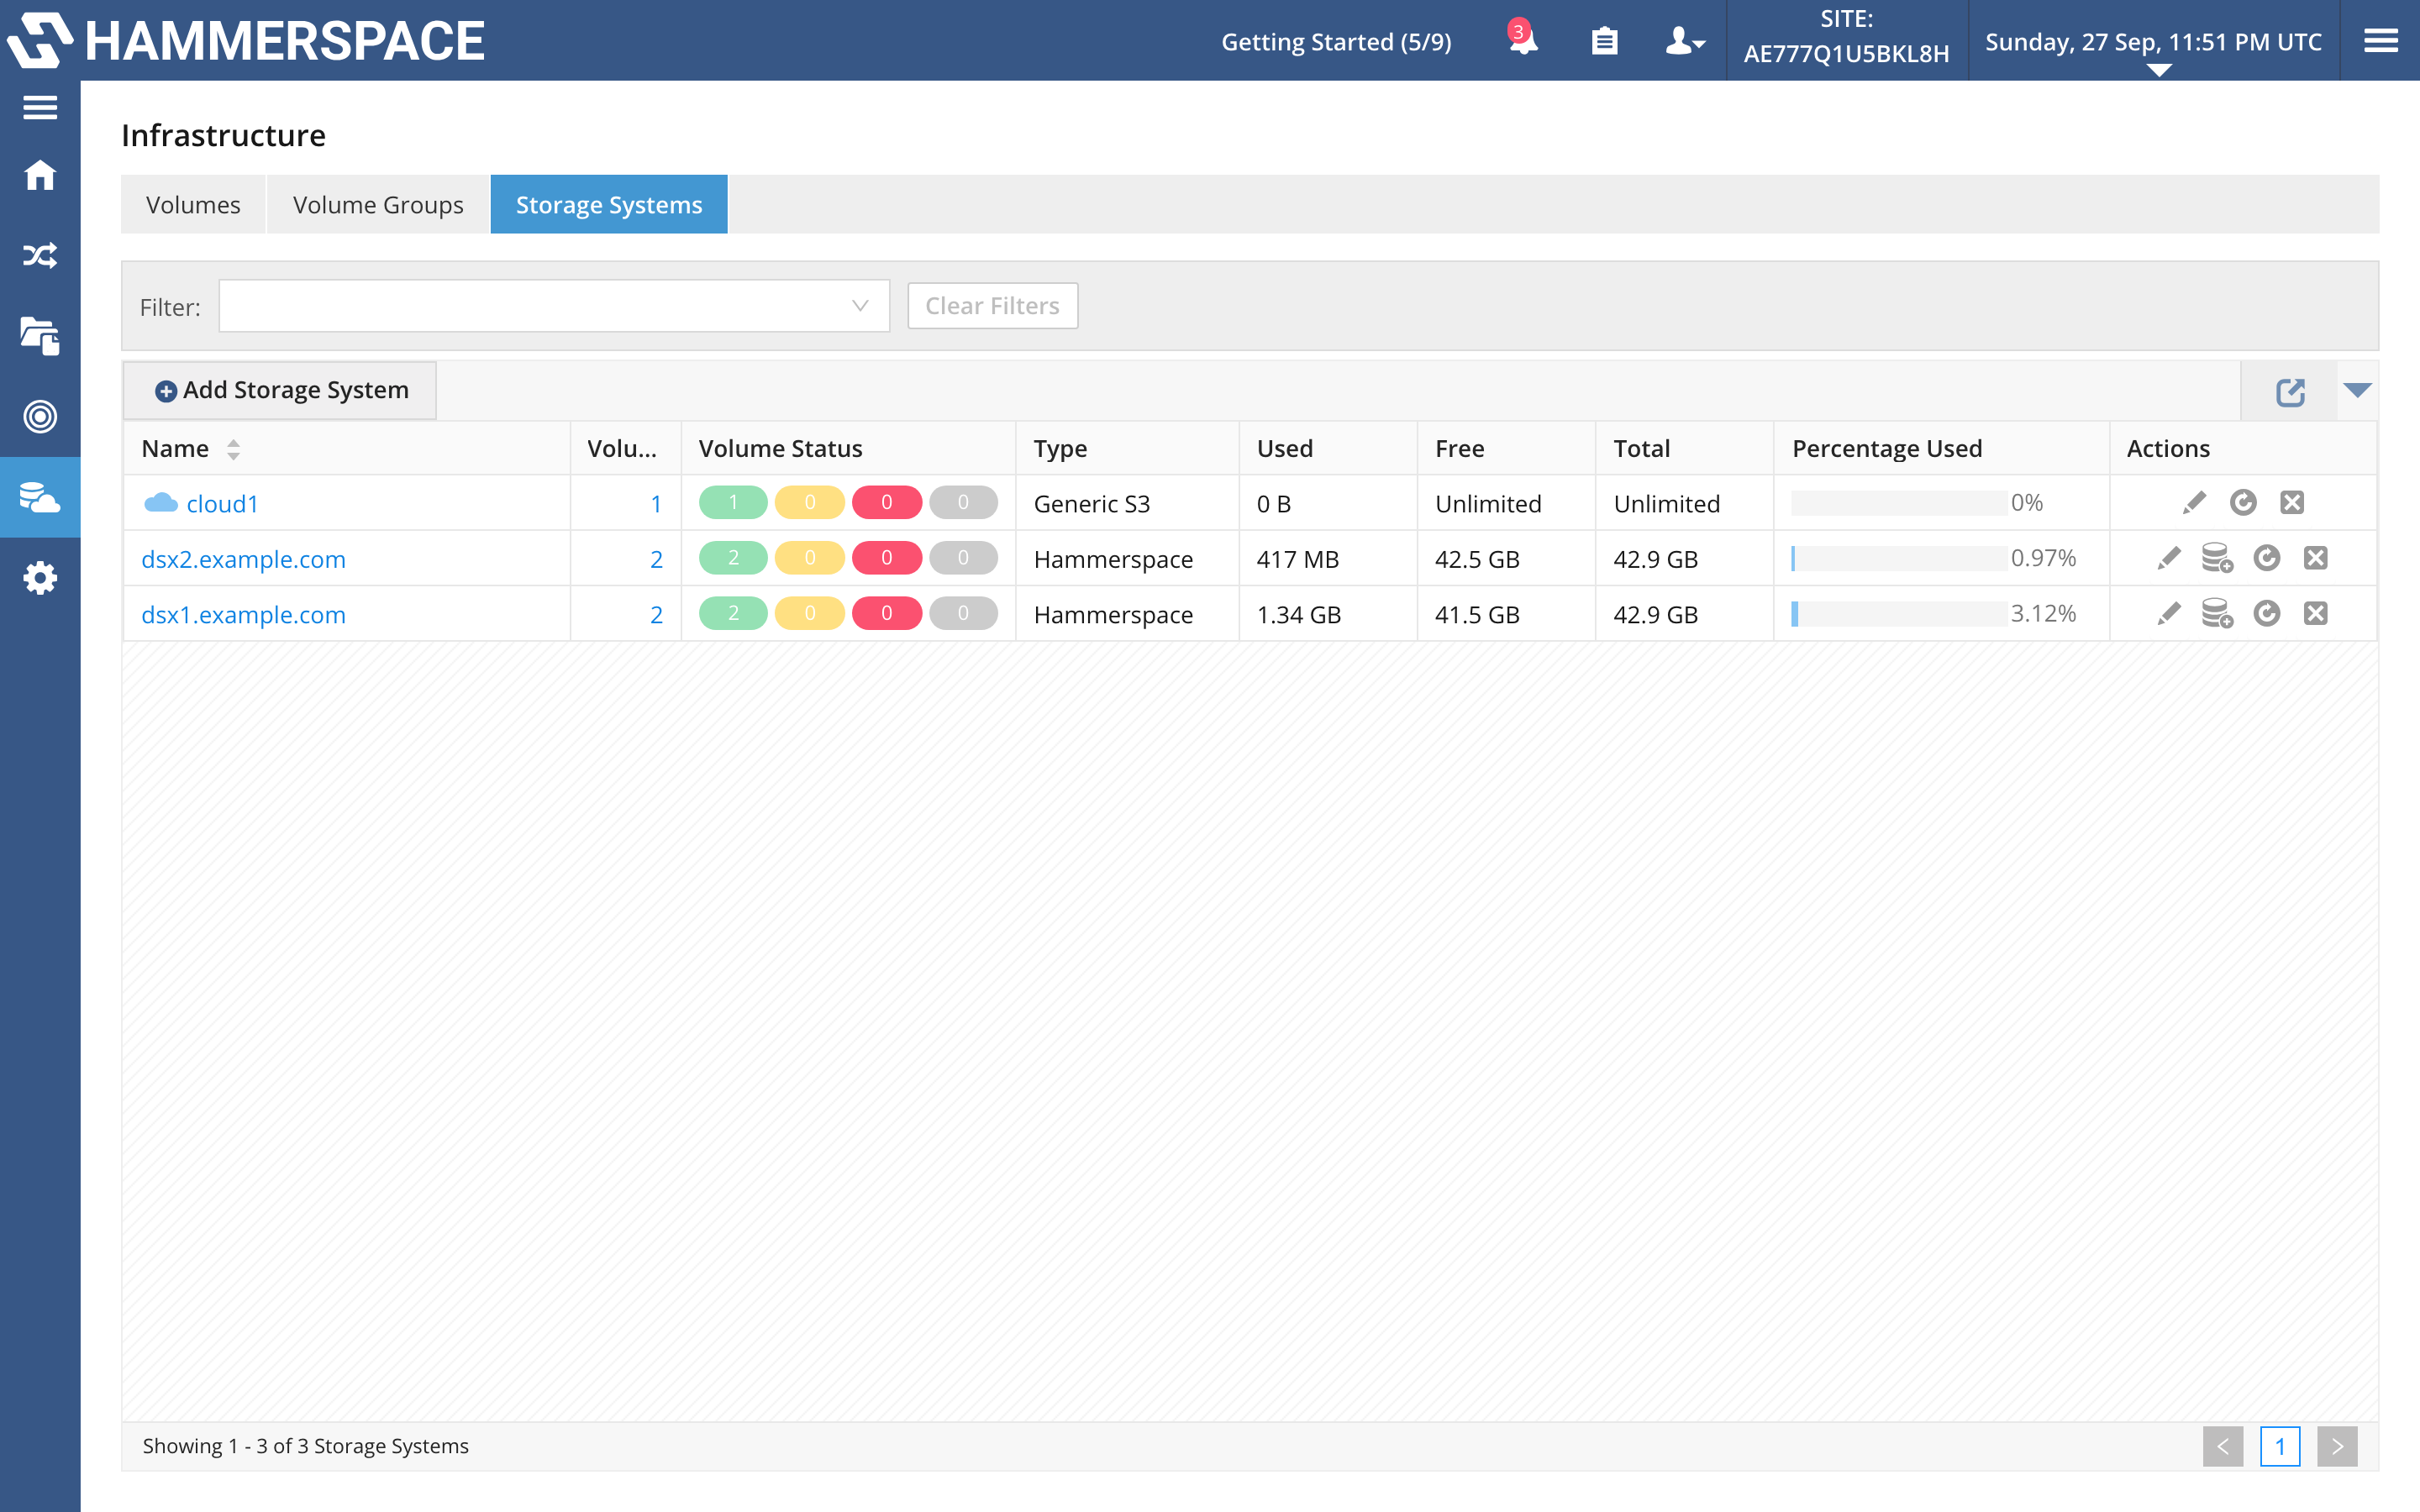
Click the Storage Systems tab and identify the DSX node to which you will connect the NVMe device.
-
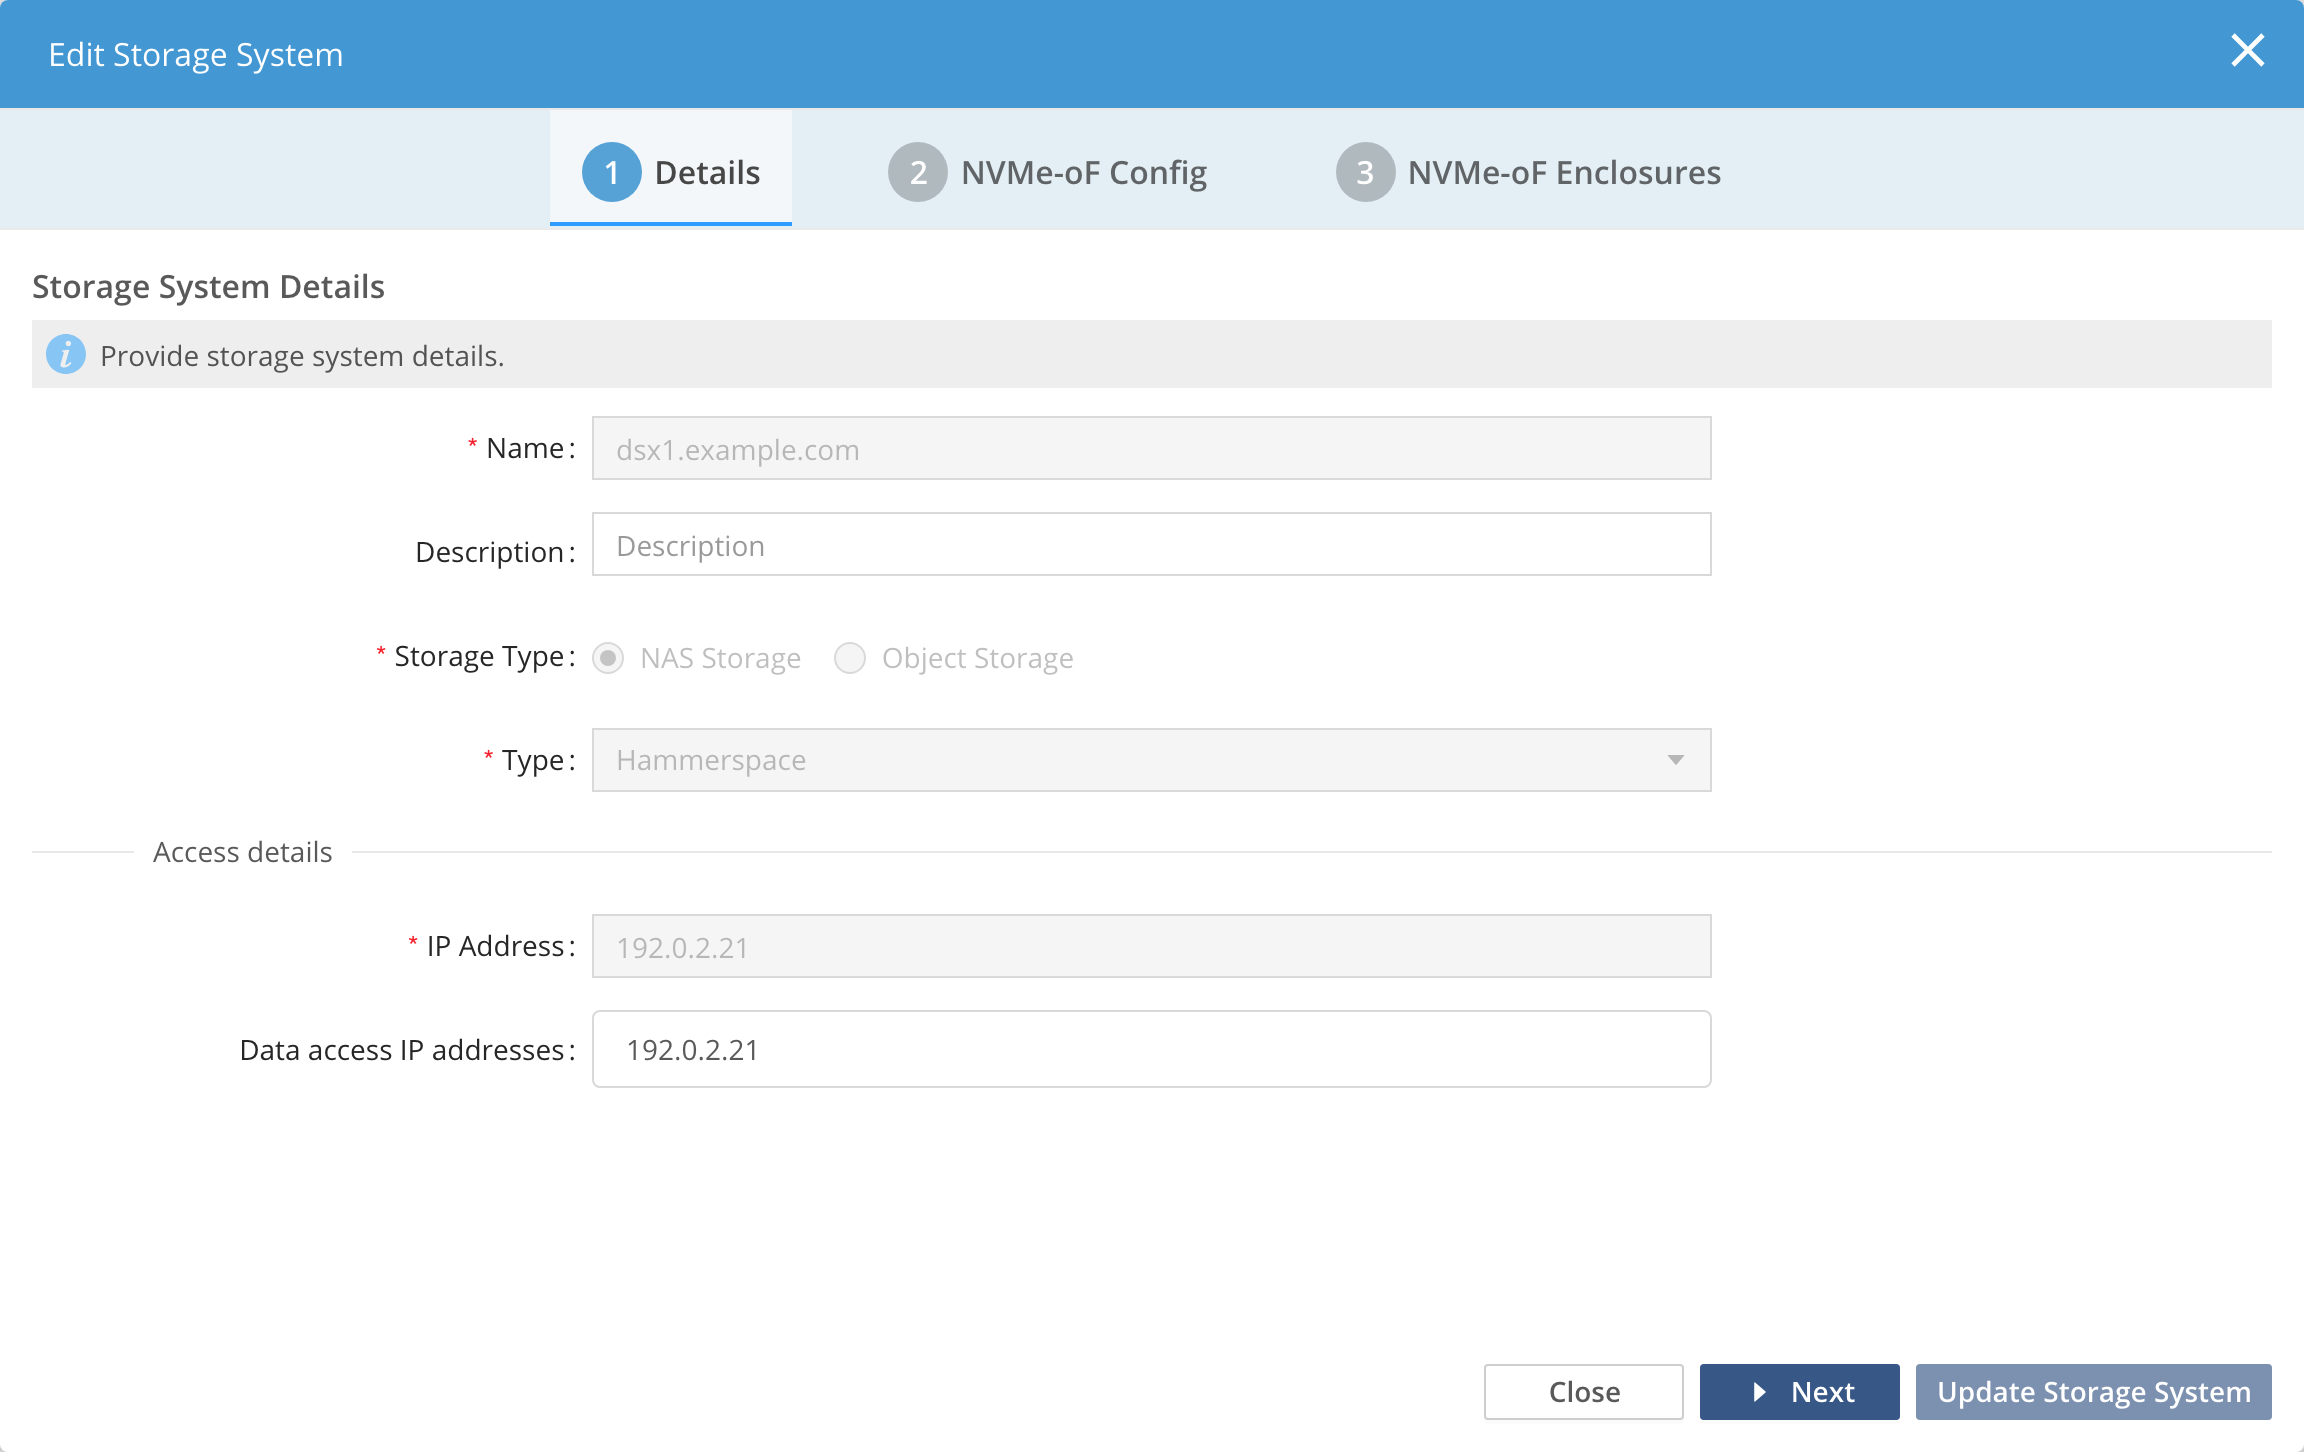
In the Actions column, click the pencil icon to edit the node. The Edit Storage System wizard opens with the Details tab visible. Note that the information in the Details tab was configured during the DSX node installation and cannot be changed here.
-
Click Next.
-
On the NVMe-oF Config tab, the Host NQN field shows the DSX node’s host NQN, which you add to the array’s host access configuration. The connection settings on this tab (Queue depth, Controller lost timeout, Multipath IO policy, and IO Queue pairs) apply to every NVMe-oF enclosure on this DSX node. For a brief explanation of each setting, click its information icon. Click Next to continue.
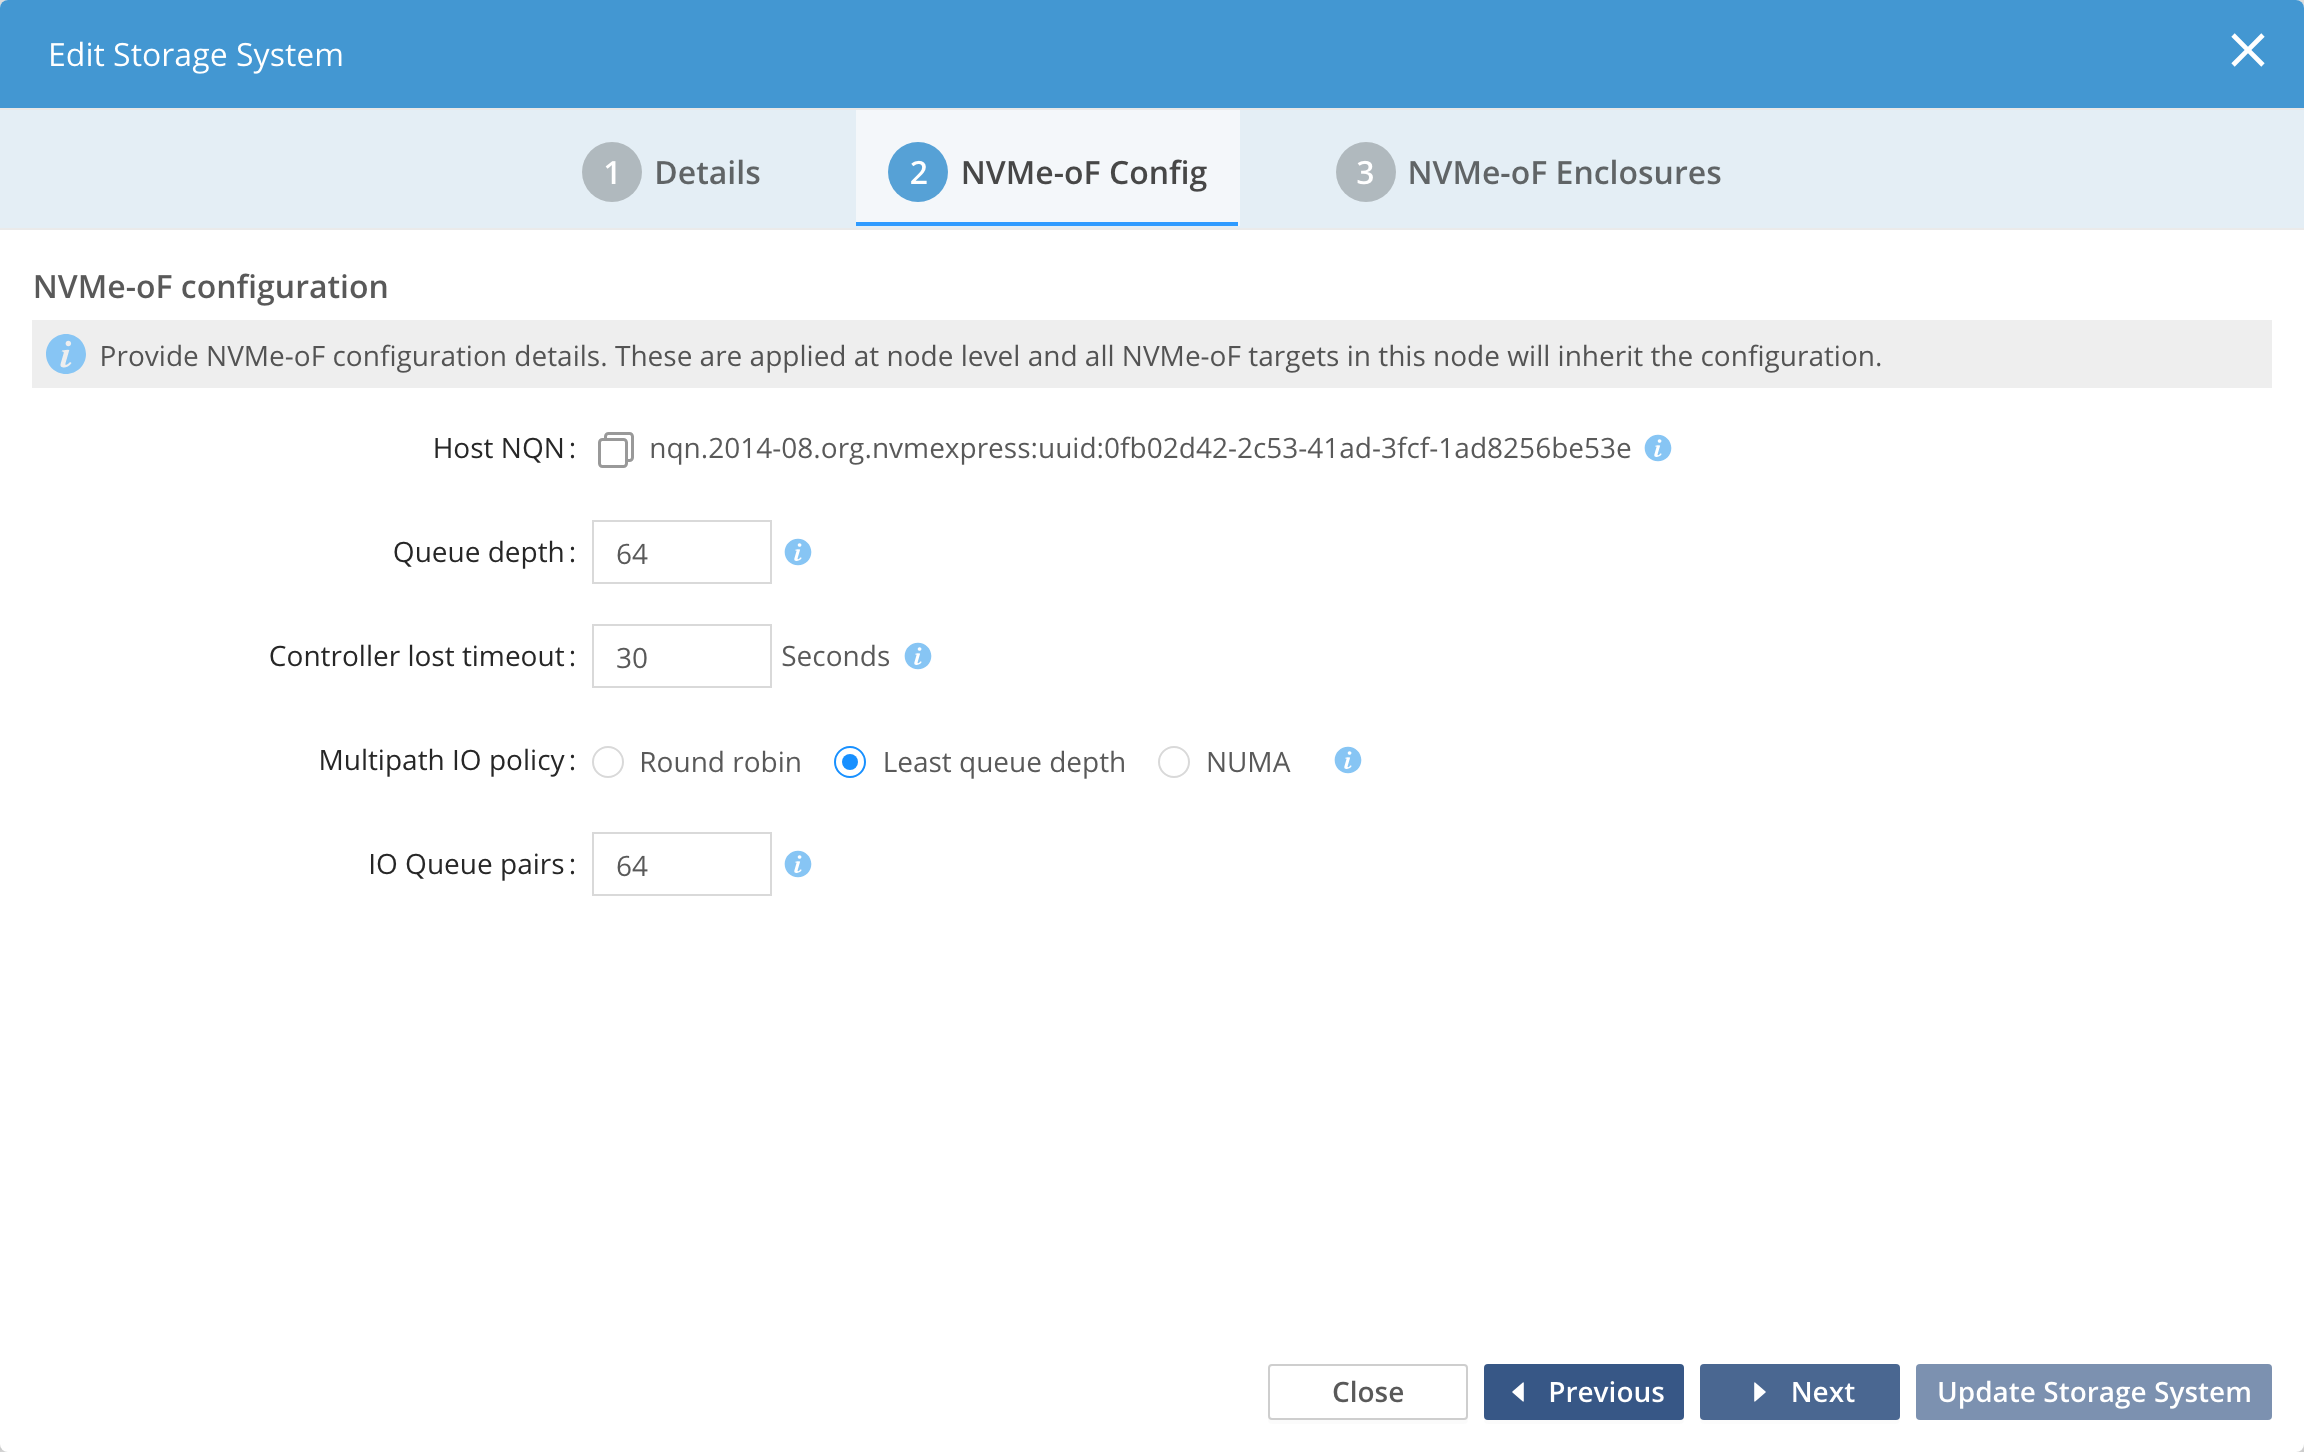
Before the node has an enclosure, the tab suggests a queue depth of 24. An enclosure added from the Admin CLI uses the product default of 64. Once the node has an enclosure, the tab shows that enclosure’s values. -
In the NVMe-oF Enclosures tab, click the Add NVMe-oF Enclosure button to add details for an enclosure. Mandatory fields are marked with a red asterisk. You can add multiple enclosures to the DSX; however, each must be added separately using the Add NVMe-oF Enclosure button.
-
Provide a name for the enclosure.
-
Optionally, enter a description.
-
In Target details, enter the host name or IP address of the array’s discovery target. The port defaults to 8009 and the transport to TCP.
-
Add every address that the array presents the subsystems on by clicking the + button for each one. If you add more than one, the Multipath box is selected automatically; you cannot select it yourself. Add all of the addresses now: an address added to the enclosure later does not become a path to subsystems that are already connected.
-
When you add the required details, the cluster searches for subsystems on the target. The search takes about 2½ minutes; the Subsystems panel lists the subsystems when it finishes. Click Refresh in the Subsystems panel to search again.
-
Select the check box next to each subsystem to connect, or the Subsystems check box to select them all. No subsystem is selected until you select it.
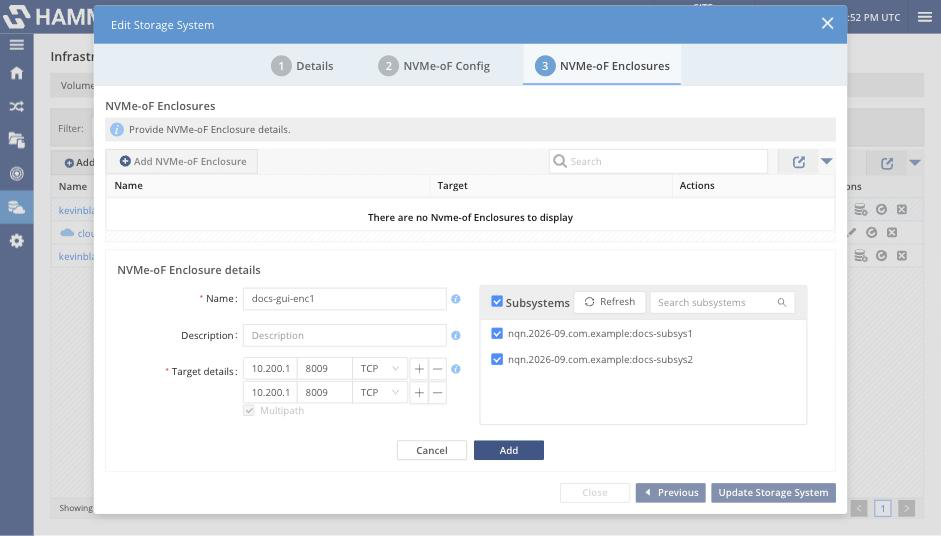 Figure 1. An enclosure with two target addresses and two subsystems selected
-
-
-
After configuring the enclosure details and which subsystems to connect to, click Add. The enclosure appears in the table; +1 after the target means that the enclosure has one more target address.
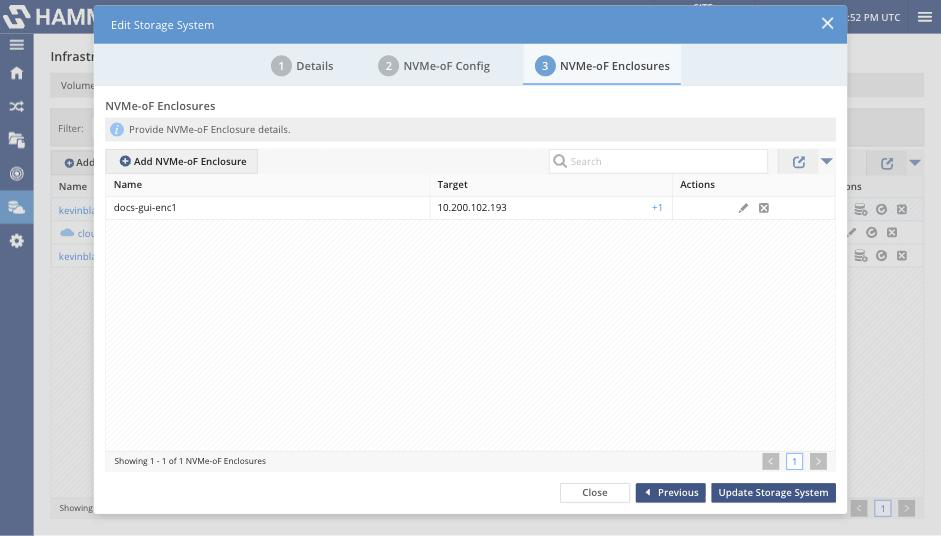 Figure 2. The new enclosure in the NVMe-oF Enclosures table
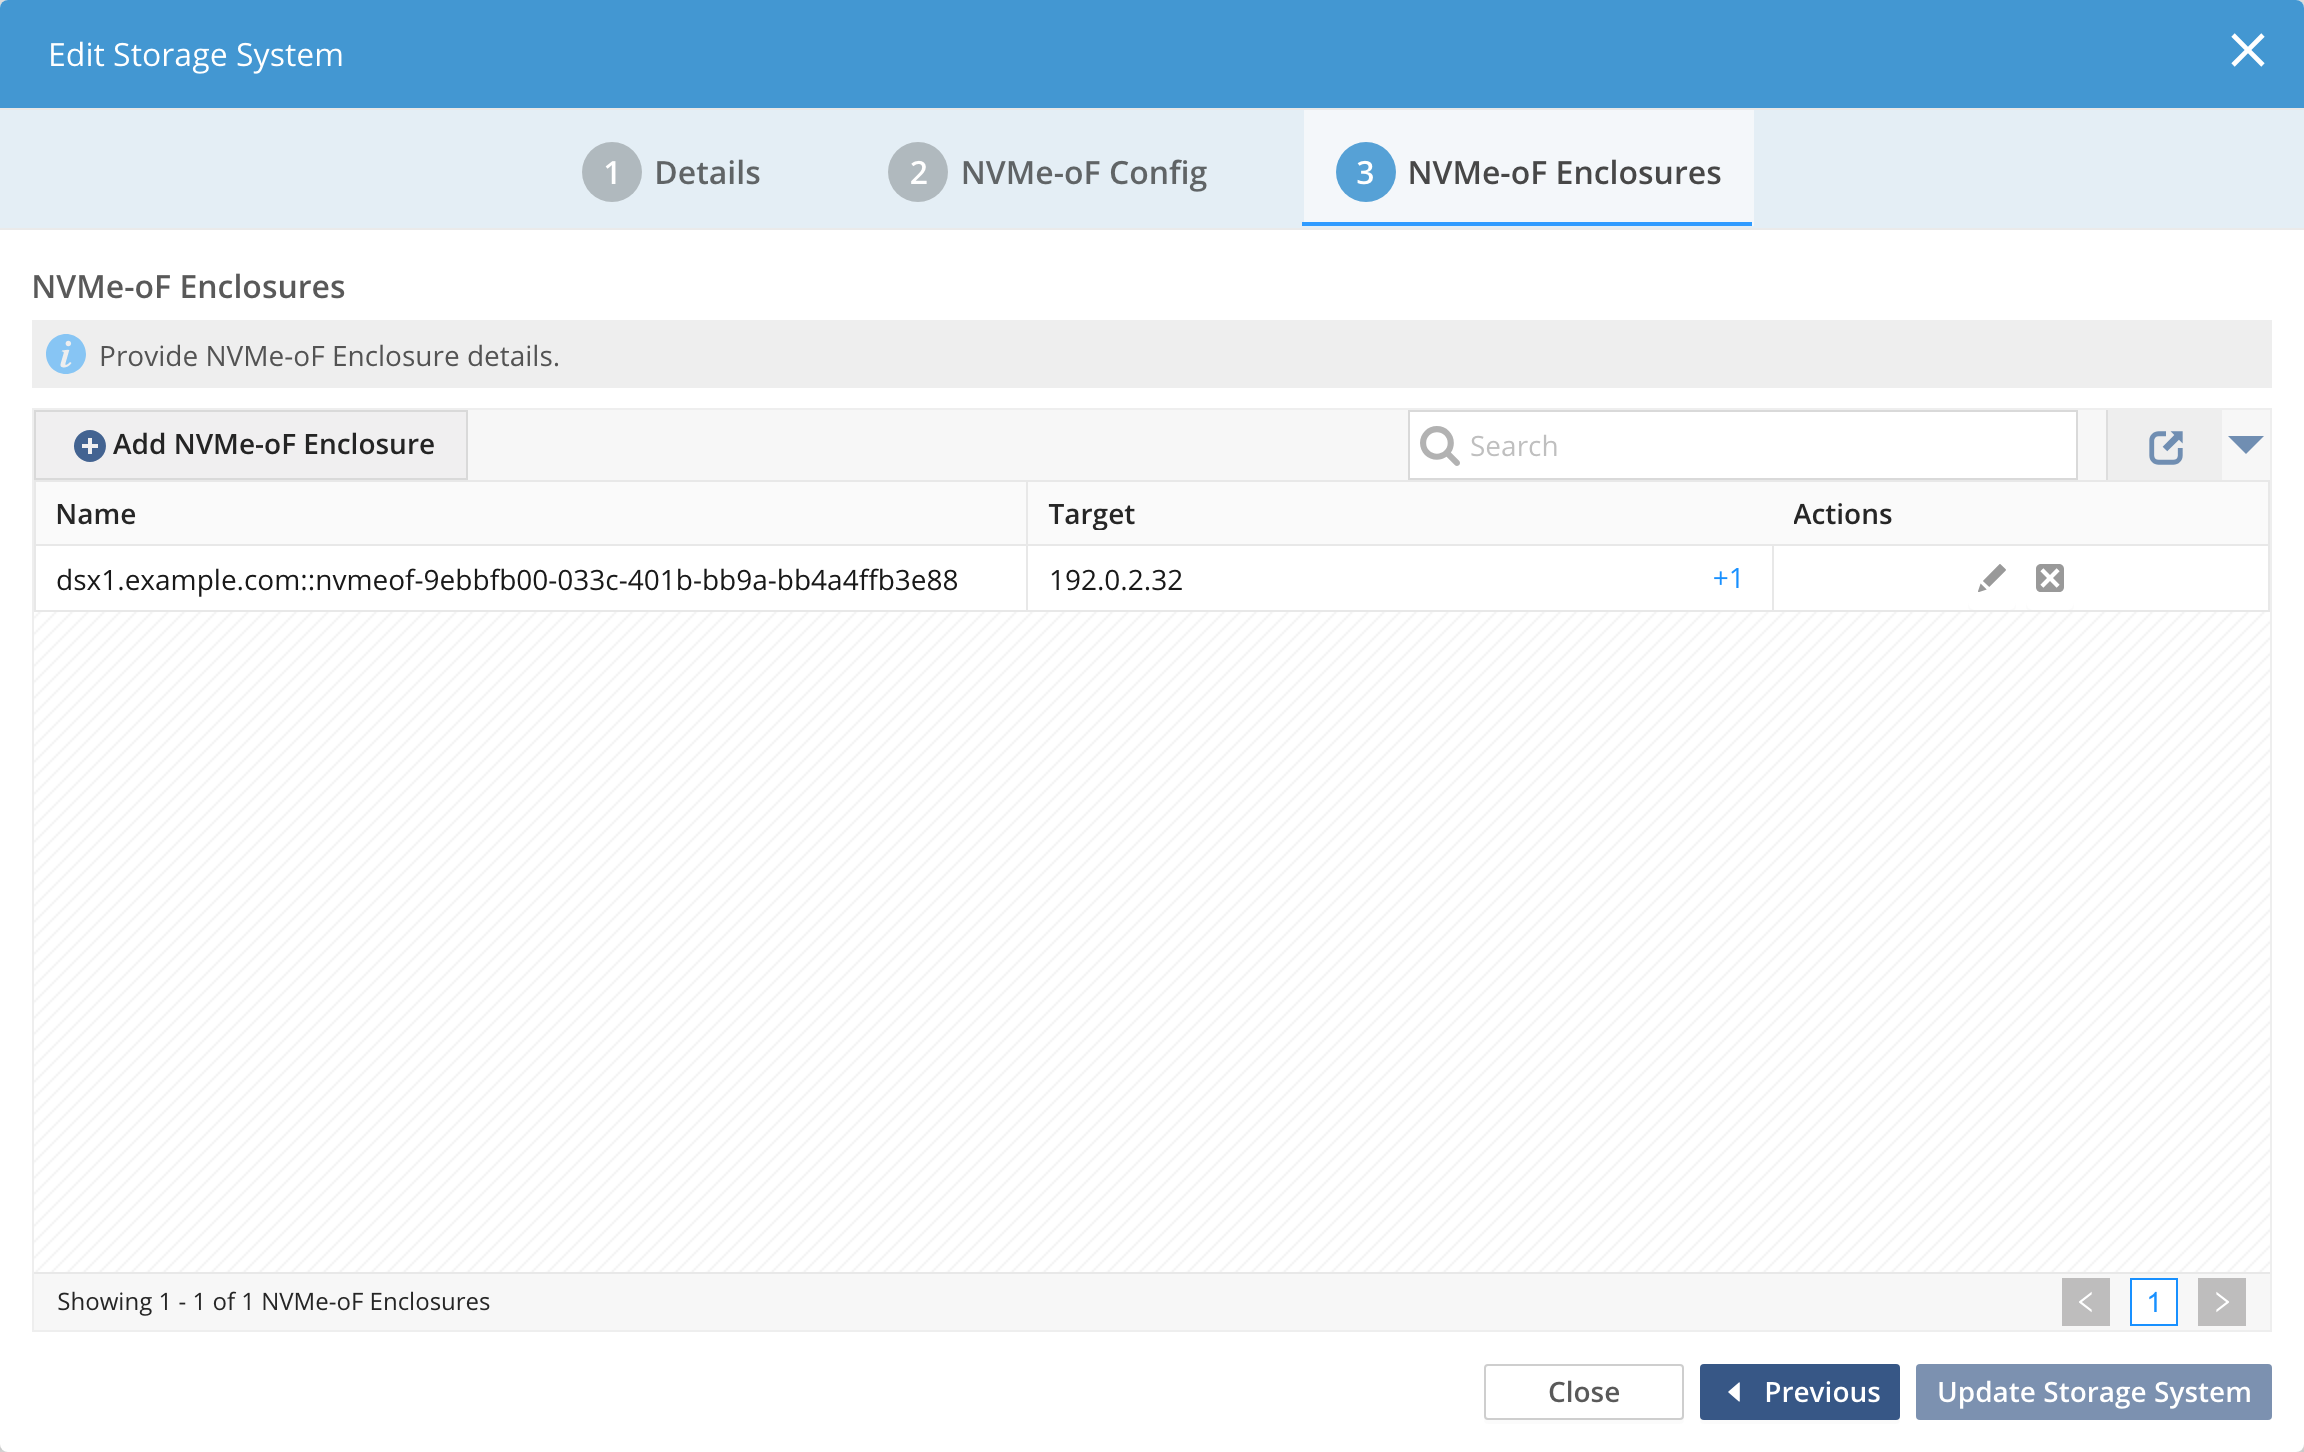
Click Update Storage System for Hammerspace to accept the device. Adding the enclosure and refreshing the storage system takes a few minutes. The number of block devices in the Logical Volumes section of the result includes the DSX node’s own disks.
-
Connect the subsystems. Hammerspace adds the enclosure with its subsystems discovered but not connected, whatever you selected. On the NVMe-oF Enclosures tab, click the pencil icon of the new enclosure, wait for the Subsystems panel to list the subsystems again (the search runs again and takes about 2½ minutes), select the ones to connect, click Update, and then click Update Storage System again. Connecting takes about a minute. Allow about 8 minutes for the whole procedure with two subsystems.
To check, run
nvmeof-config --list --fullin the Admin CLI: each connected subsystem showsState: CONNECTEDon its target addresses and its namespaces.
After the refresh completes, the popup displays the new enclosures and confirms that the storage system was updated successfully. You will also see the available block devices. Next, click Configure Logical Volumes to configure the file systems on the blank block devices.
Configuring the Logical Volumes
This procedure assumes you have just configured and connected NVMe-oF enclosures and subsystems, and that you are in the popup.
-
Click Configure Logical Volumes. This opens the Configure Logical Volumes wizard. The Block Devices table shows all of the block devices recognized by the system, with their Device Path, State, Force Initialize box, Logical Volume (if one exists), Serial No, and Storage System. The NVMe-oF namespaces you connected appear as
/dev/nvme…devices, with a Serial No. The table also lists the DSX node’s own devices: its disks (/dev/sd…, which already have a logical volume) and device-mapper devices (/dev/dm-…, no serial number). Select only the/dev/nvme…rows.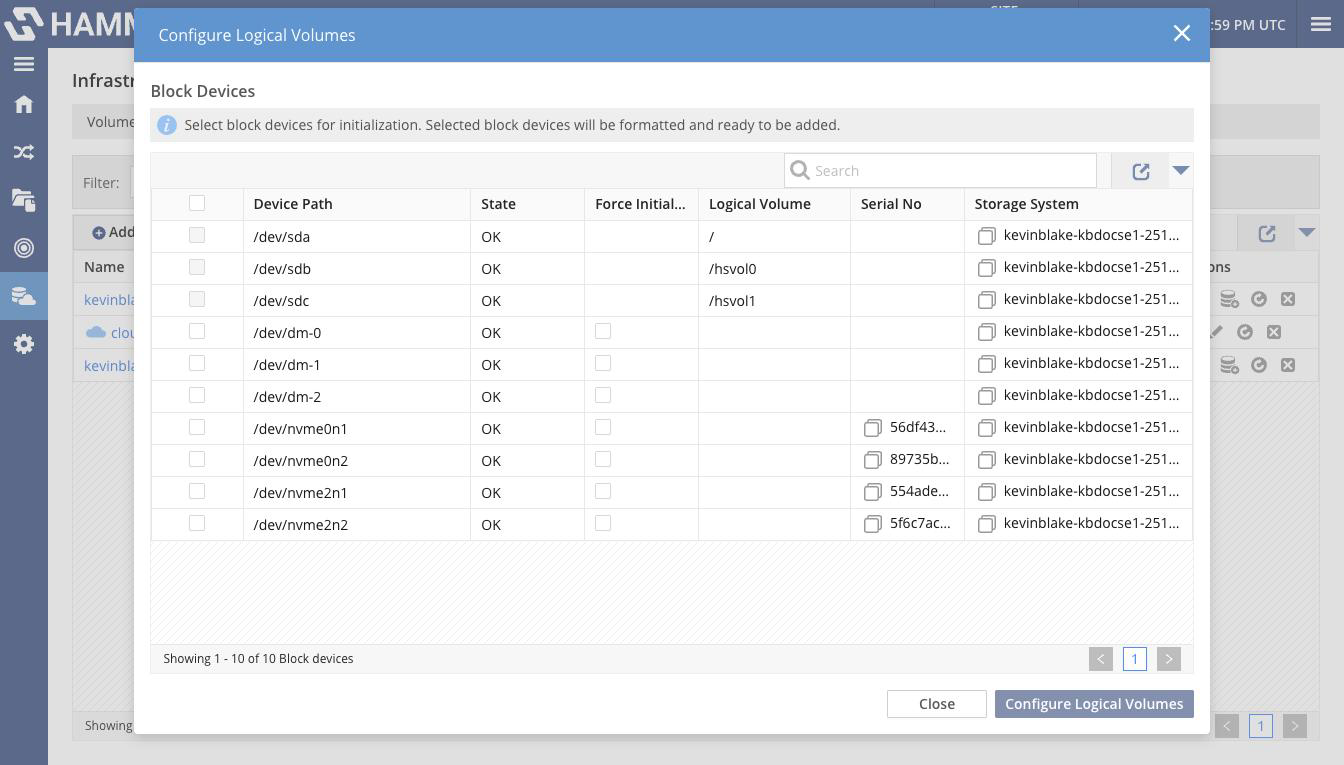 Figure 3. The Block Devices table
 -
Check the box next to each NVMe drive you added earlier, then click Configure Logical Volumes.
If a drive belongs to a subsystem that is also connected to another DSX node, the operation fails for that drive with Error creating logical volume for
<device-path>. Present each subsystem to one DSX node only.
+
| As a safety feature, Hammerspace will fail the operation to configure logical volumes if it detects that a drive already contains customer data. To use a drive that was previously written and contains data that is safe to delete, you can click the box in the same row as the drive, under the Force Initialize column, to allow Hammerspace to configure the drive. |
+
Without Force Initialize, such a drive fails with Error creating logical volume for <device-path> and no reason. This includes a drive whose logical volume was deleted, because deleting a logical volume leaves its file system on the drive. The Force Initialize box appears only on rows that have no logical volume.
+ .Force Initialize selected for a drive that was used before image::admin-configuring-the-logical-volumes-image3.png[]
-
Click Configure Logical Volumes. A popup shows the progress of the operation as a logical volume is created for each drive. Creating logical volumes on two drives took about 20 seconds.
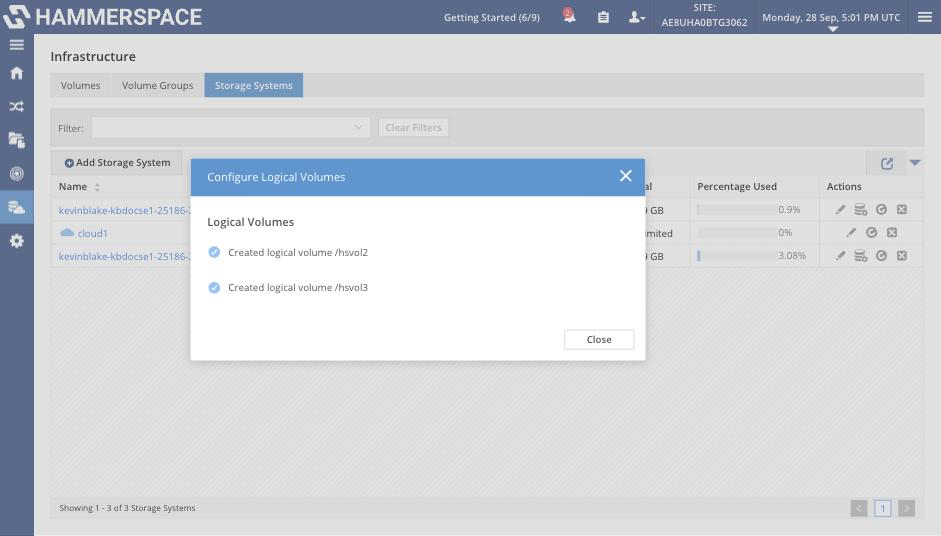 Figure 4. Logical volumes created
After the first logical volume is created, a + Volume button appears beside the DSX node’s name on the Storage Systems tab.
-
After the operation has finished successfully, go to the Infrastructure page > Volumes tab, and click Add Volume.
-
In the Add Volumes popup, the Selections tab shows previously added volumes with grayed, already-active check boxes and the recently added logical volumes for each drive. Check the box next to each new logical volume and click Next Step.
-
In the Data tab for each volume, you can select to restrict data access to Read Only and to assimilate the data on the volume. Once you have made these selections, click Next Step.
-
In the Capacity tab, you can adjust the default capacity threshold parameters as needed. Click Next Step.
-
In the Capability tab, the default, auto-created objectives for durability and availability are already selected for each volume. Make the selections and click Next Step.
Auto-created objectives are the best option in most cases; however, you can unselect the auto-created objective and specify durability and availability objectives manually. You can also select whether to perform a performance test on the volumes using the selected objective. -
In the IP tab, you will see the discovered IPs, and you can add additional IPs and exclude IPs for each volume as needed. Make your selections and click Next Step.
-
In the Review & Add tab, you can review volume details and click Add Volumes to add them to your DSX infrastructure.
As the operation progresses, you can view the status in the Tasks view.